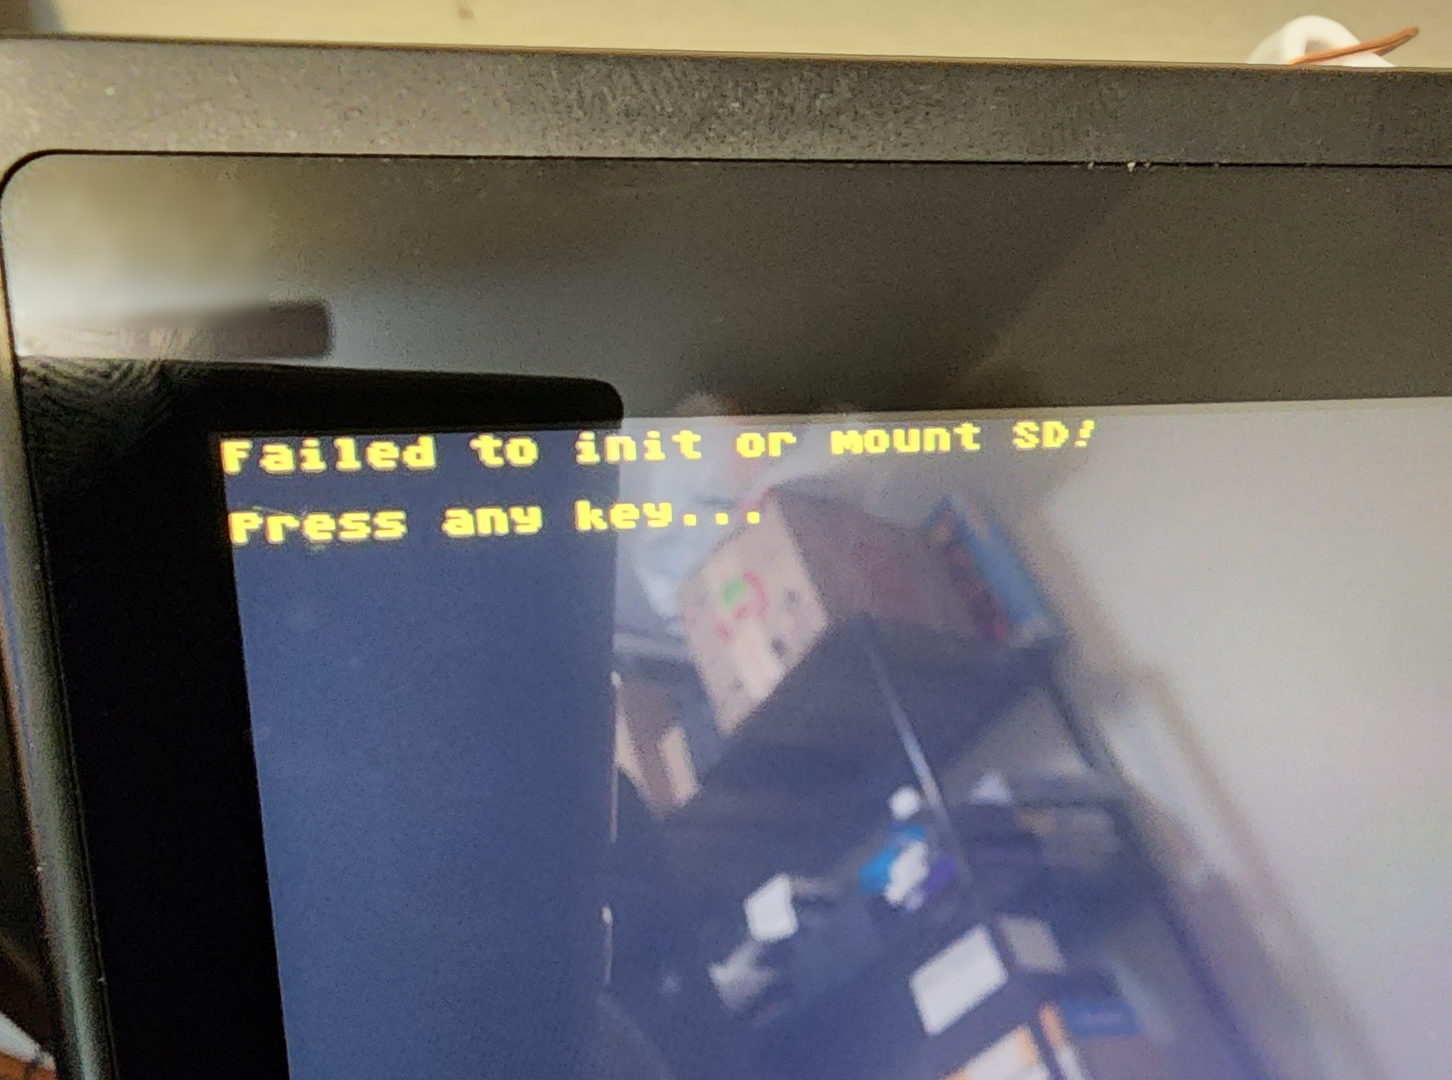
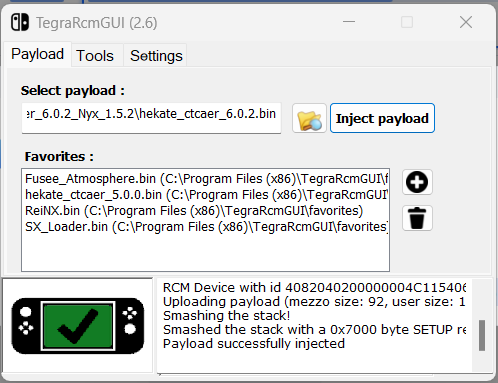
I recently found out that my Nintendo Switch is old enough that it hasn’t been ‘patched’ and therefore able to have homebrew installed. While following this guide, in particular step 4 where you inject the payload to launch hekate, everything looked good from the TegraRcmGui perspective. However, I ran into a message on the switch itself that said “Failed to init or mount SD! Press any key…”

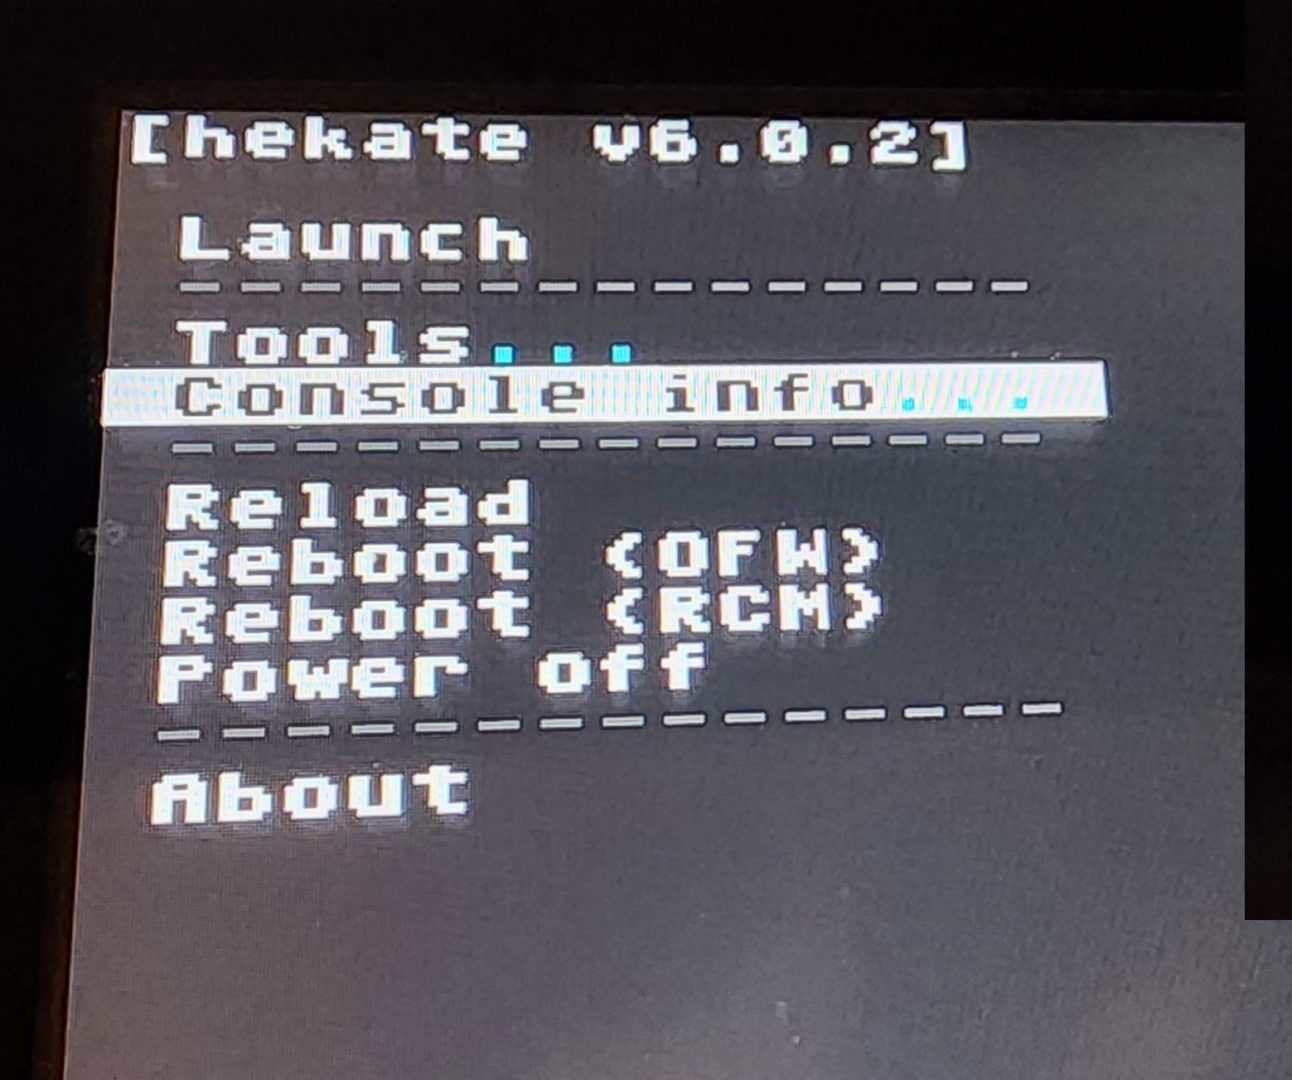
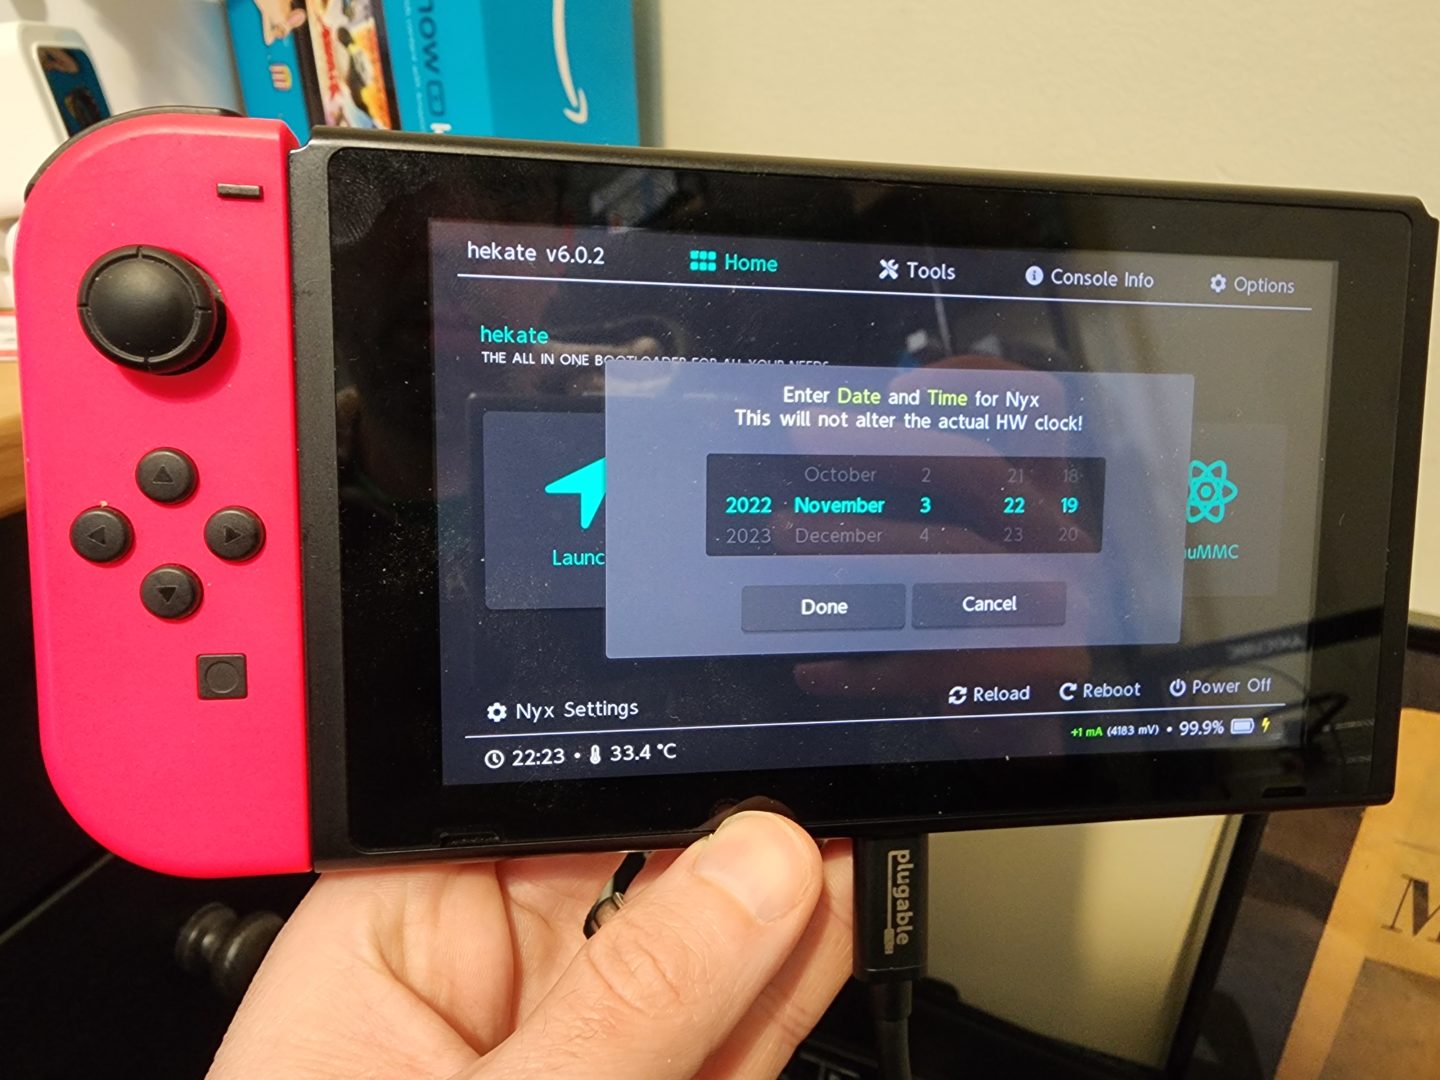
At this point, I pressed any key as directed (Vol +, Vol -, or Power), then navigated to “Console Info…” –> “SD Card”:
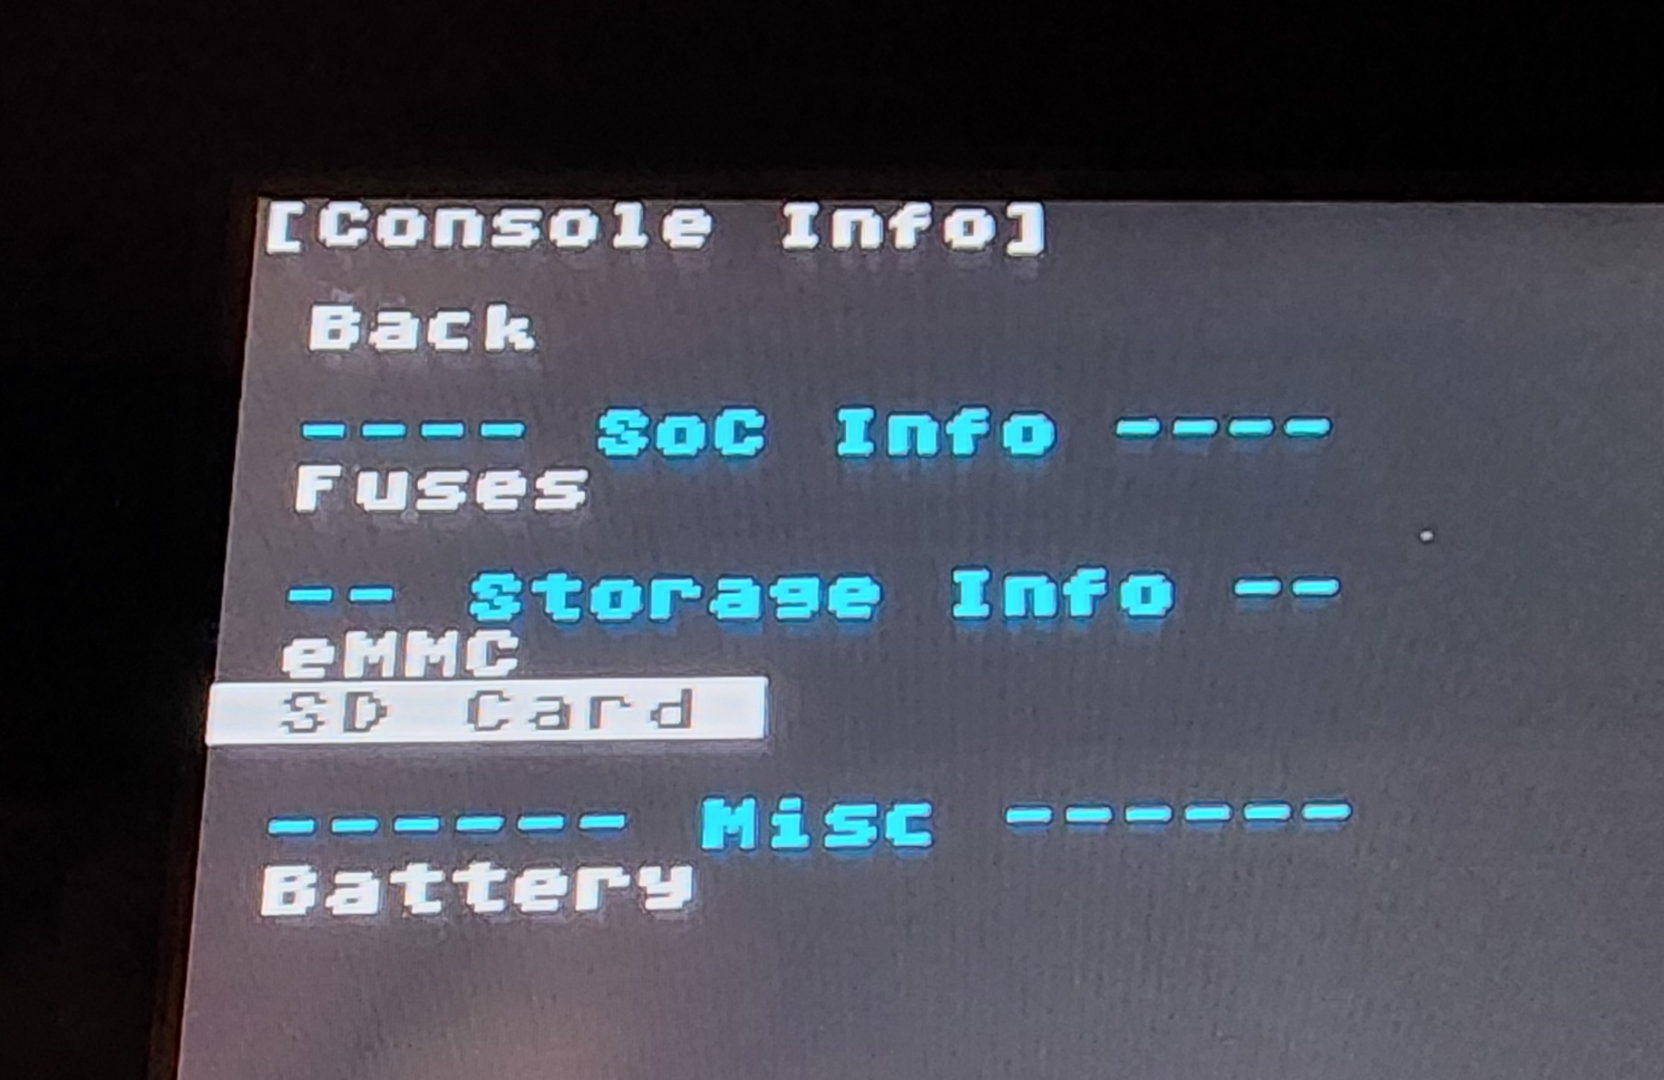
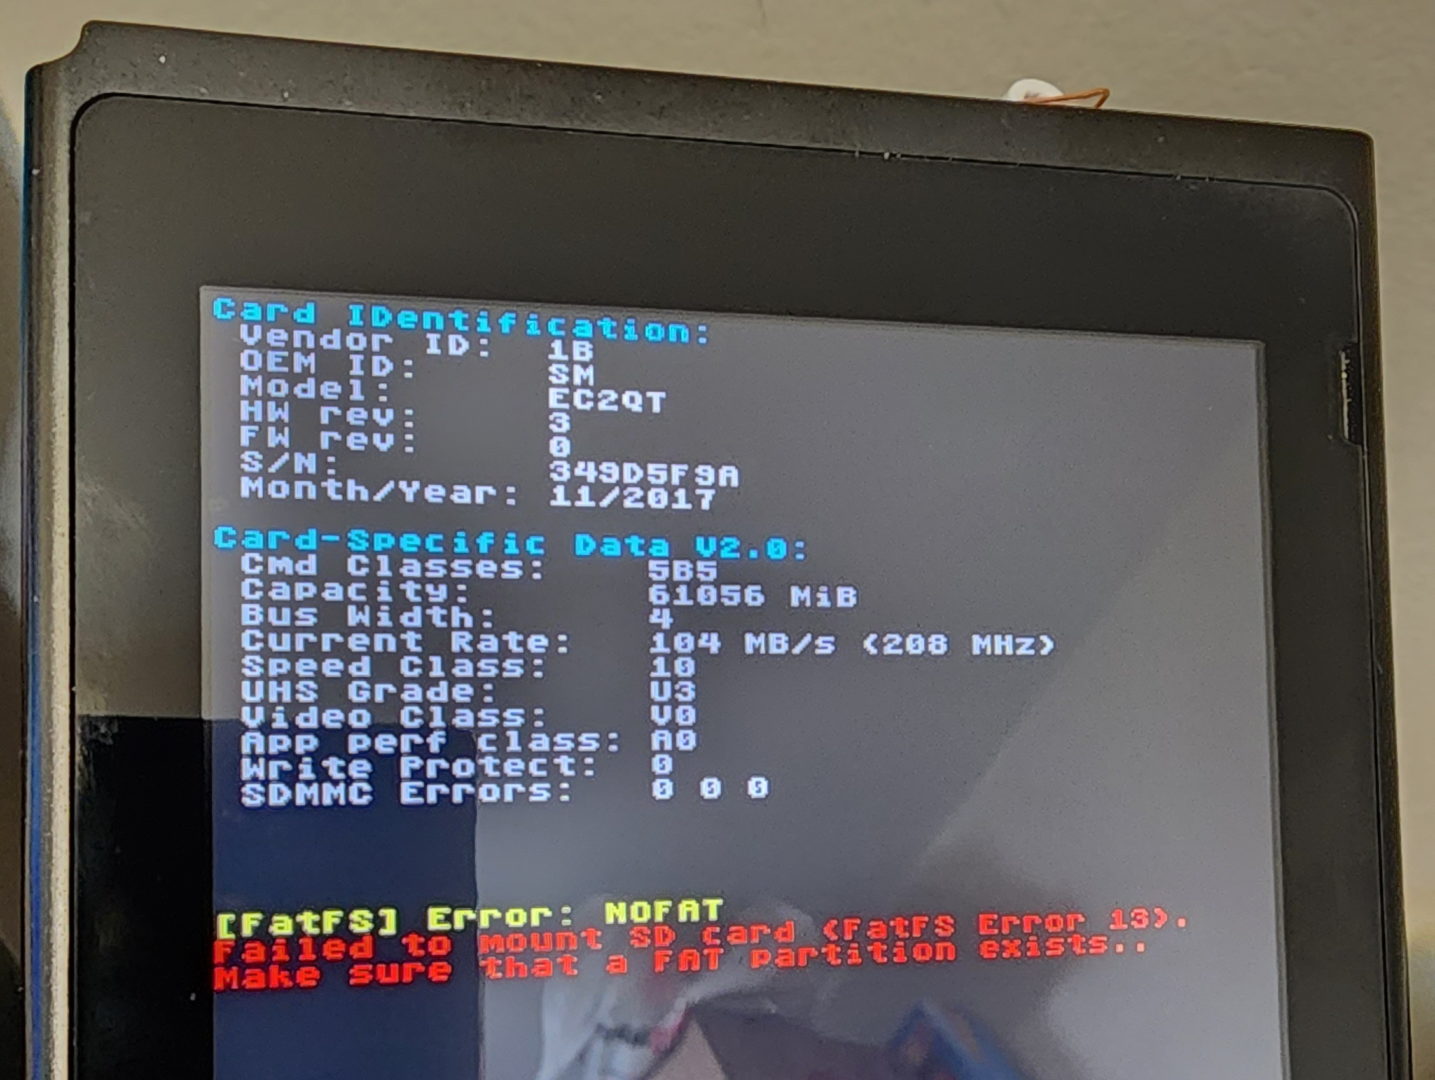
Here I could see that the Switch was at least recognizing that the card exists (and with the correct size, etc), so it didn’t seem that the Switch’s card reader itself was having issues. That said, there was also the error messages:
“[FatFS] Error: NOFAT”
“Failed to mount SD card (FatFS Error 13).”
“Make sure that a FAT partition exists..”:
Googling around ultimately lead me to this post which pointed out the partition on the card needed to be primary (not logical), and doing that fixed it! So how do you setup your SD card correctly with a primary fat32 patition? Read on:
Windows Diskpart (for microSD card <=32gb)
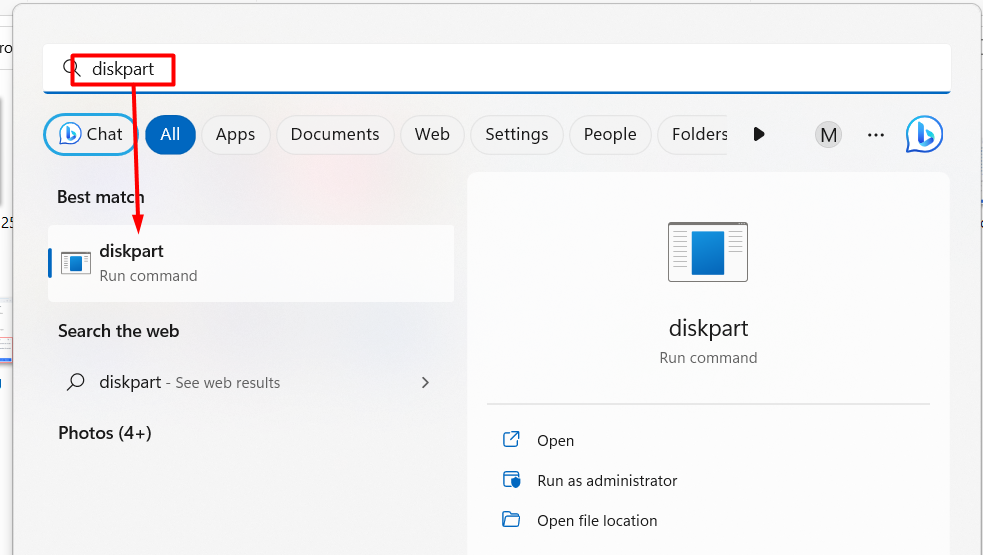
If you are using a microSD card that is 32gb or less, you should be able to quickly/easily use the “diskpart” command built into windows. First, click/press Start and search for “diskpart” and run it:
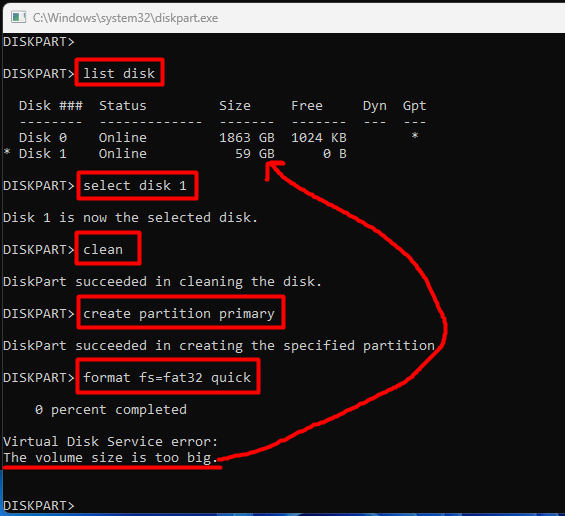
Then, type the command “list disk” to find out which disk is your microSD card (mine was 1), followed by “select disk 1” (assuming your sd card is also 1). Next, run “clean”, then “create partition primary”, and finally “format fs=fat32 quick”. If your card is greater than 32gb in capacity (mine is 64gb), you’ll see the below error “The volume size is to big” and you’ll want to move to a 3rd party tool described next, otherwise, it’ll complete successfully and you can try homebrew process again:
EaseUS Partition Master (for microSD cards >32gb)
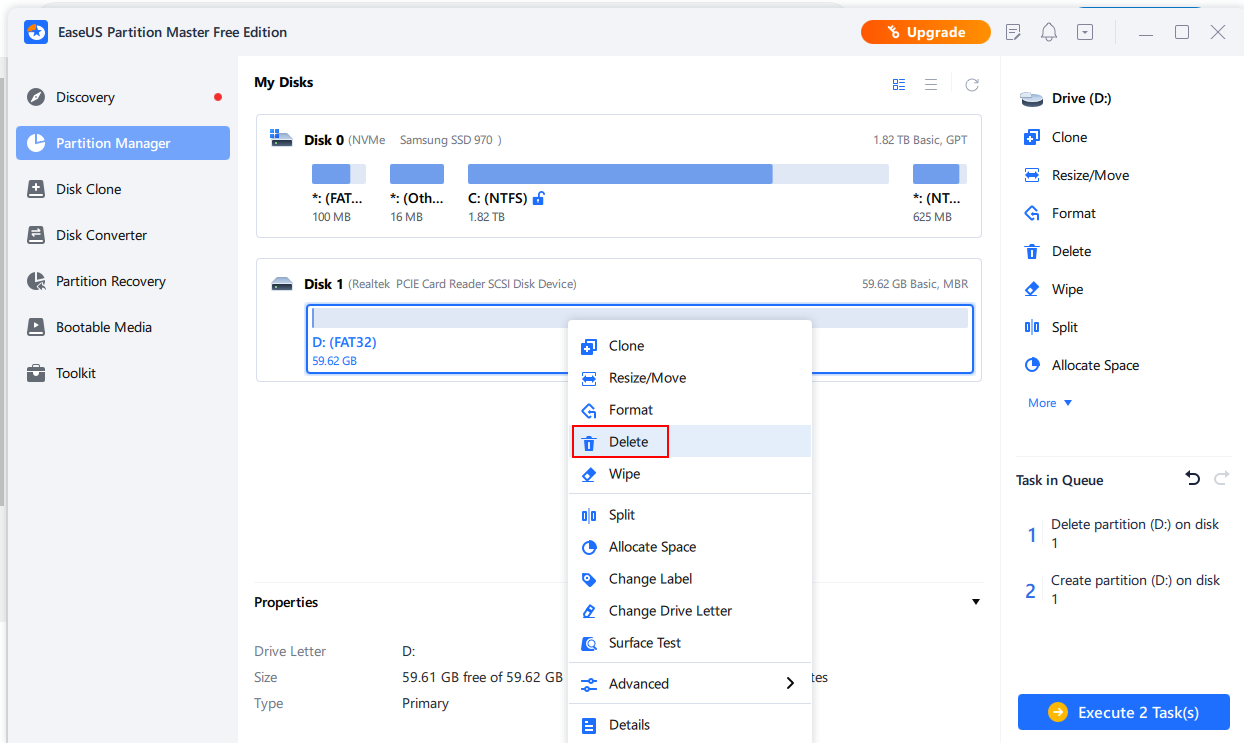
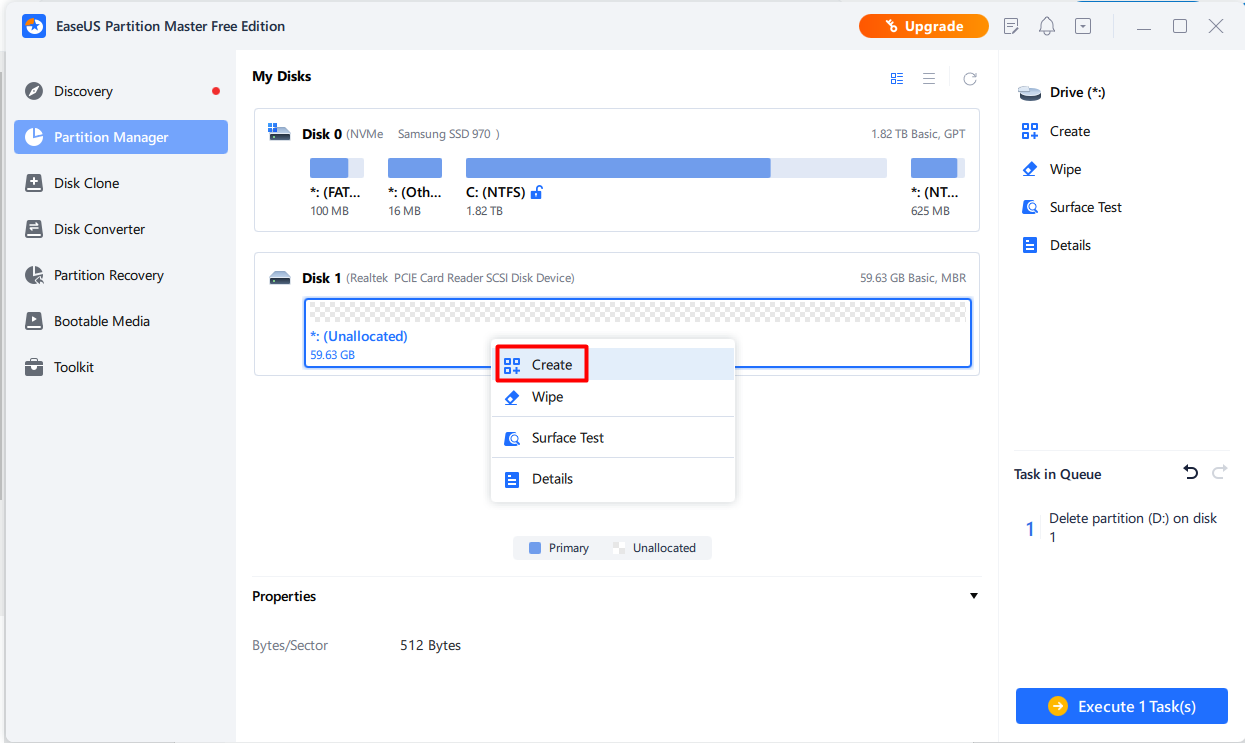
Windows alone will not allow you to format drives greater than 32gb with FAT32 file system (learn why here), so you’ll need to rely on a 3rd party tool to do so. There are quite a few options, but I chose EaseUS Partition Master because there’s a free version and I’ve used it many times before. Start by opening the app and determining which disk is your microSD card by checking the overall size and “source” for each disk. For example, I can see that my 2tb SSD, which is plugged into my NVMe port, is Disk 0, and my 64gb microsd card, plugged into my card reader, is Disk 1. With the correct disk in mind, right click->Delete all existing partitions on your microsd disk until you’re left with essentially a blank drive (mine just had one, yours might have more).
Then, right click on the now (Unallocated) space on your card and click Create:
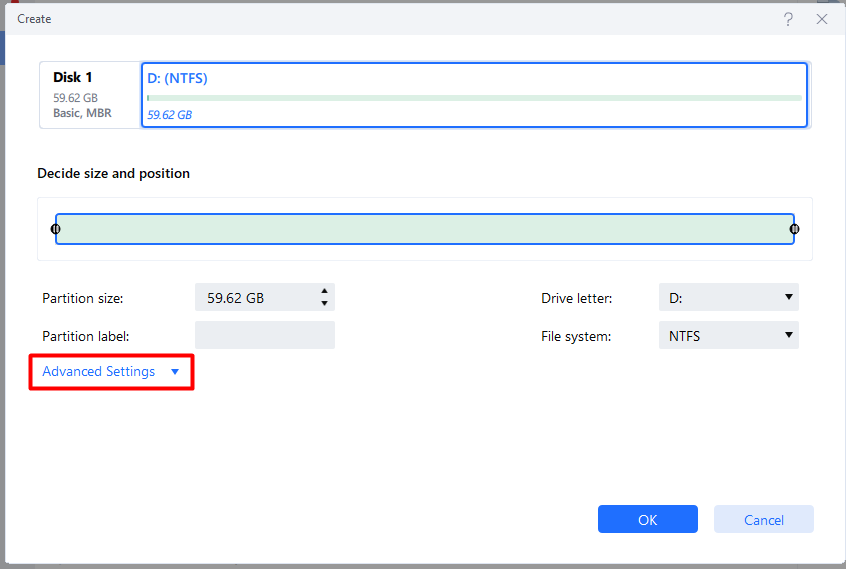
Followed by clicking on “Advanced Settings“:
And finally choosing the FAT32 filesystem and Primary partition type:
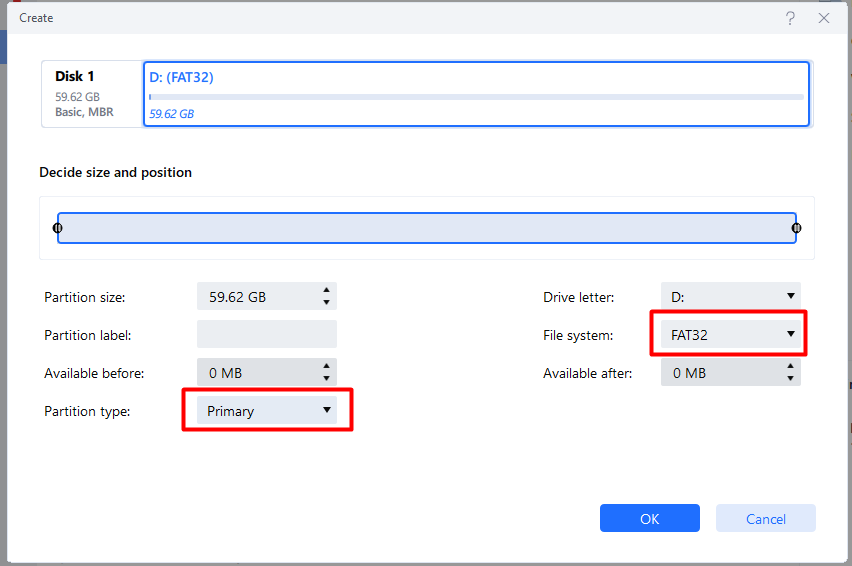
From here, click OK, then Execute Tasks, then Apply and wait for it to finish. Once it’s done, your microsd should now be ready to try again and hopefully no longer run into the ‘Failed to init or mount SD’ on your Nintendo Switch!
TL;DR: to fix “Failed to init or mount SD”
In short, to fix the “Failed to init or mount SD” message on a Nintendo Switch when trying to homebrew, one possible (likely?) reason is because the FAT32 partition on your microSD card is not the primary partition. To fix this, using EaseUS Partition Master, delete all existing partitions, create a new one with FAT32 filesystem and Primary partition type, and try again!
Thank you for this tutorial!
this saved me, ty
Thanks, it worked like a charm!
you’re an absolute god
the best help ever
you literally save me yes you are AHMAZING
i love you Thanks
I hadn’t found the solution for this error in two days, and this tutorial saved my life!! Thank you so much for your tremendous contribution!! a hug from Santiago, Chile.
_——————————-
llevaba dos días sin encontrar la solución para este error, y este tutorial me salvo la vida!!! muchas gracias por tremendo aporte!! un abrazo desde Santiago, Chile.
Pingback: SD Card Format Not Supported on Bambu Lab P1P - James Has Answers
Did not work
Error code 13 reappear
I’ve tried everything to no avail
Switch reads SD card when I boot it normally so my reader is probably ok
Anyone know what to do?
You are a God send! I was going down other rabbit holes before I came across this webpage. This totally saved me. I miss the good ol’ days of websites so thank you for this page and for keeping your site.
I love you man thankes
Yes, after reading so many Reddit’s and other google searches this one worked for me! Thank youu!!