Are you trying to use a microSD card on your Bambu Labs P1P and it’s either showing “SD Card Not Found” or “SD Card Format Not Supported”? If so, that likely means it’s not formatted in FAT32 with a Primary partition and/or MBR partition table. Watch the video or read the article below to find out how to fix it!
Confirm the Error
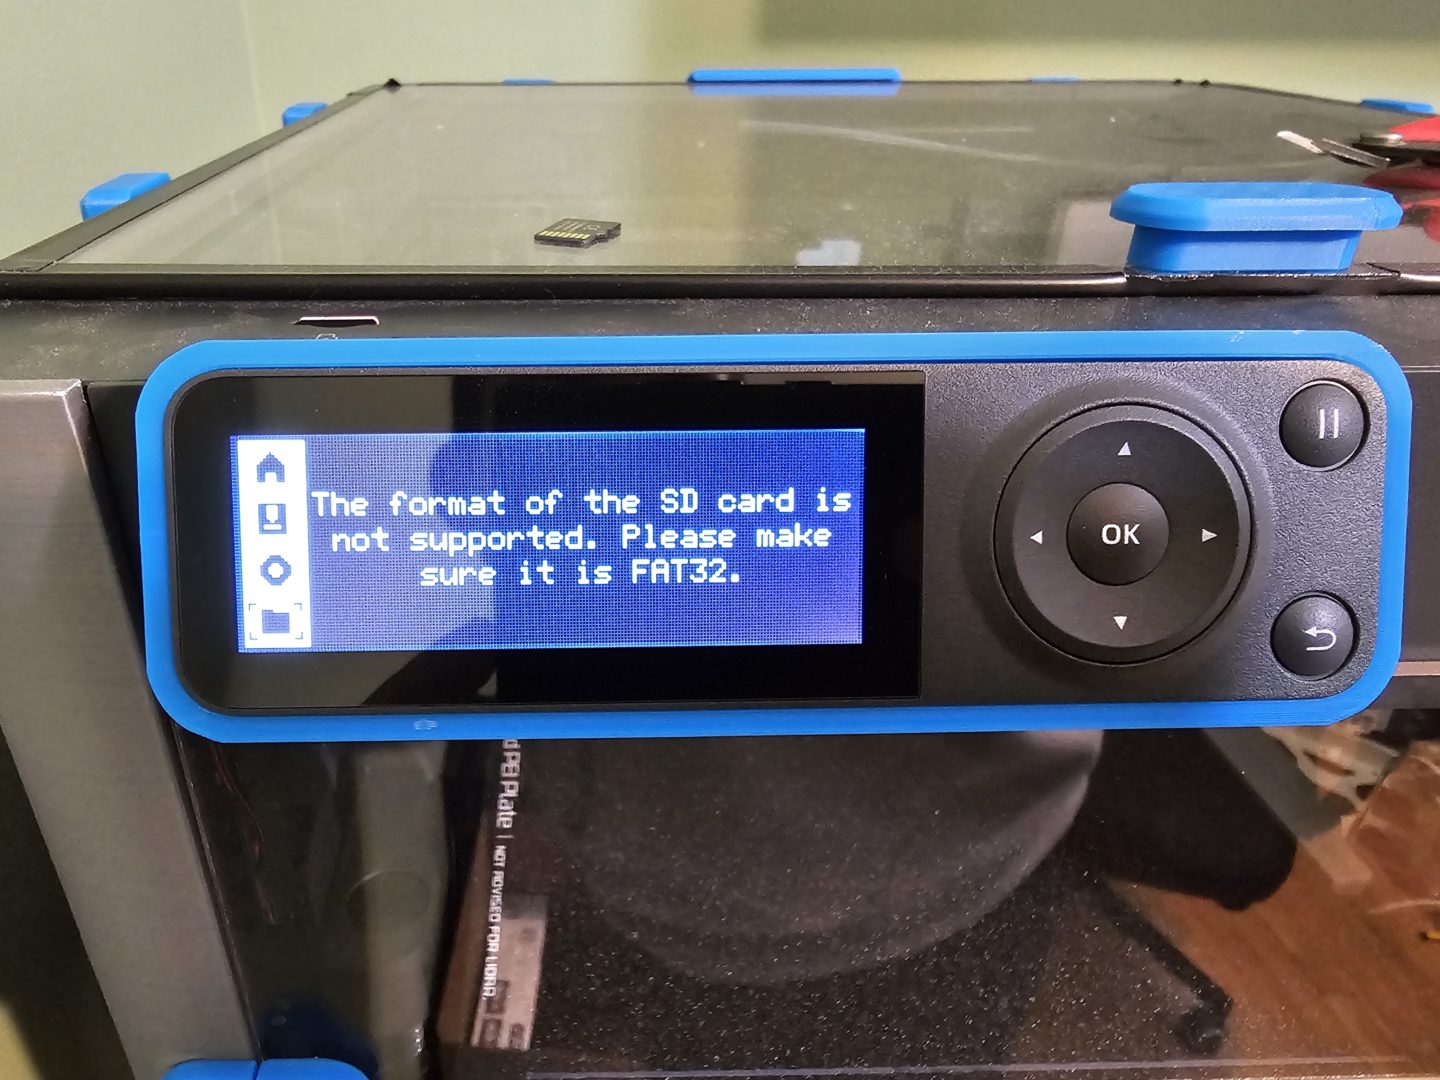
When you plug in a different microSD card than what came with the printer and you are presented with “The format of the SD card is not supported. Please make sure it is FAT32”, then this is your guide. Note that even if your card is formatted as FAT32, you may still run into this issue if it wasn’t formatted with a Primary partition or with an MBR partition table.
Format the SD card on Windows
There are many options for accomplishing this on Windows, which I’ve previously outlined in an earlier post on Fixing ‘Failed to init or mount SD’ on Nintendo Switch. That said, if your microSD card is less than 32gb, you can use the built in DiskPart utility in Windows:
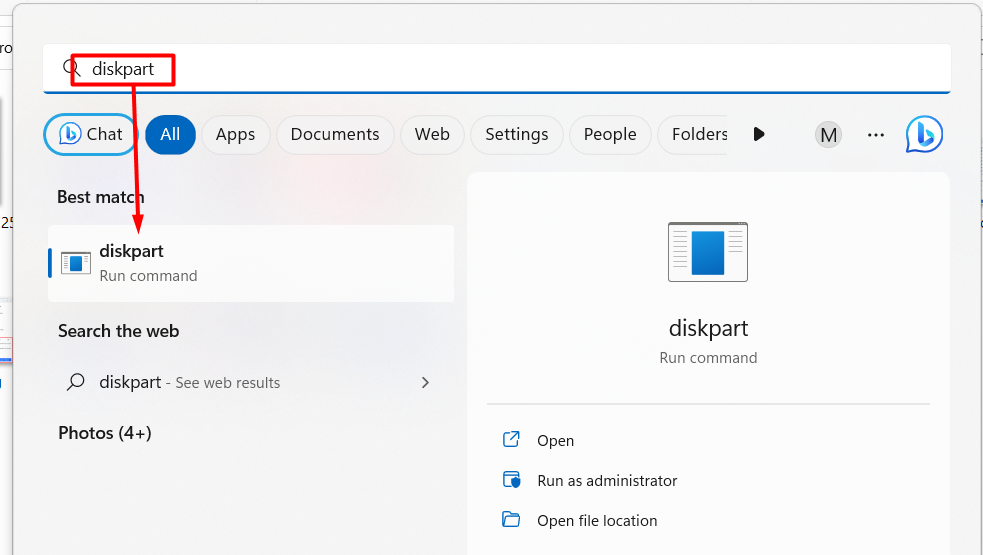
First, click/press Start and search for “diskpart” and run it:
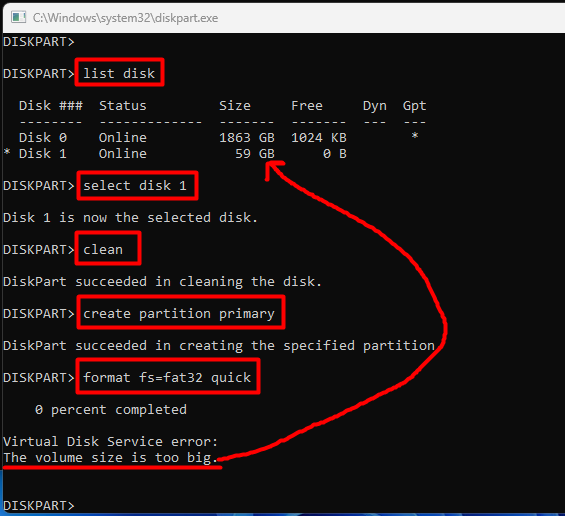
Then, type the command “list disk” to find out which disk is your microSD card (mine was 1), followed by “select disk 1” (assuming your sd card is also 1). Next, run “clean”, then “create partition primary”, and finally “format fs=fat32 quick”. If your card is greater than 32gb in capacity (mine is 64gb), you’ll see the below error “The volume size is to big” and you’ll want to move to a 3rd party tool described next, otherwise, it’ll complete successfully and you can try to put it in your printer and try again:
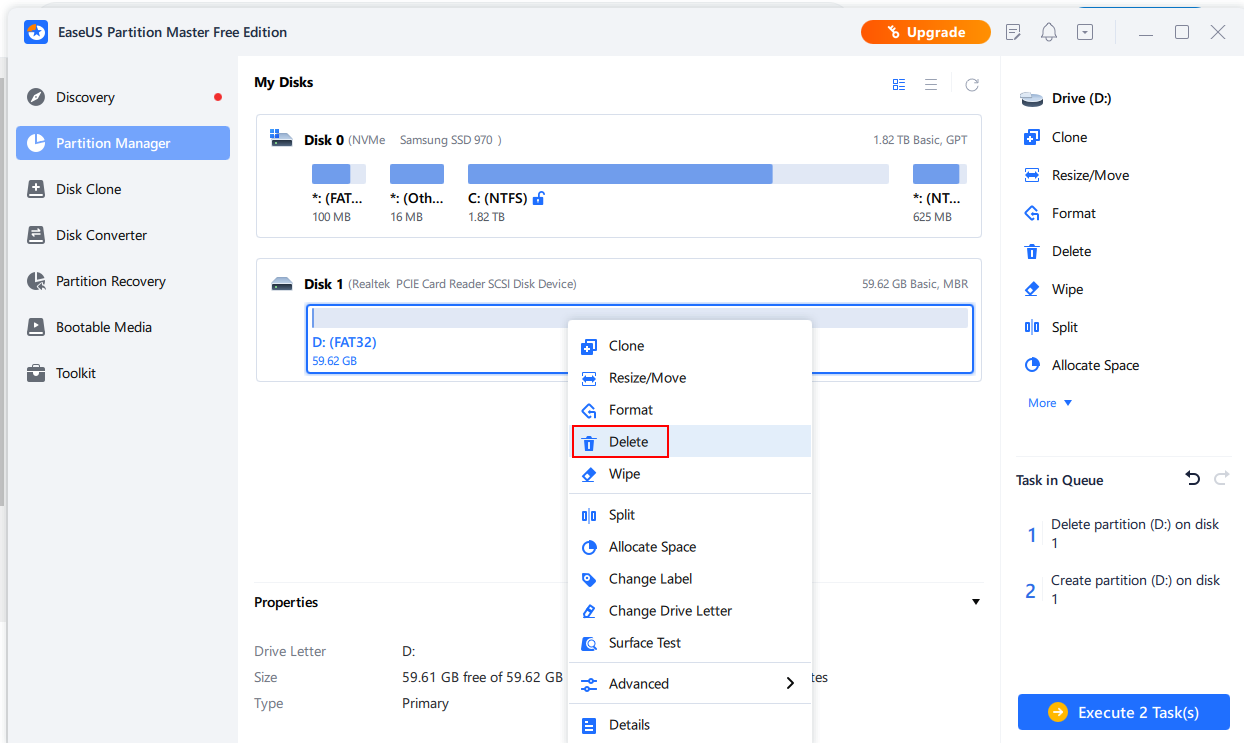
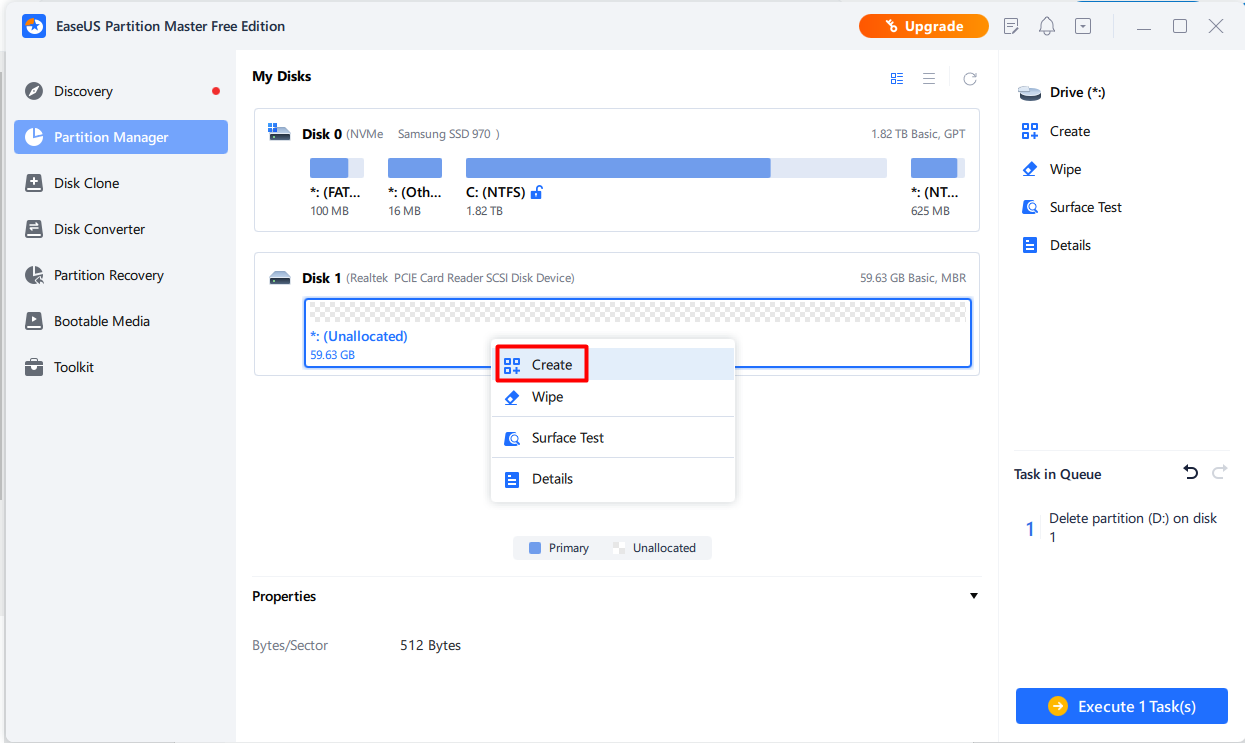
If your card is larger than 32gb, you’ll need to use a third party tool. While there are numerous apps out there, I use EaseUS Partition Master as it’s free and I’ve used it in the past. Start by opening the app and determining which disk is your microSD card. With the correct disk found, right click->Delete on all existing partitions on your card until you’re left with a blank drive. For example, my card had just one partition, yours might have more paritions):
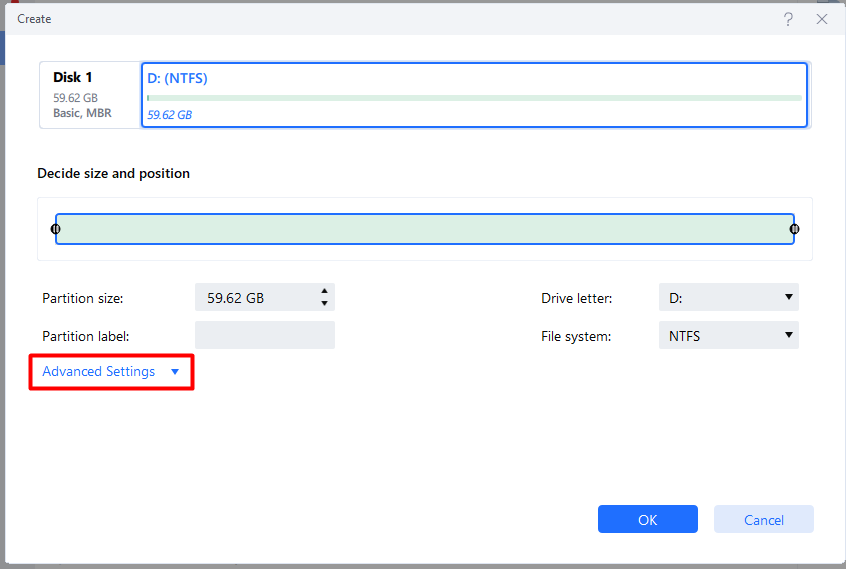
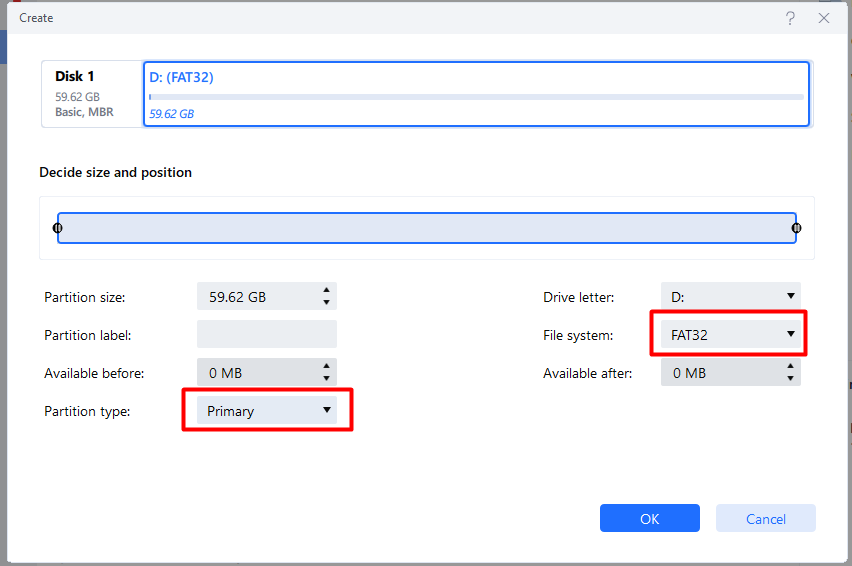
Then, right click on the now Unallocated space on your card and click Create, followed by selecting FAT32 filesystem and Primary partition type (under Advanced Settings):
From here, click OK, then Execute Tasks, then Apply and wait for it to finish. Once it’s done, your microsd should now be ready to try again in your printer!
Format the SD card on MacOS
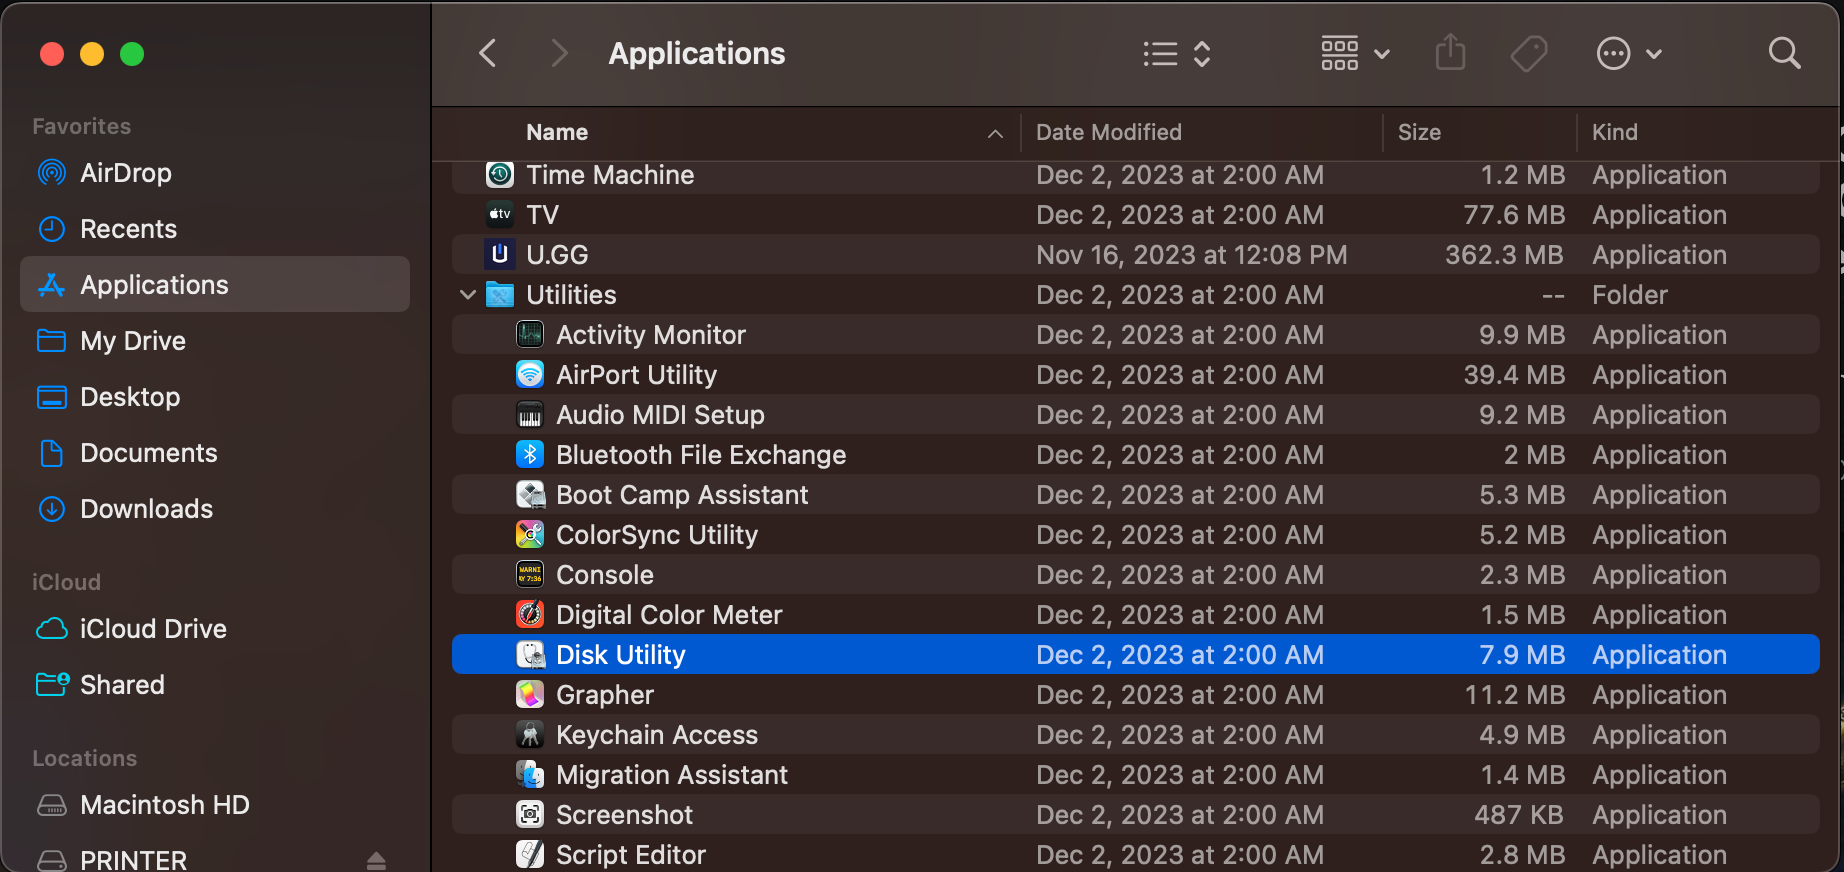
Formatting the card on a Mac can be done using the built in Disk Utility app. With your card plugged into a USB card reader, start by going to Applications then Utilities, and then open up Disk Utility:
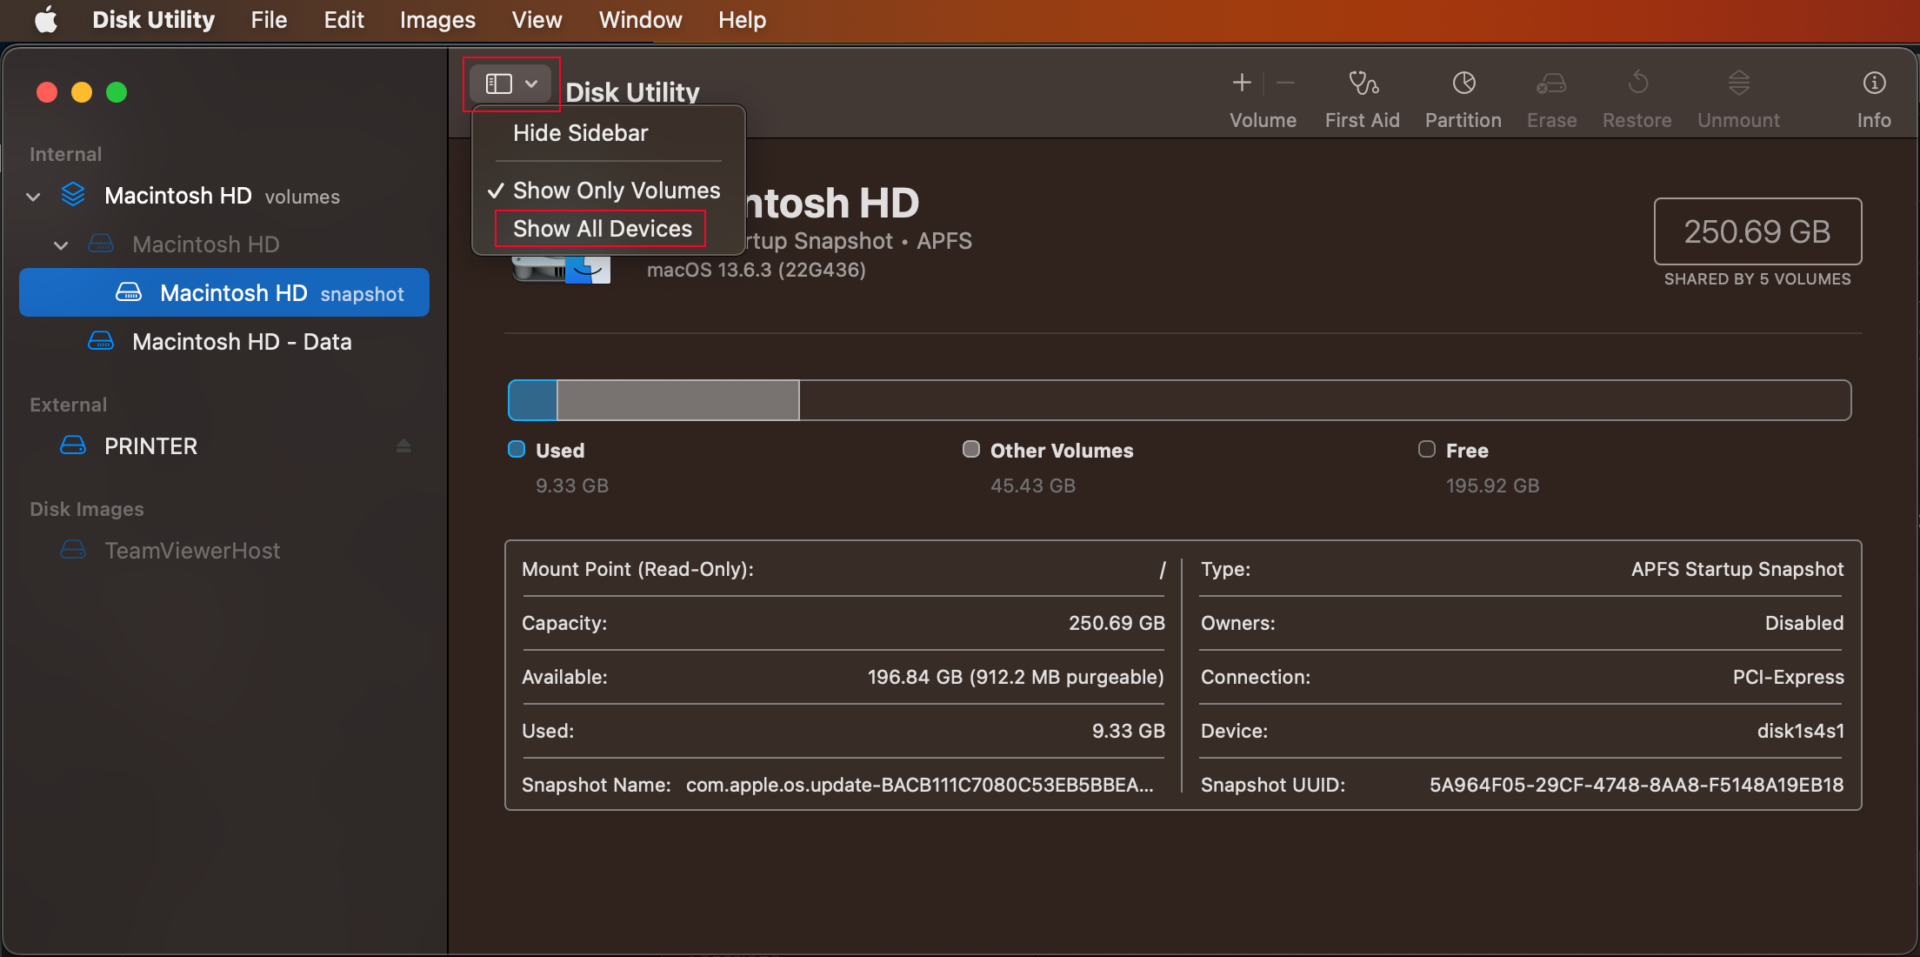
By default, your card reader may not be shown, so click on View menu and then Show All Devices if it’s not:
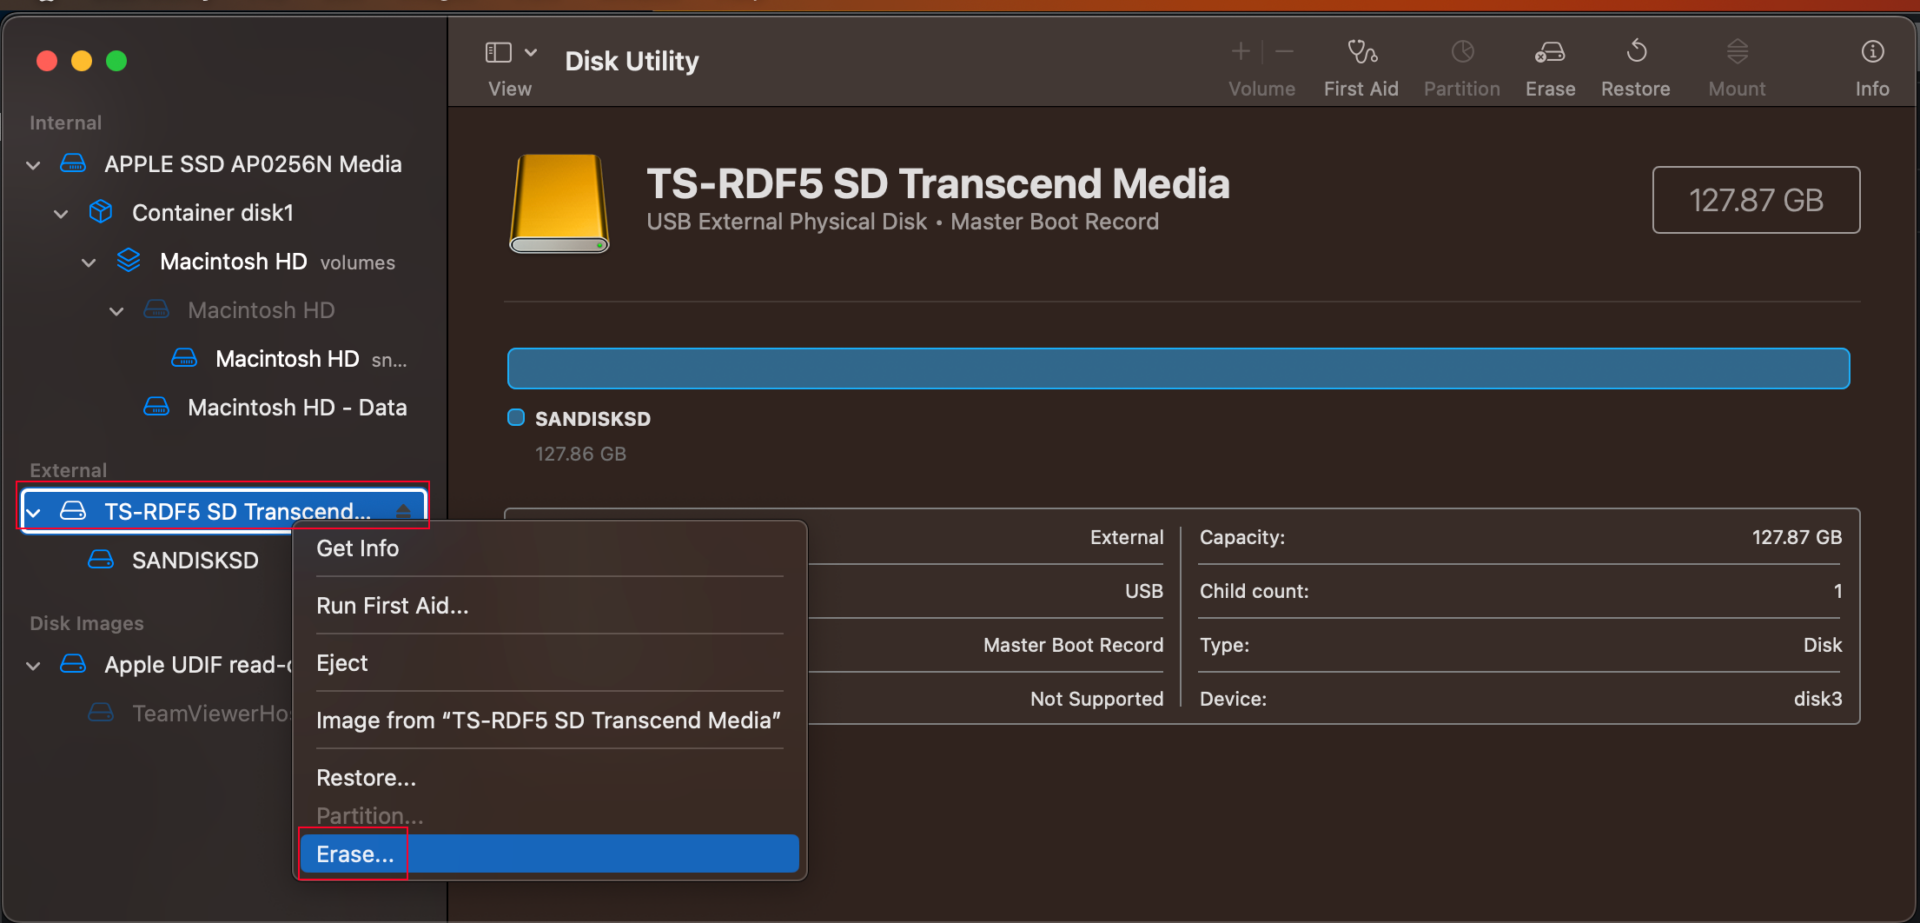
Now, right click on your card reader in the left column and select Erase:
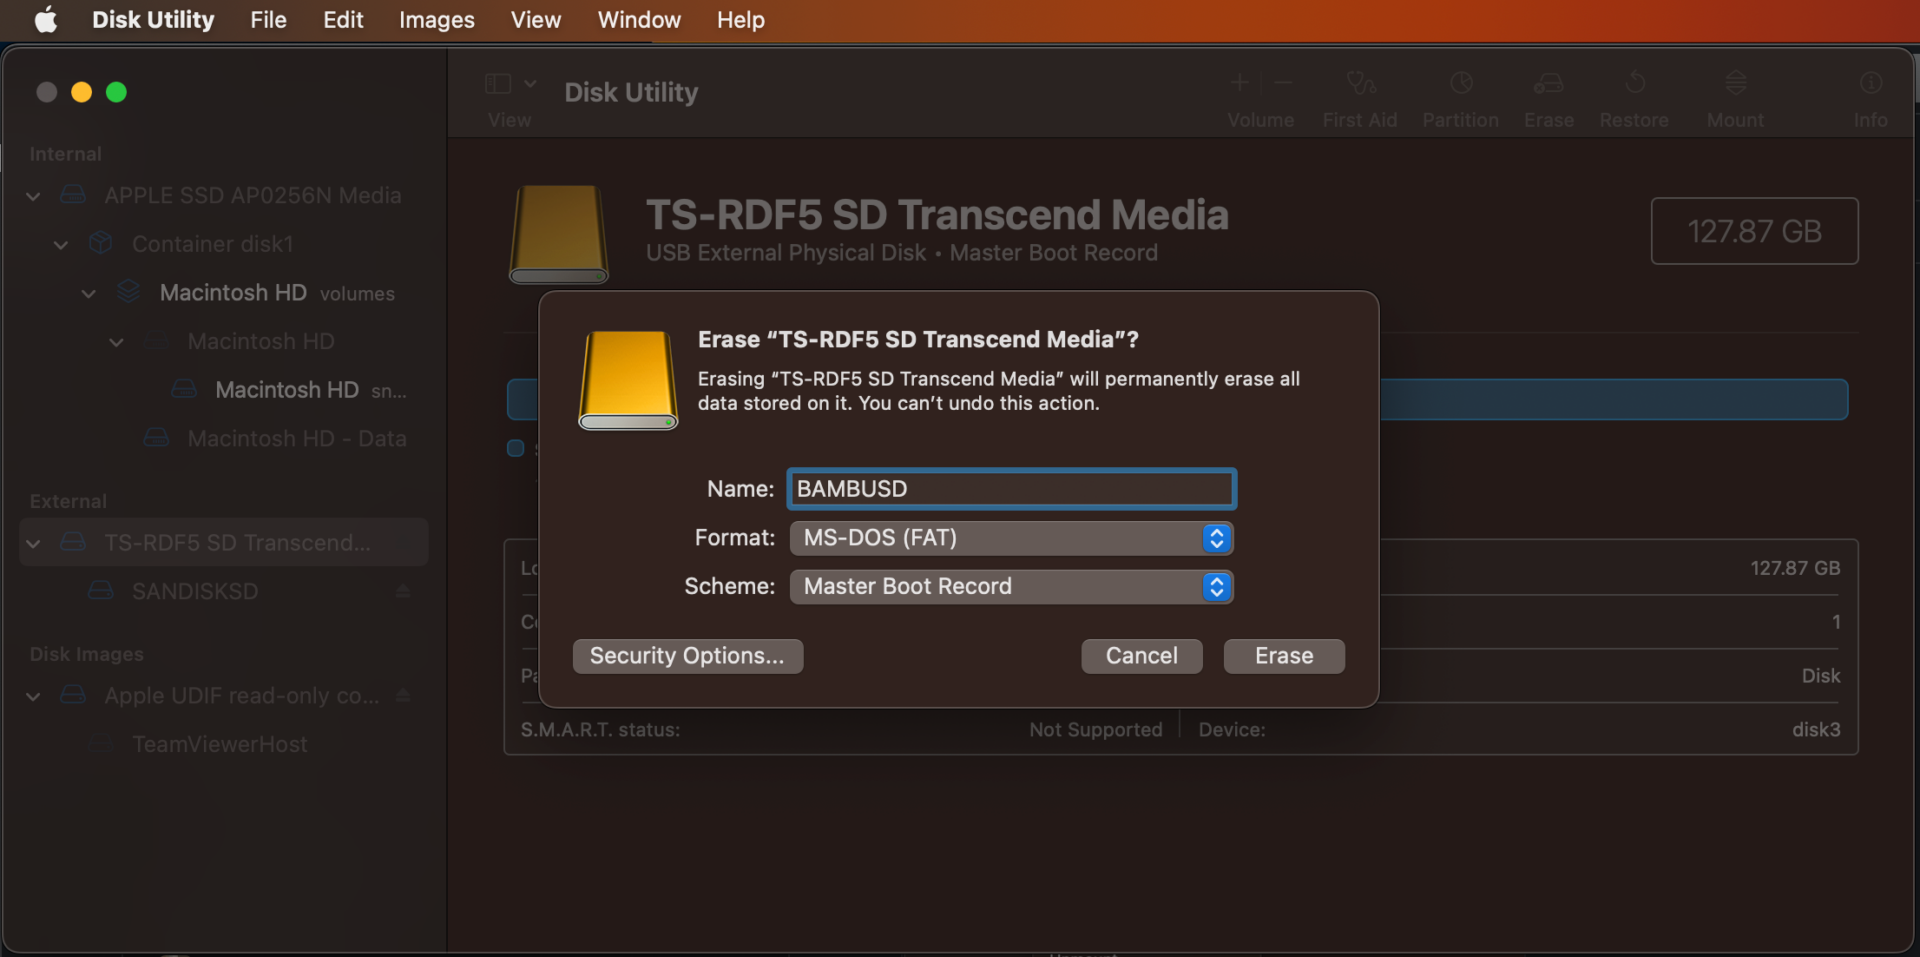
Then, give it a Name of your choice, choose Format: MS-DOS (FAT), and Scheme: Master Boot Record, then click Erase:
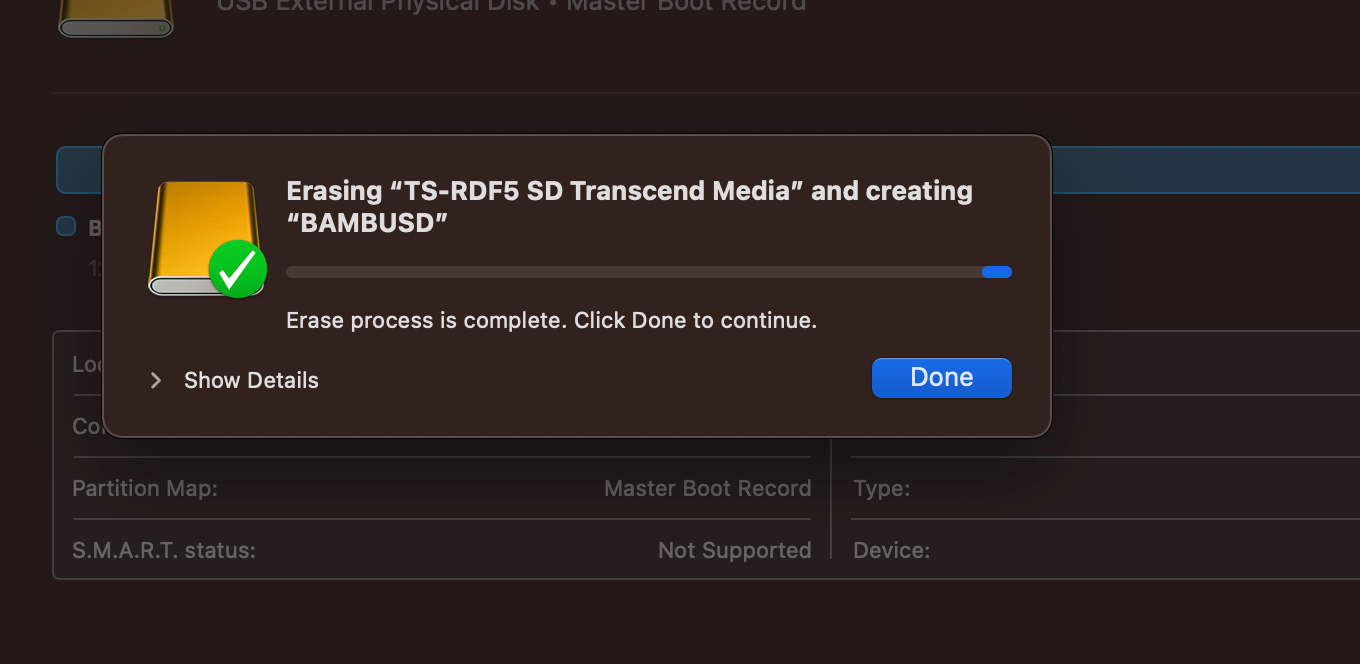
Once that’s Done, safely eject the card and try it in your printer!
TL;DR: Make sure the FAT32 partition is Primary and/or MBR (not GPT)
If you have a Bambu Lab printer and are facing a “SD Card Not Found” or “SD Card Format Not Supported”, it’s likely your card is not properly formatted as FAT32 in the way the printer needs. When formatting, you need to make sure the partition is MBR (vs GPT) and/or it’s set as the primary partition, and performing a default or quick FAT32 format doesn’t always do that. Therefore, you’ll need to go a few settings deeper when formatting to make sure you set those extra details in order to fix the SD Card Format Not Supported on a Bambu Lab P1P printer