Have a Dell XPS 13 9370 laptop and want to upgrade the SSD (which is the only thing you can upgrade, since the memory is soldered to the motherboard)? All you need to do is remove 8 screws, pop off the bottom cover, unplug the battery (for safety), remove the ssd screw and cover, and you’re done! Read on for a detailed walk-through:
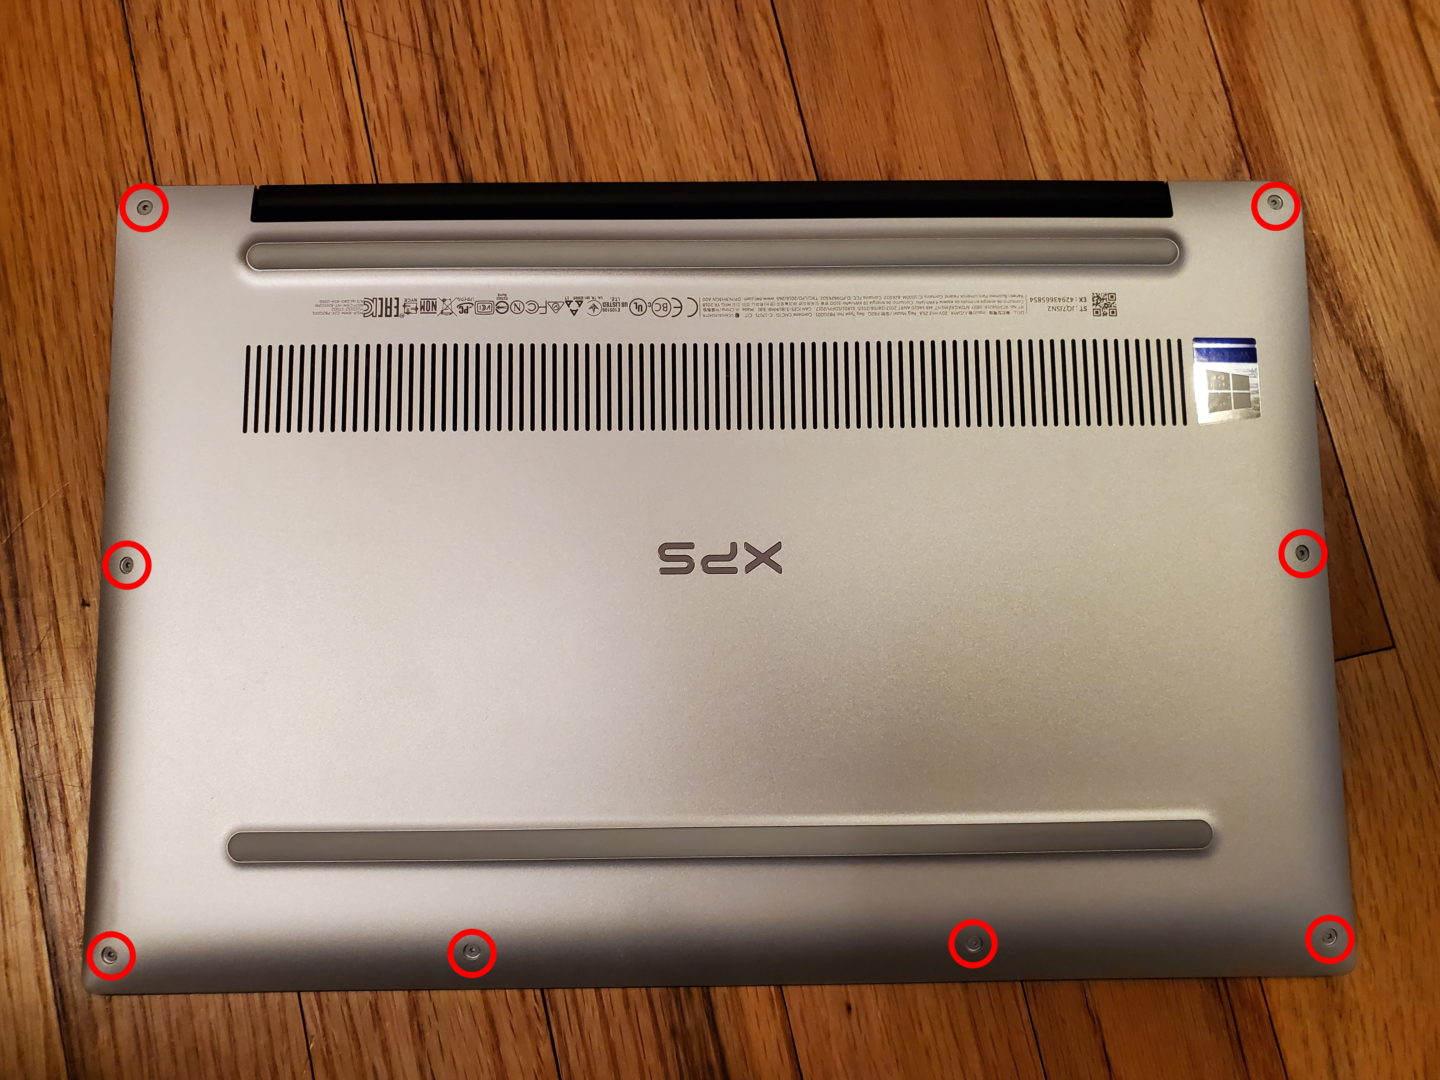
Remove the bottom cover screws
Flip the laptop over and remove the 8 screws on the left, bottom, and right side:
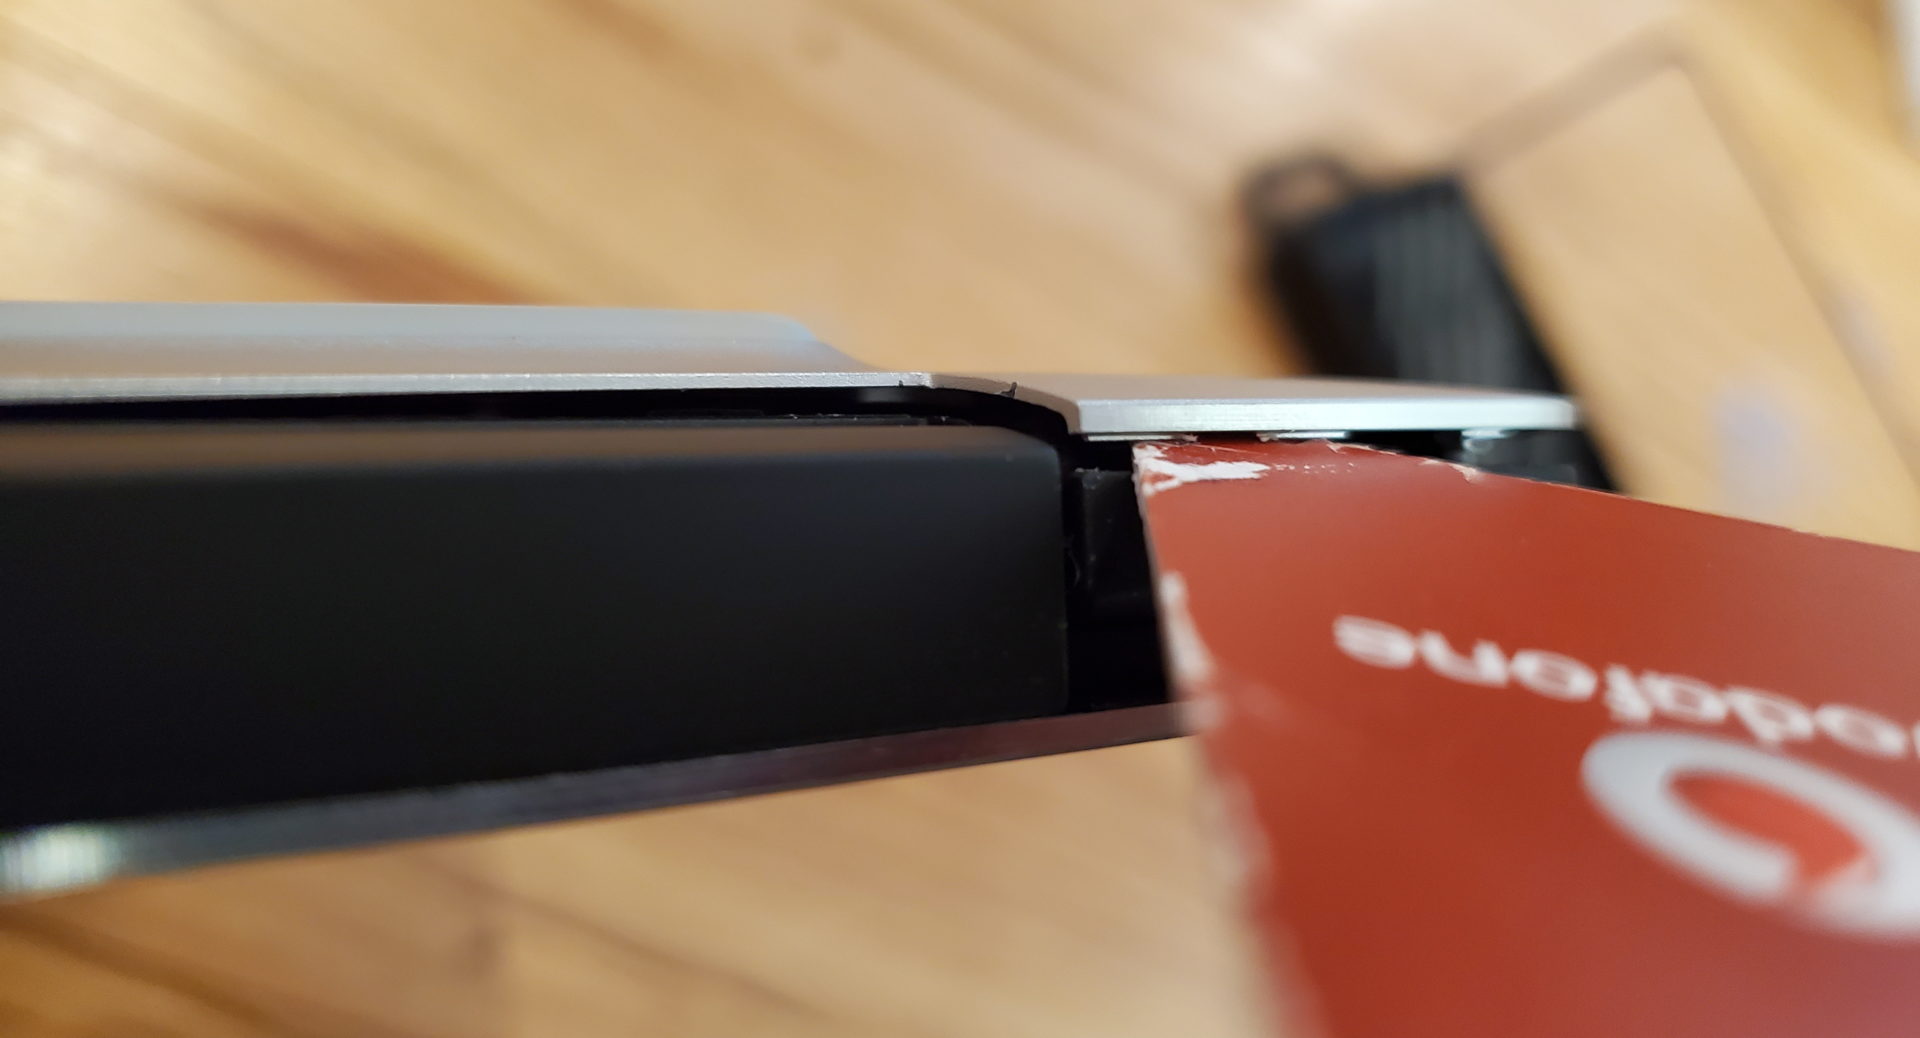
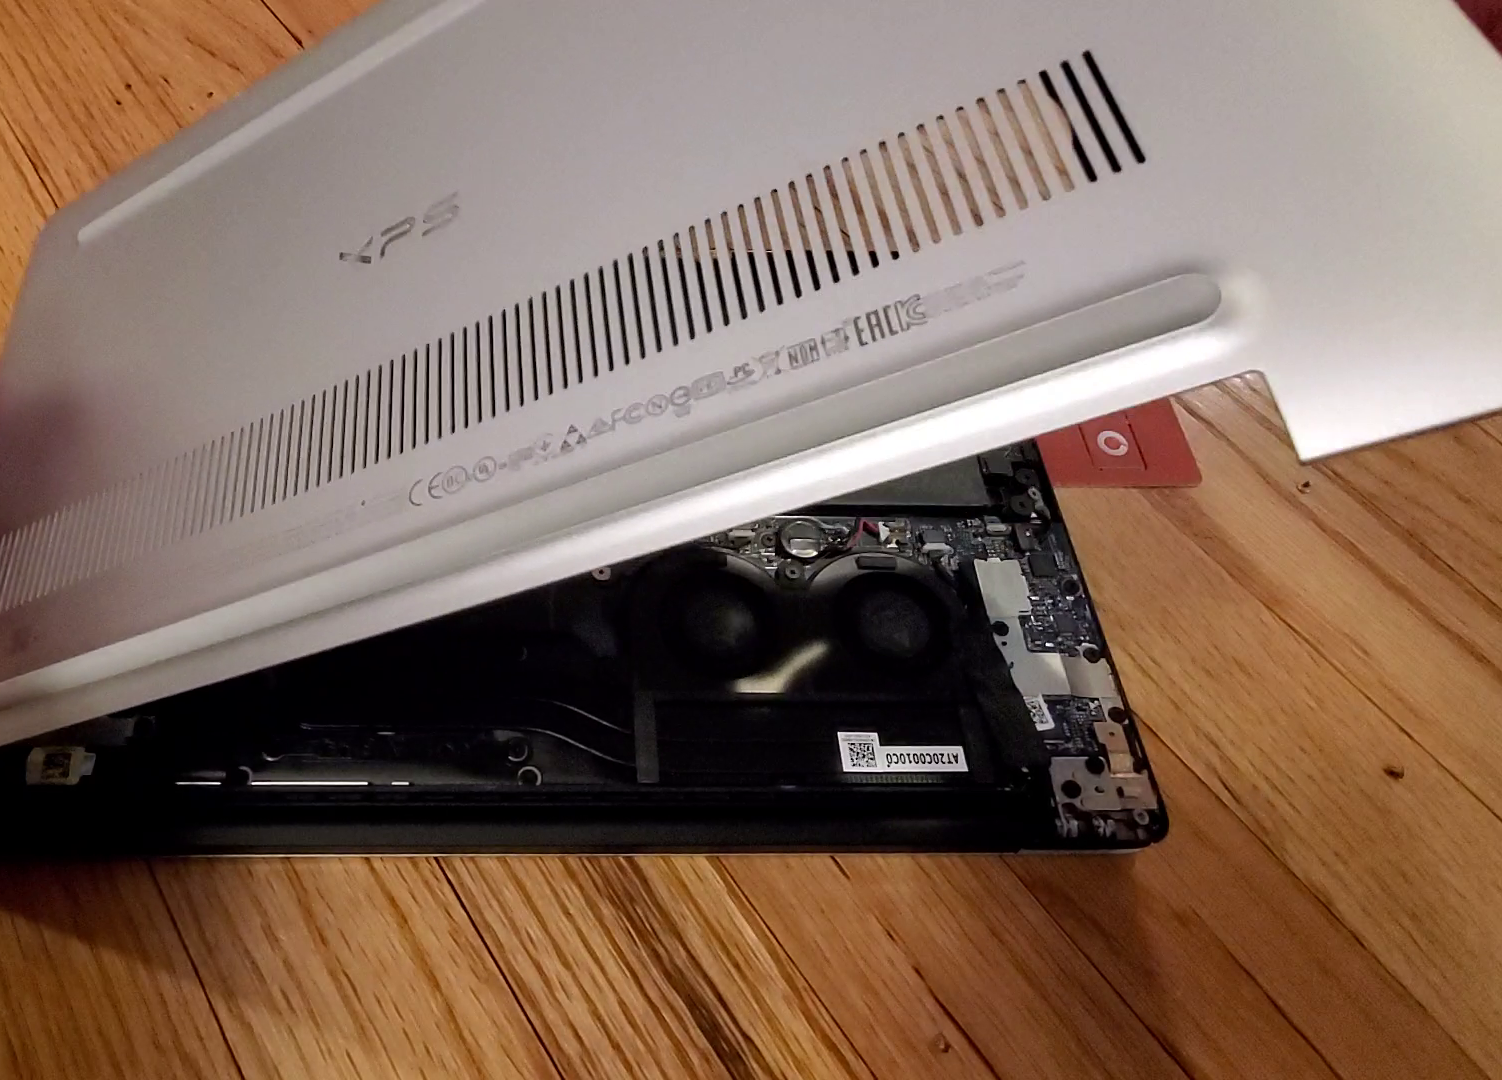
Pry off the bottom cover
You need to find somewhere to start prying off the bottom cover. I found it easiest to start at the back left hinge by wedging an old credit card in the corner:
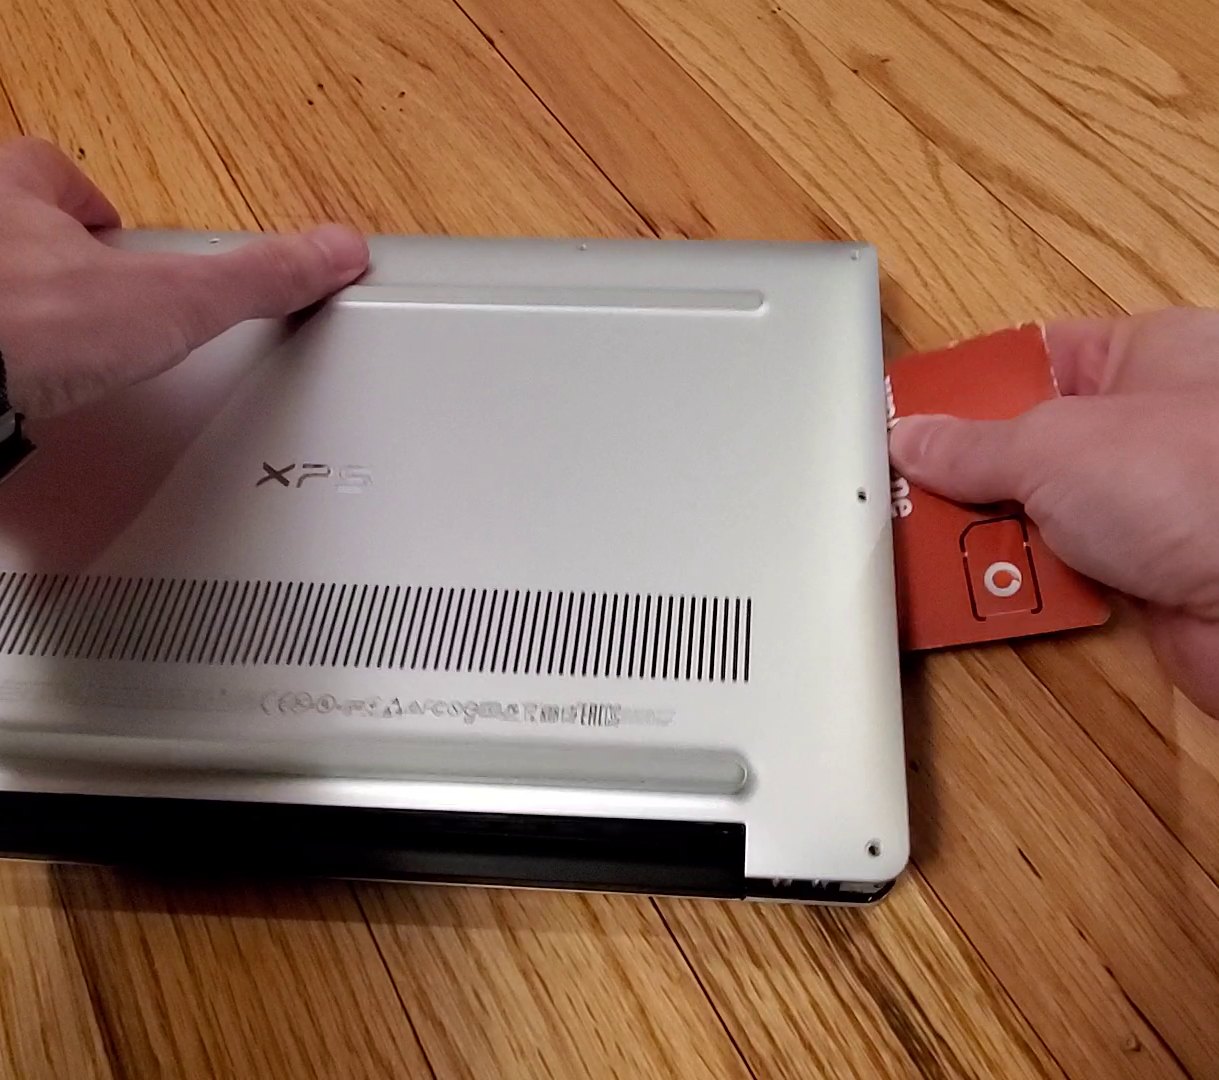
Then, simply carefully slide the tool (credit card) along the entire perimeter of the cover until it simply pops off:
Disconnect the battery (for safety)
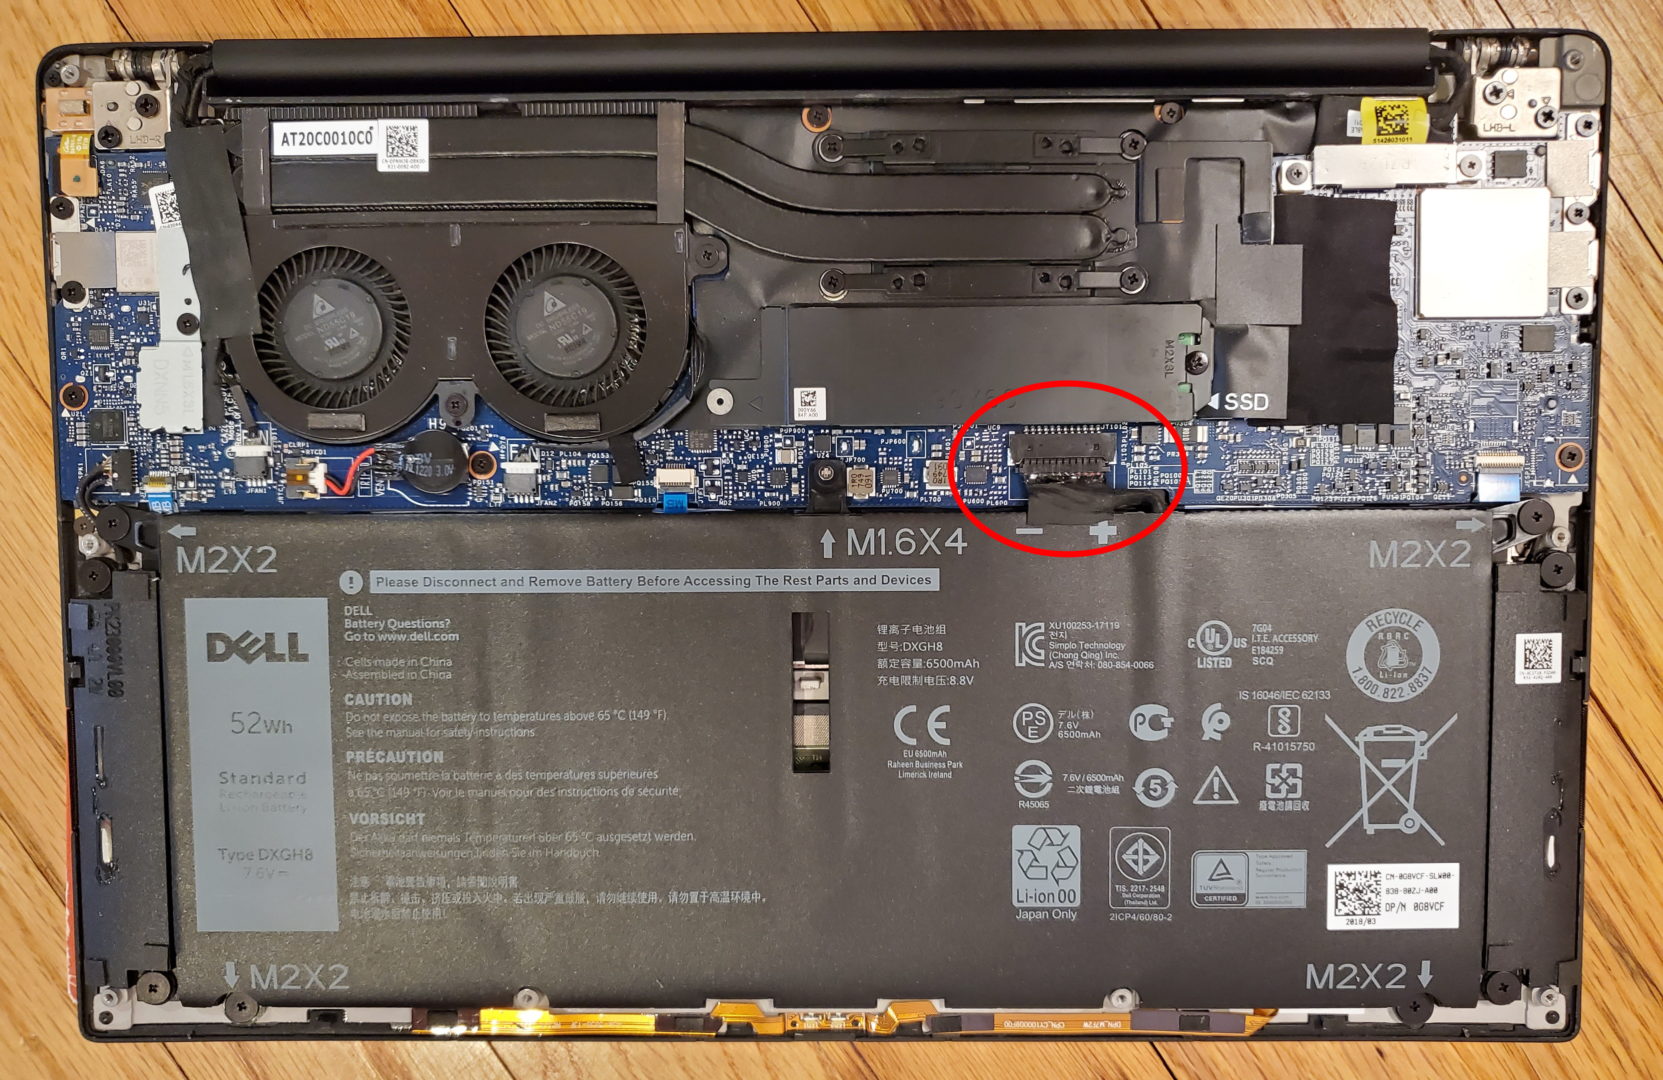
Okay, so now you have the cover off. While this next step isn’t technically necessary, since you can get at the SSD without doing it, it’s still safe to disconnect all power sources just in case. All you need to do is push out the battery cable from the connector:
I simply used my finger nails on either side of the connector and pulled down towards the battery:
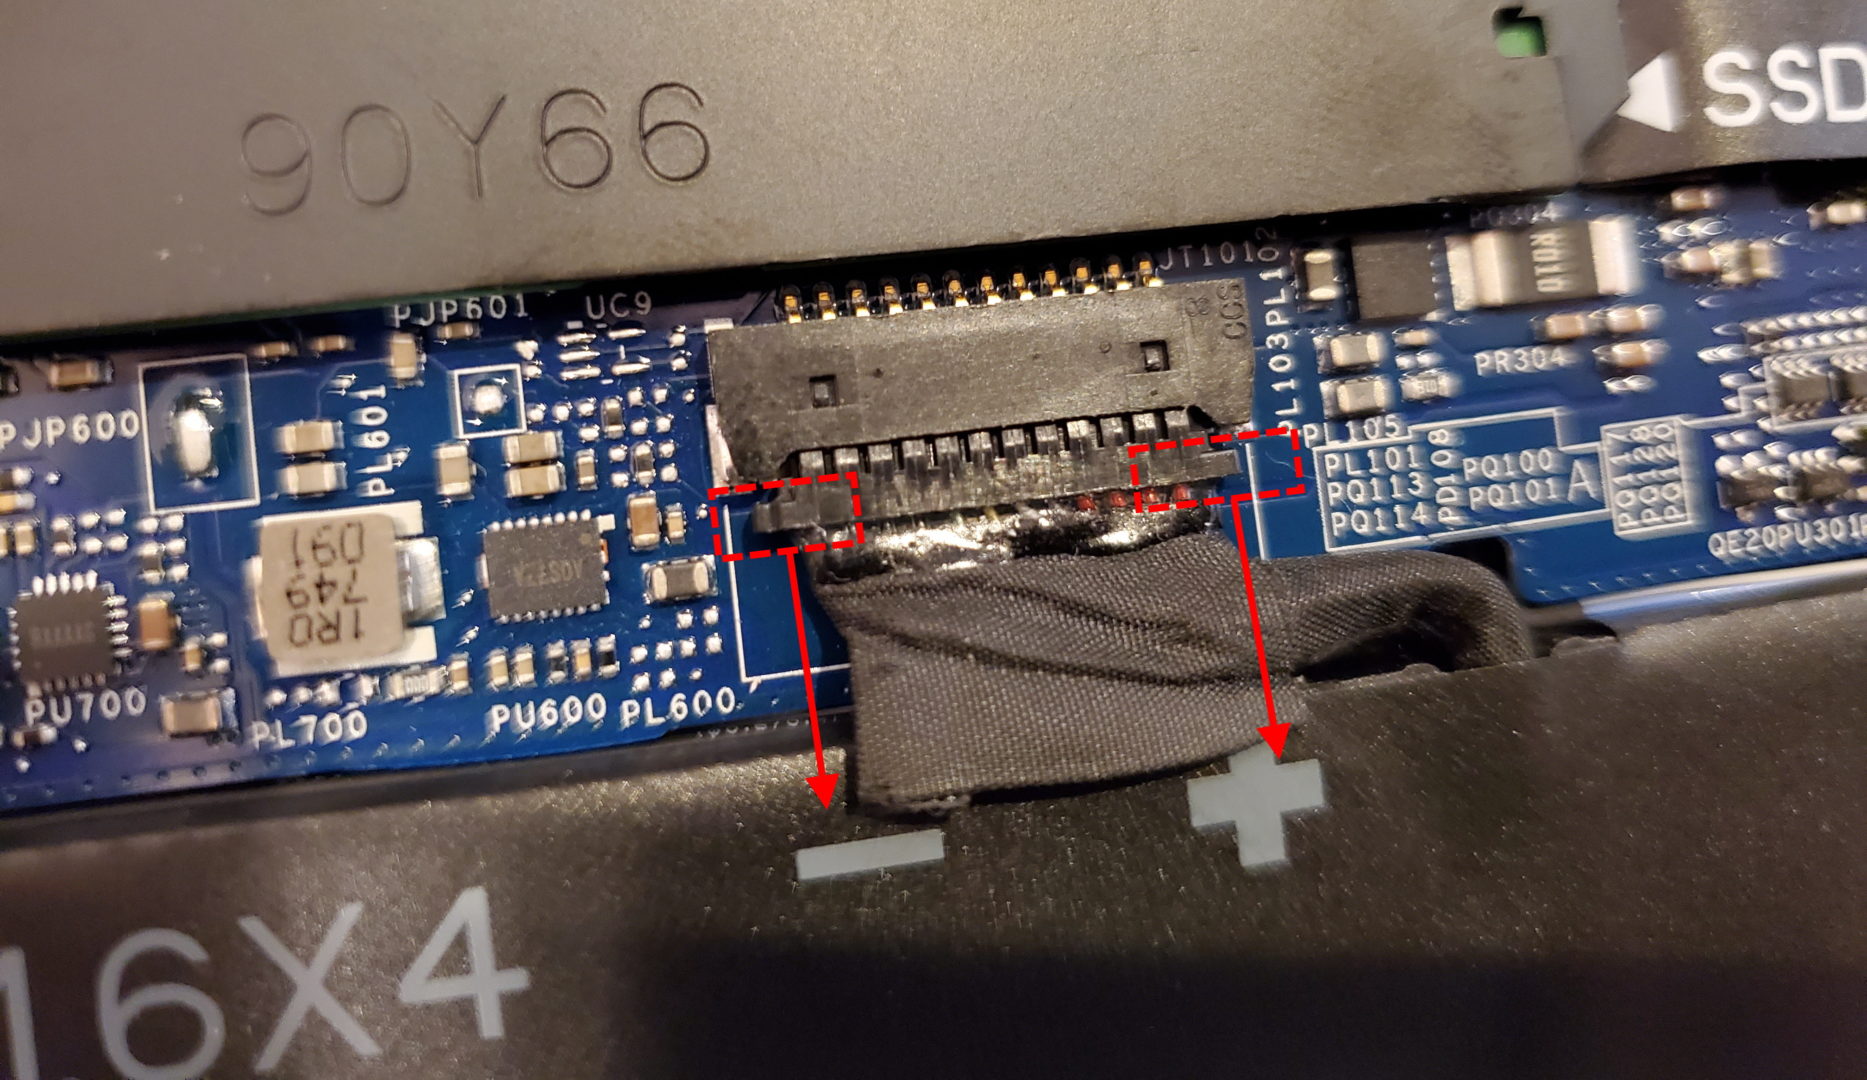
push/pull the cable out using these tabs 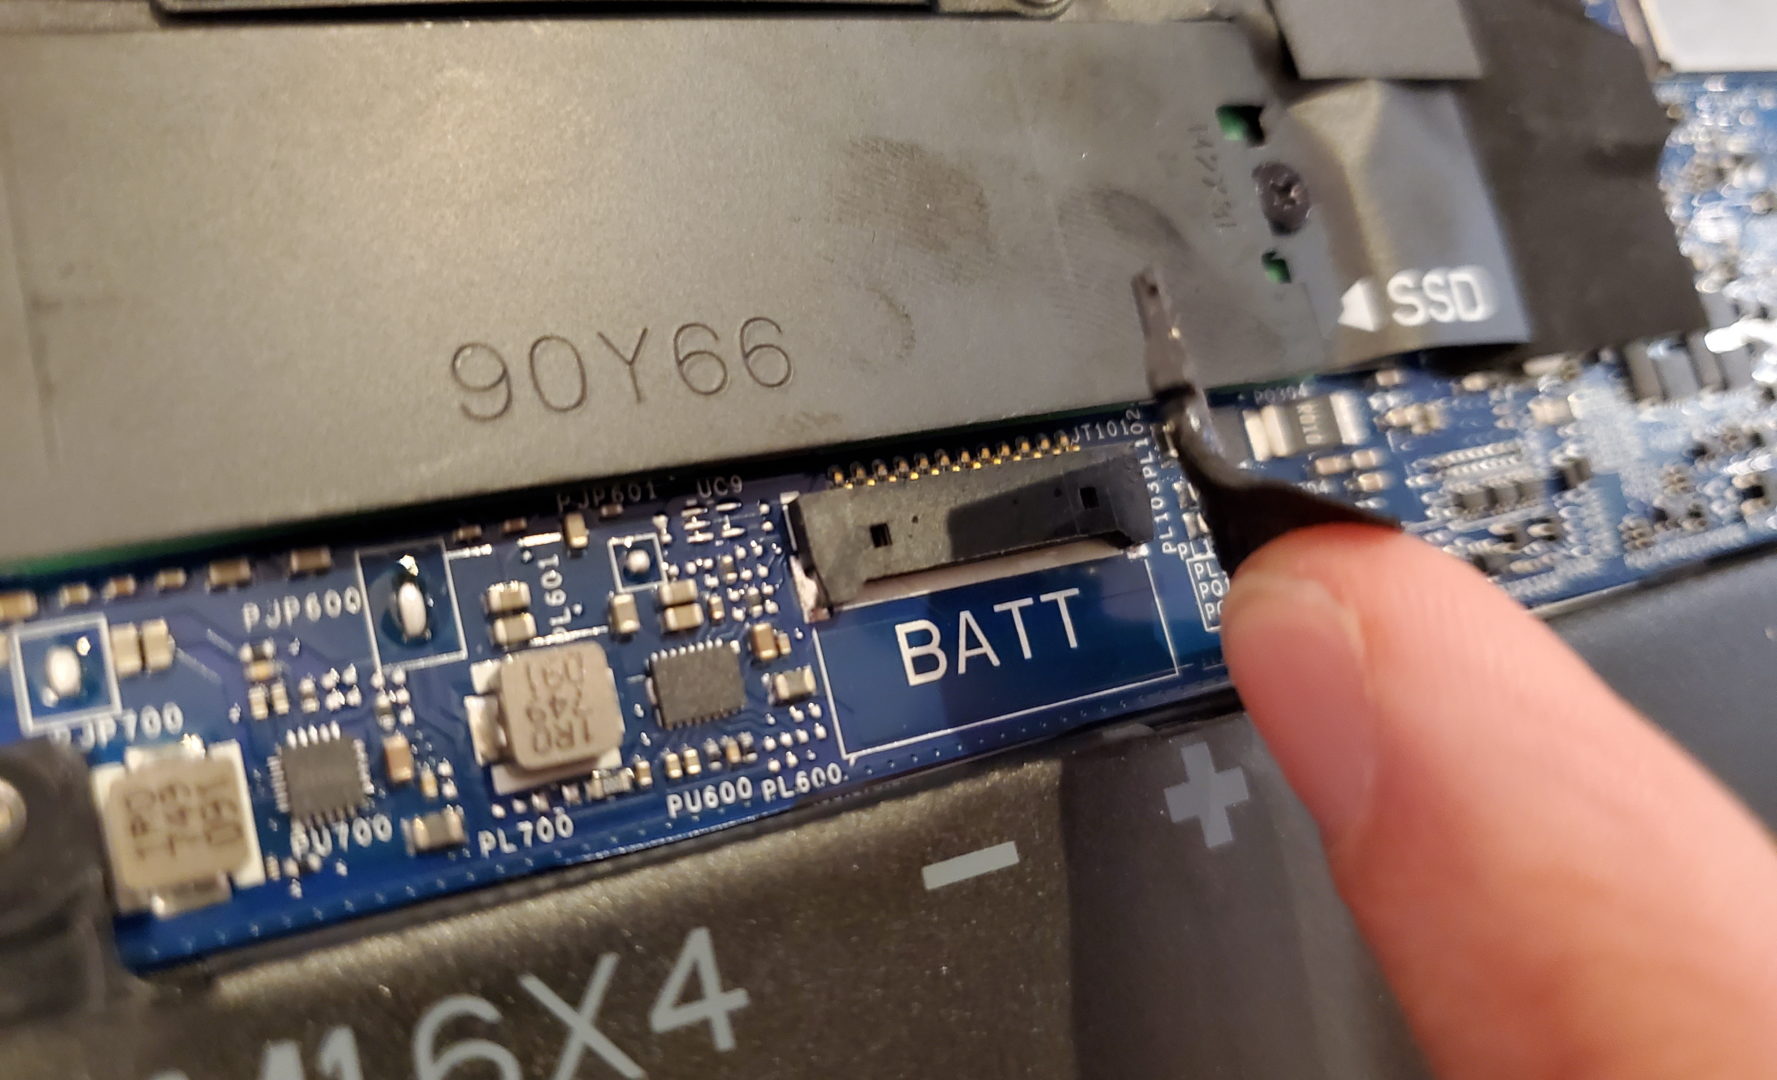
what it looks like with the battery unplugged
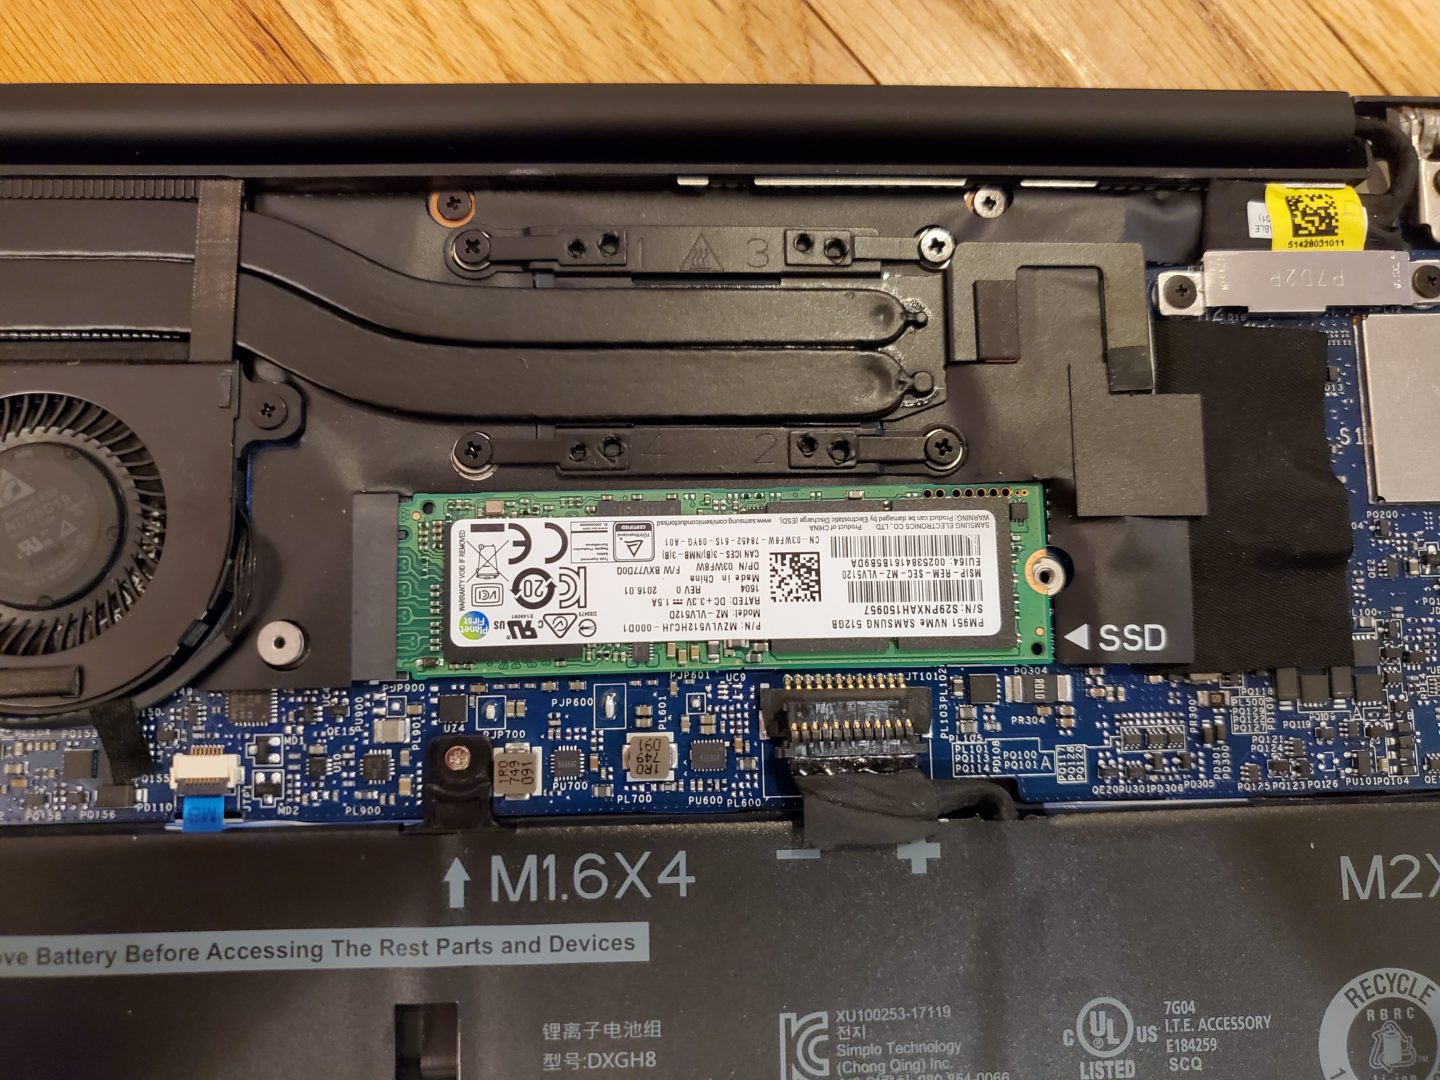
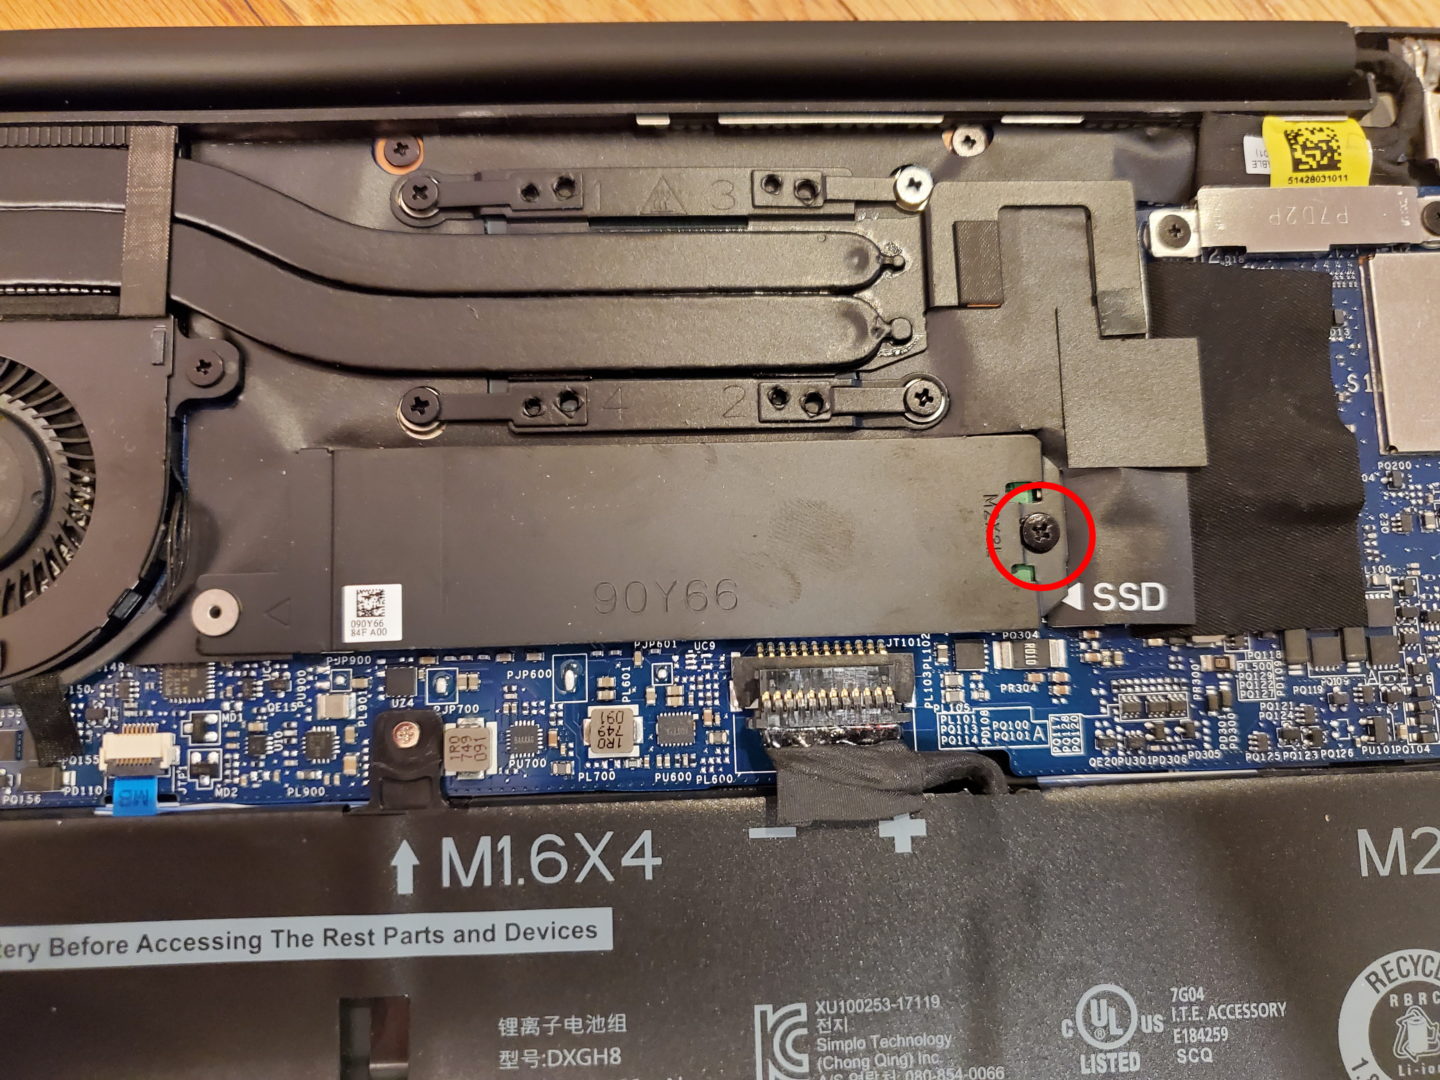
Remove the SSD
With the battery unplugged, remove the single screw holding the SSD cover (heatsink?) down. Note there’s a little bit of adhesive on the other side, so when pulling it off, there may be some resistance and/or it may pull the SSD out with it
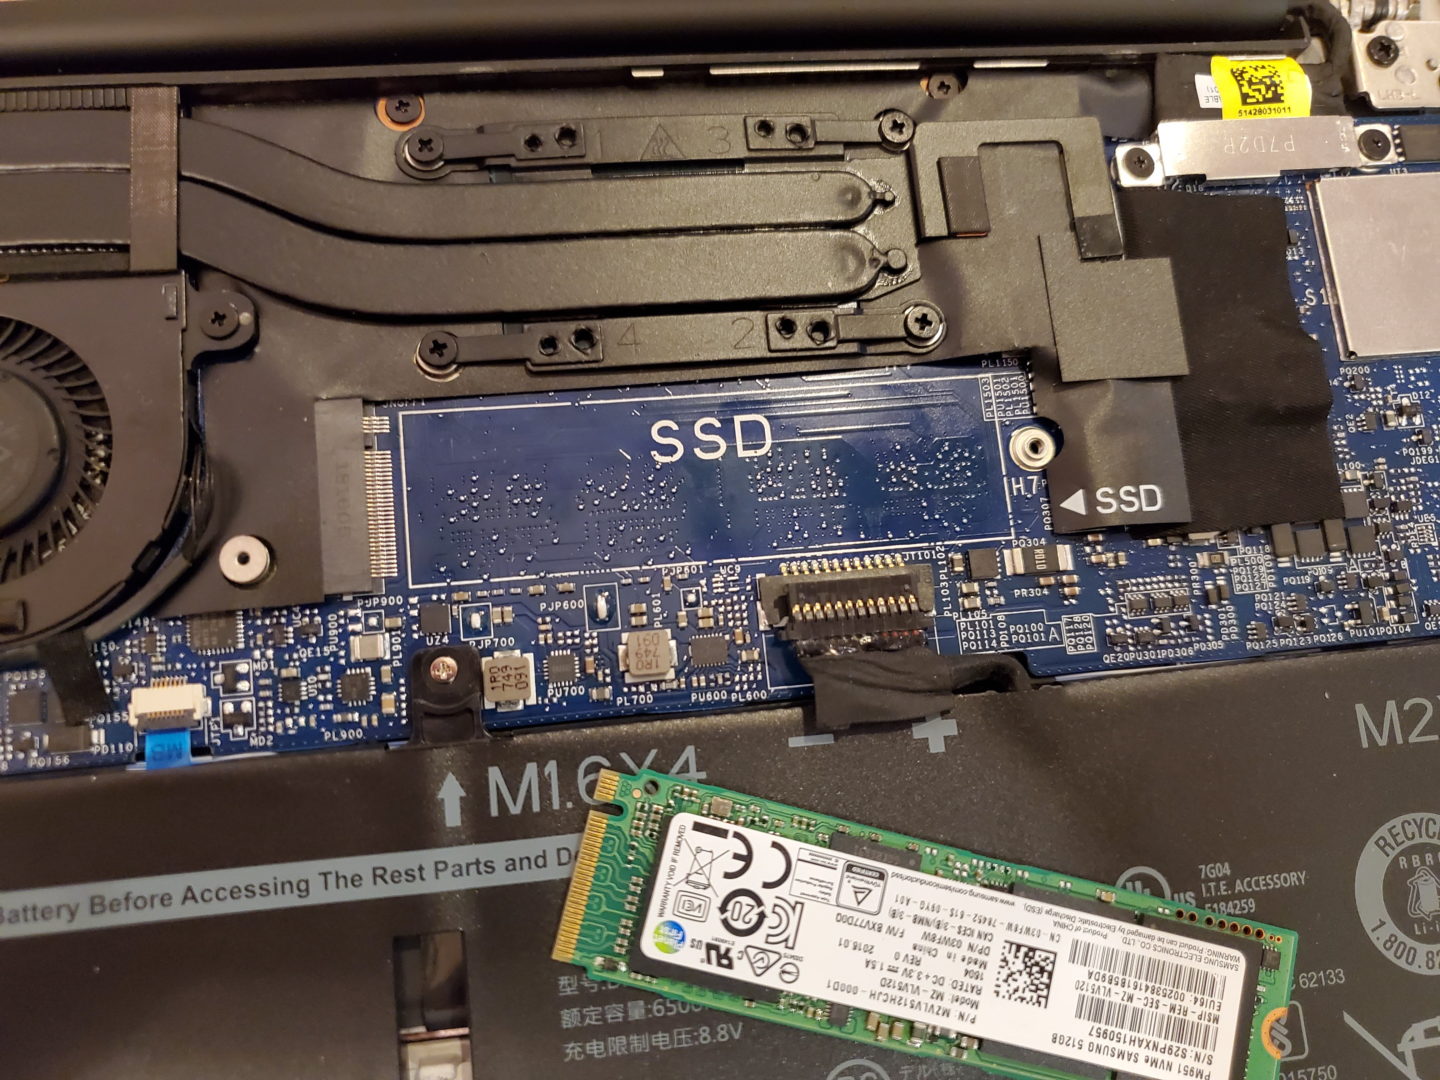
Now assuming the SSD didn’t come loose with the cover, simply wiggle the SSD free (pull it out away from the connector, or to the right). From here, you now can replace the SSD with the one of your choice
Wrap up
That’s it! Remove nine screws, pry off a cover, pull out a cable, removing another cover, and you, too, can easily perform a Dell XPS 13 9370 SSD upgrade with minimal worry or effort. When you’re done, all you need to do is do everything in reverse order to put it all back together.