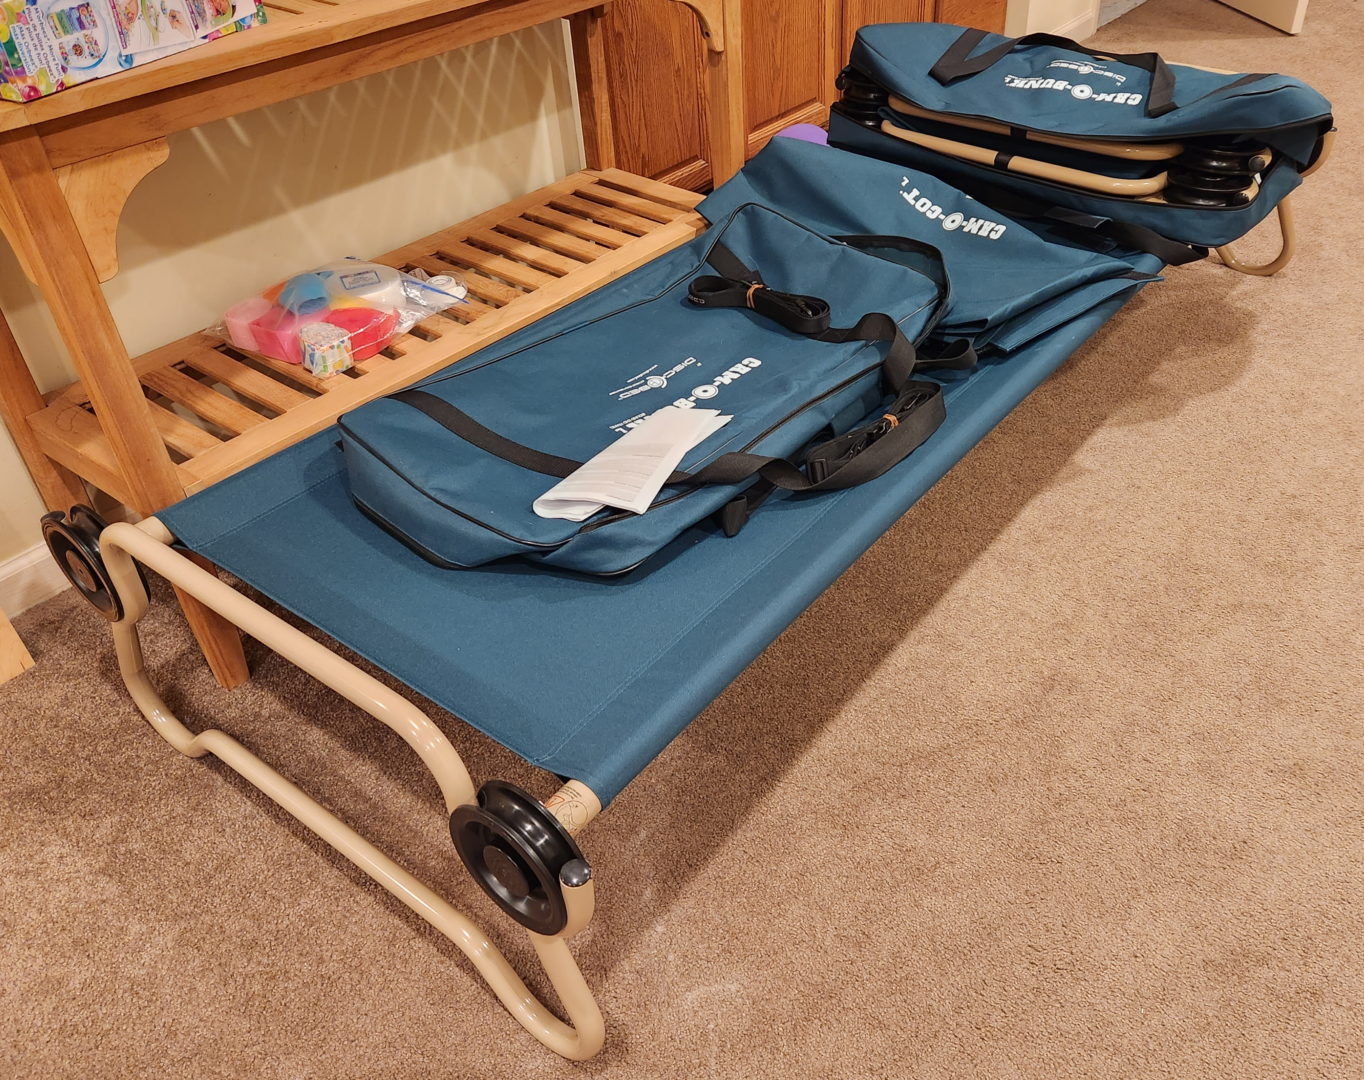
I recently purchased a set of Disc-O-Bed Bunk Beds to act as extra beds when guests stay over, as well as for the occasional camping trip. However, after testing them out, I couldn’t quite figure out how to get them back in the bags nicely. I finally worked it out (but not until after I found the last page of the instruction manual), and figured this guide to repack a Disc-O-Bed may help others:
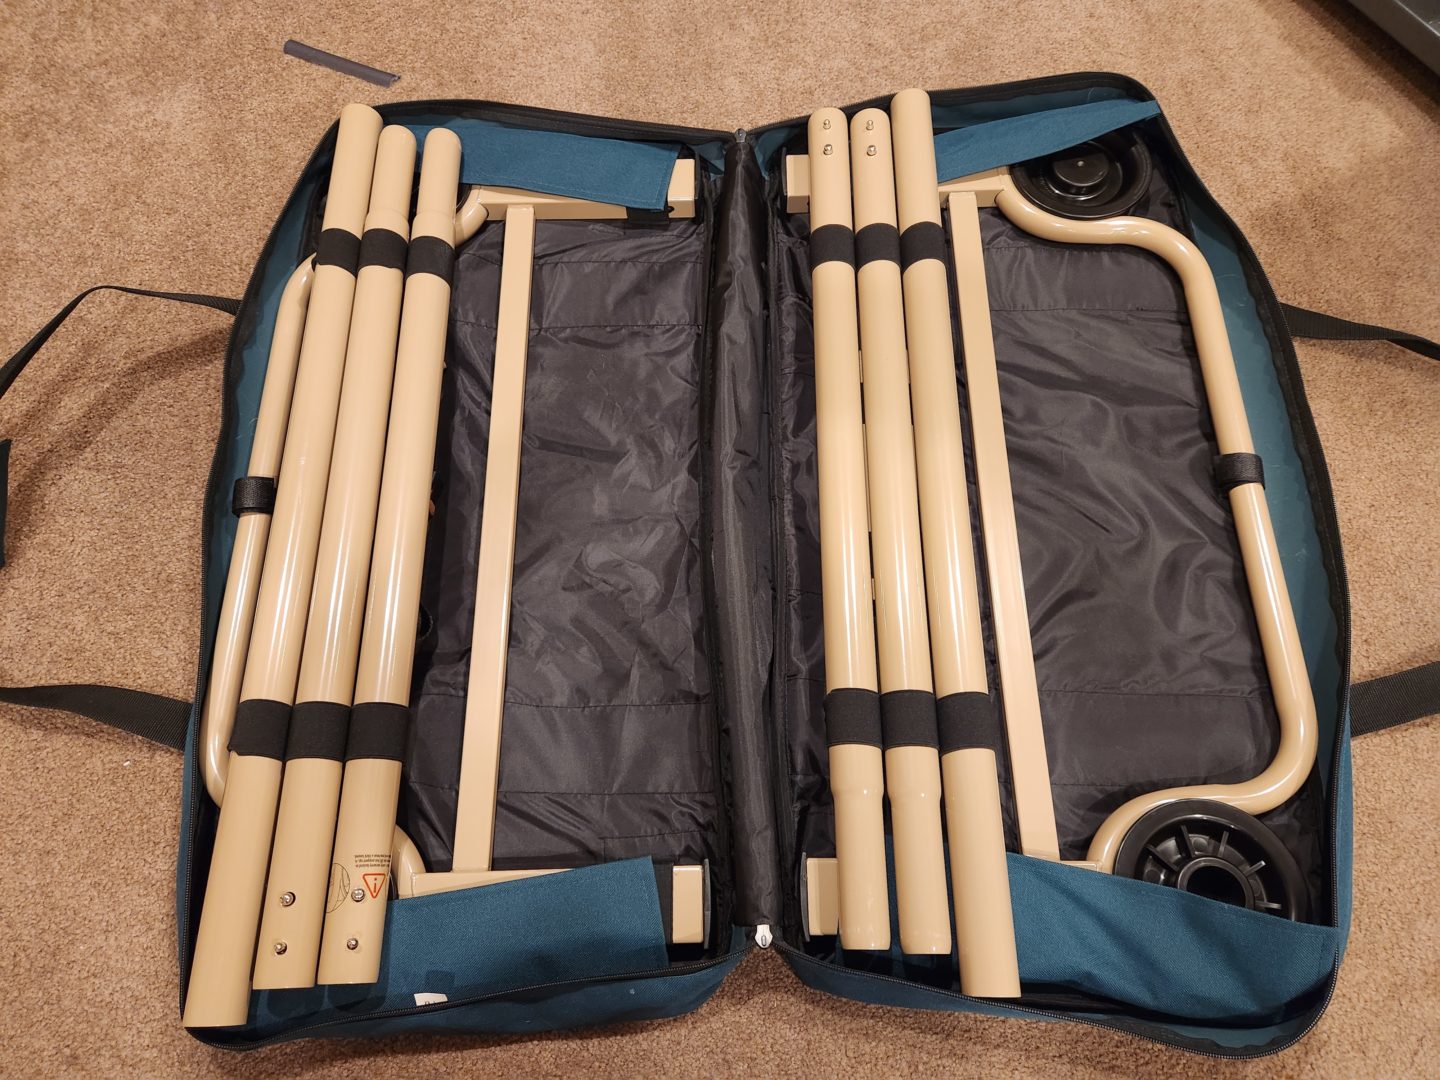
Start With the Frames
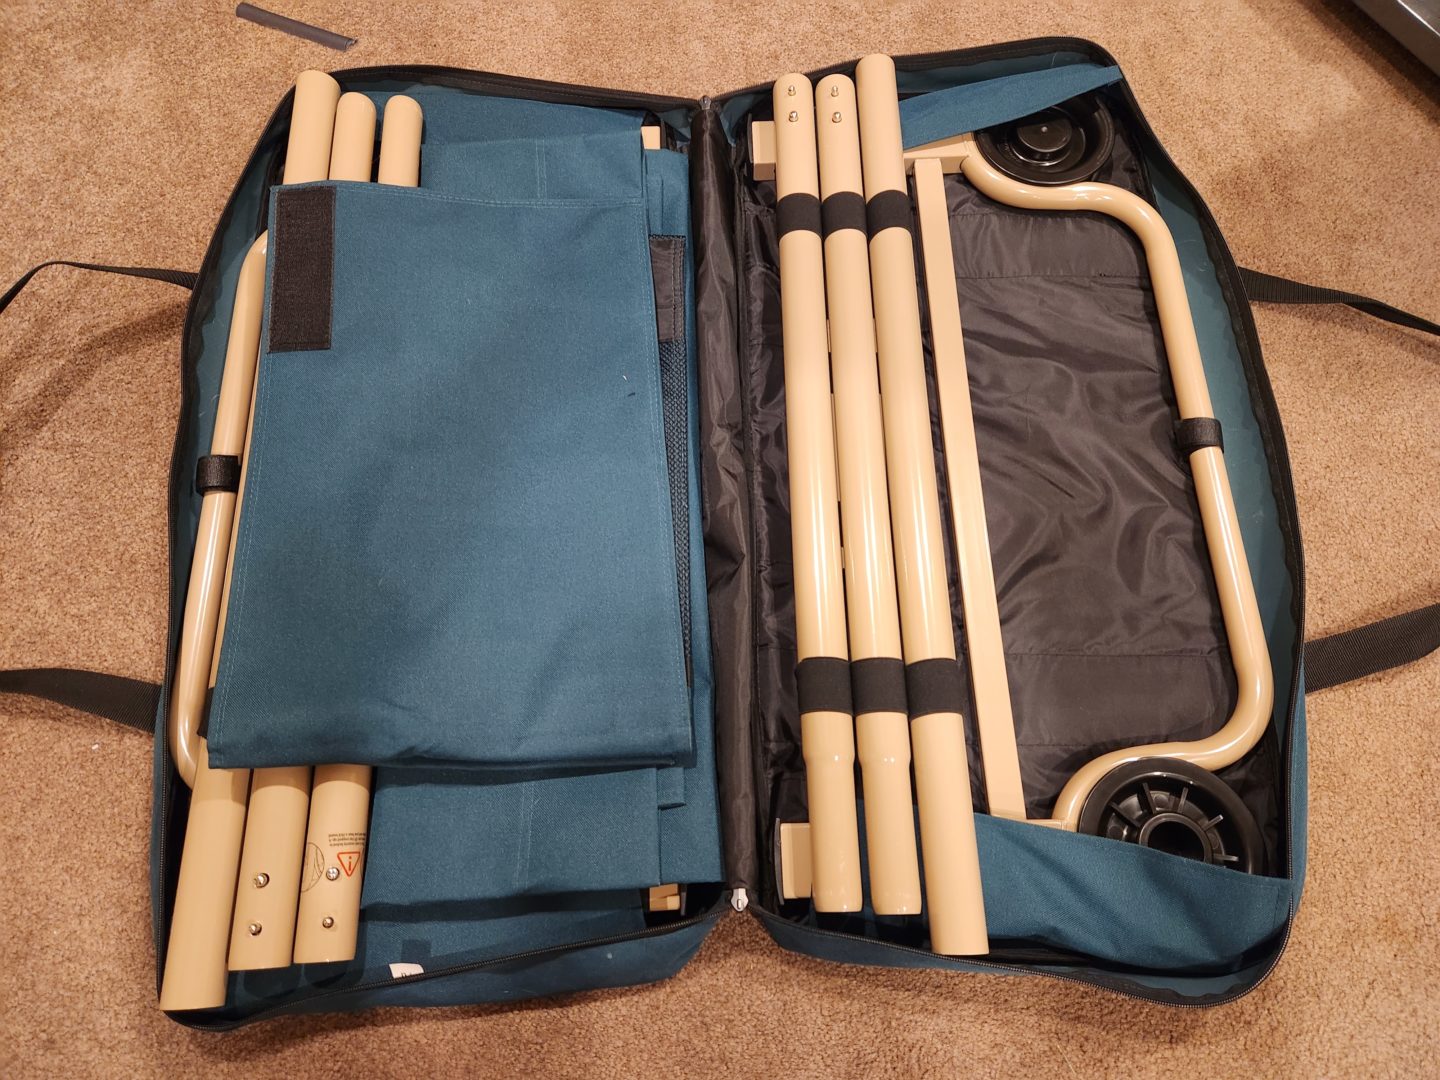
First step is to lay out the bags and insert the round and straight frames. For both frames, you wrap the Velcro strap around the long bar, and for the straight frame only, you also slide the legs into some elastic straps. Note that the bags are also, therefore, different (one has the leg straps).
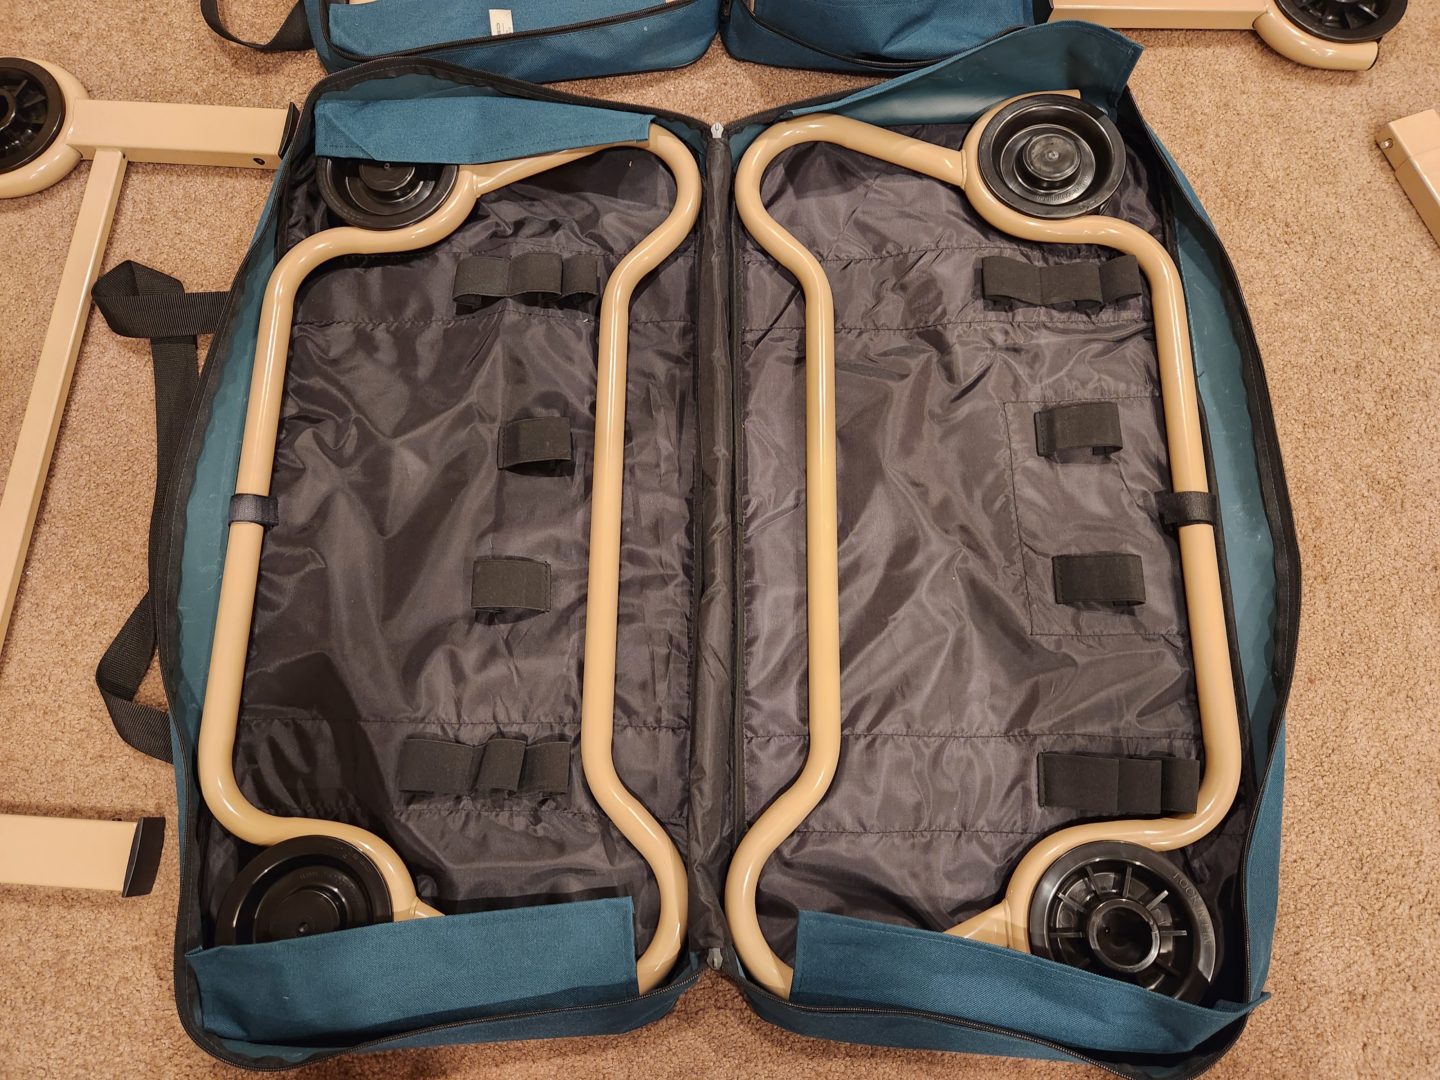
Once the frames are strapped in, lay the green fabric flaps as best as you can over the sides of each frame.
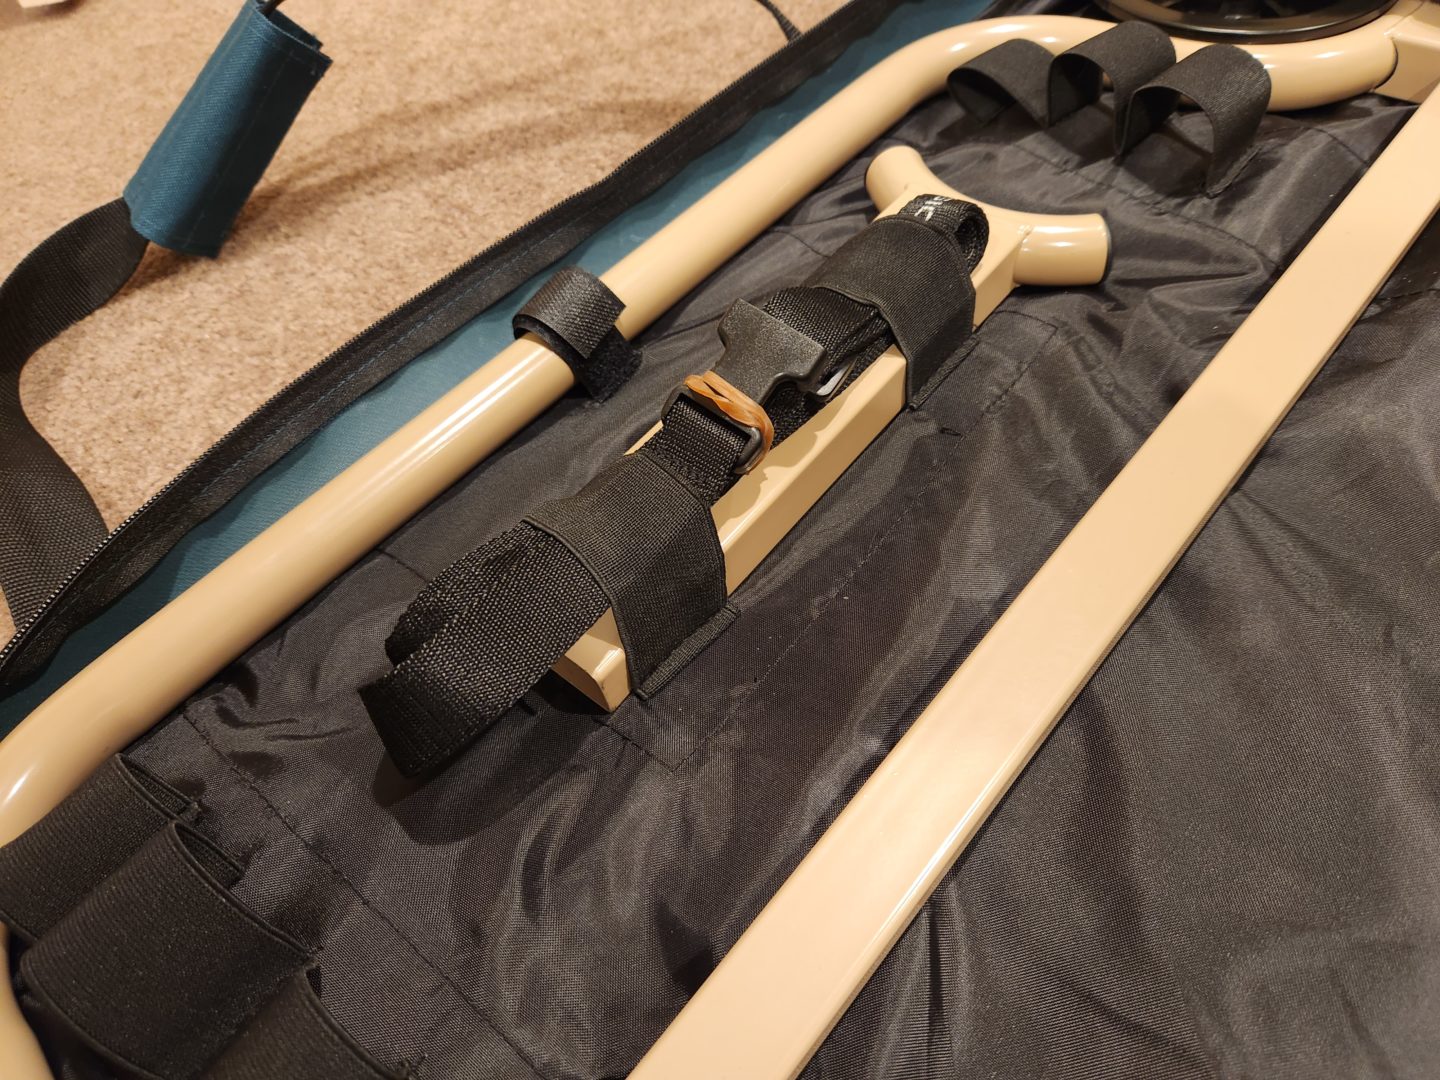
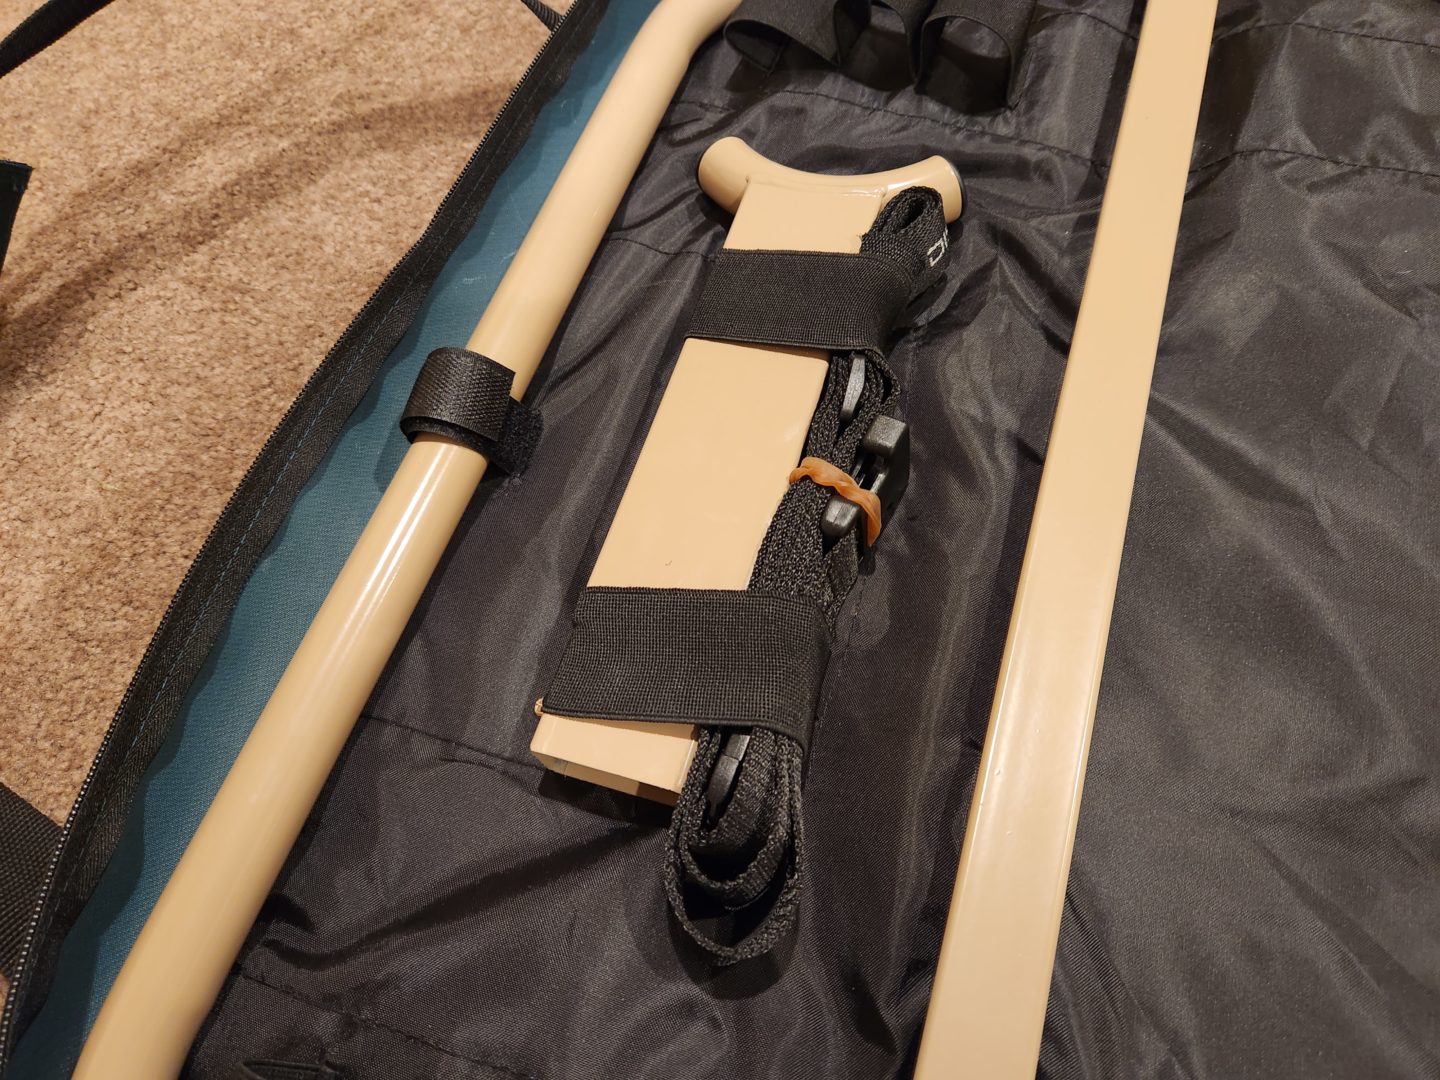
Add the Stack Adapters
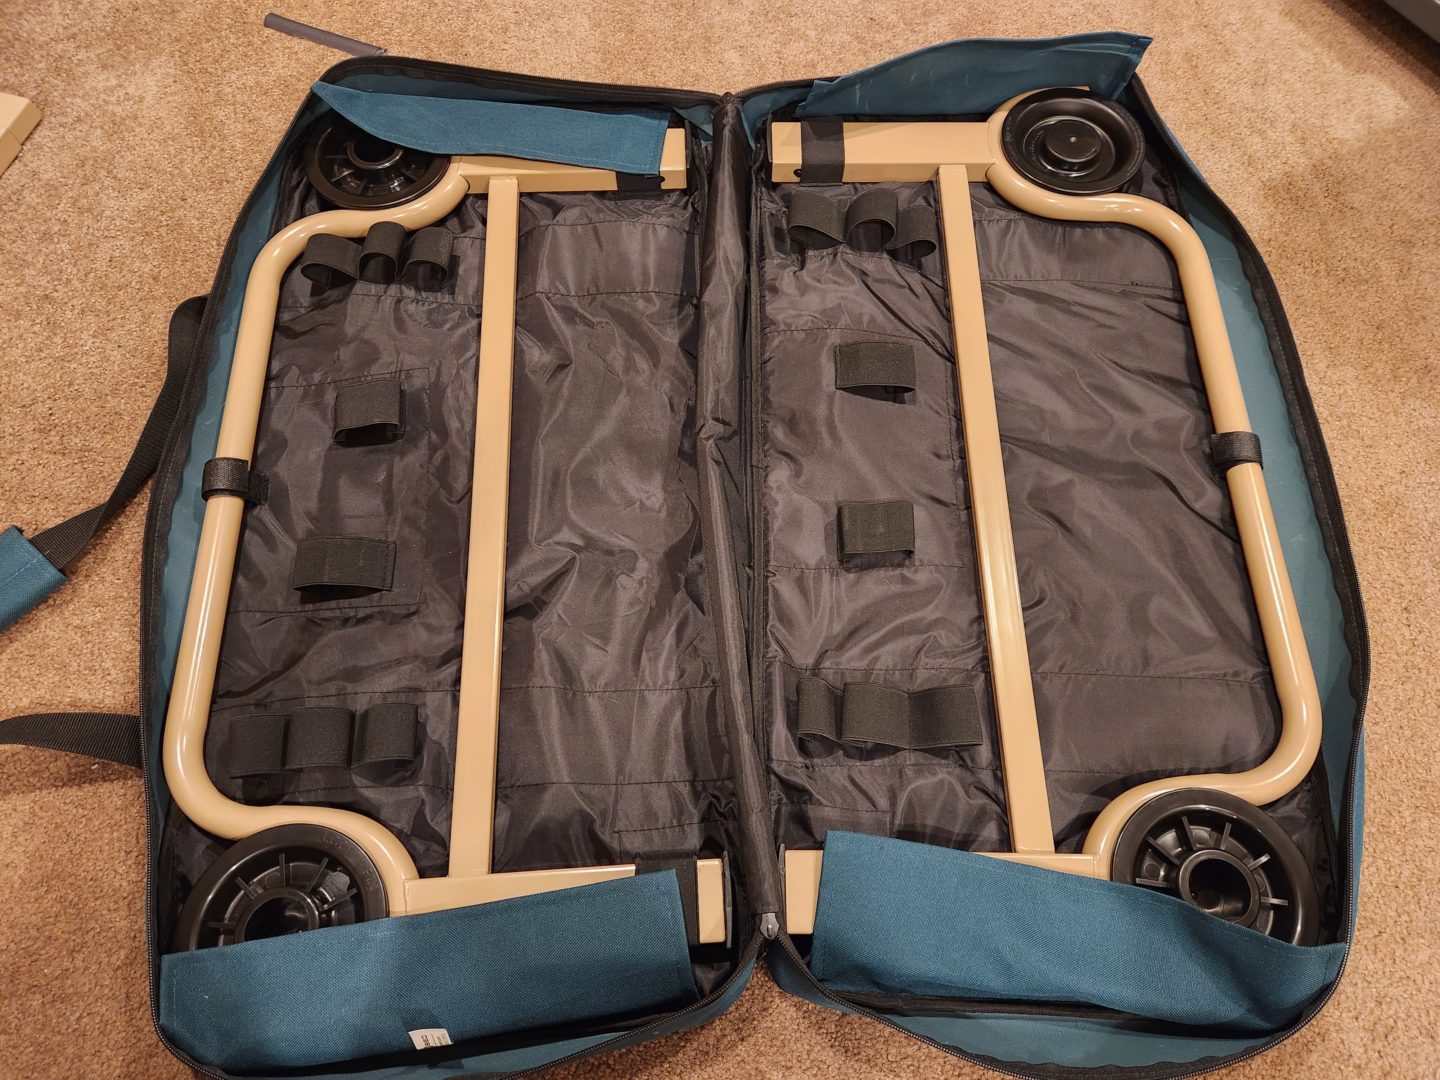
Next step is to add the stack adapters, which are the pieces you add to the straight frames’ legs in order to bunk the two beds. These four adapters slide into the two elastic straps that are found in-between the sets of three straps. Simply slide them in like below:

The two locking straps are also meant to be stored alongside the adapters. I found it easiest to slide the folded up straps on top of the adapters first, then push them over to the side:
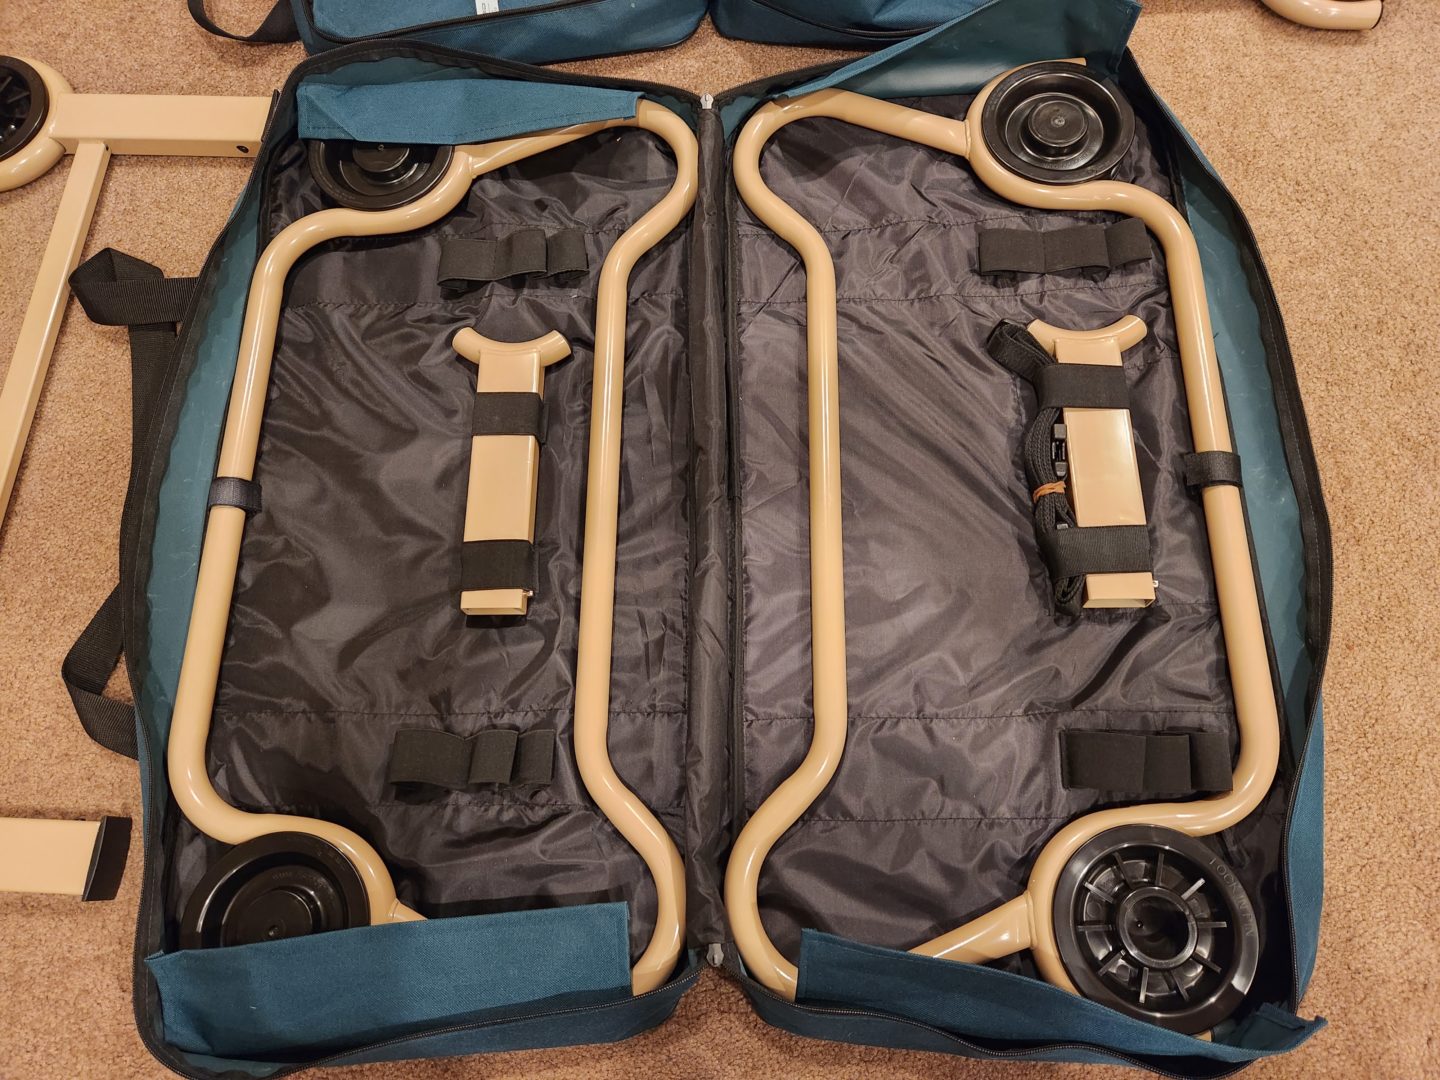
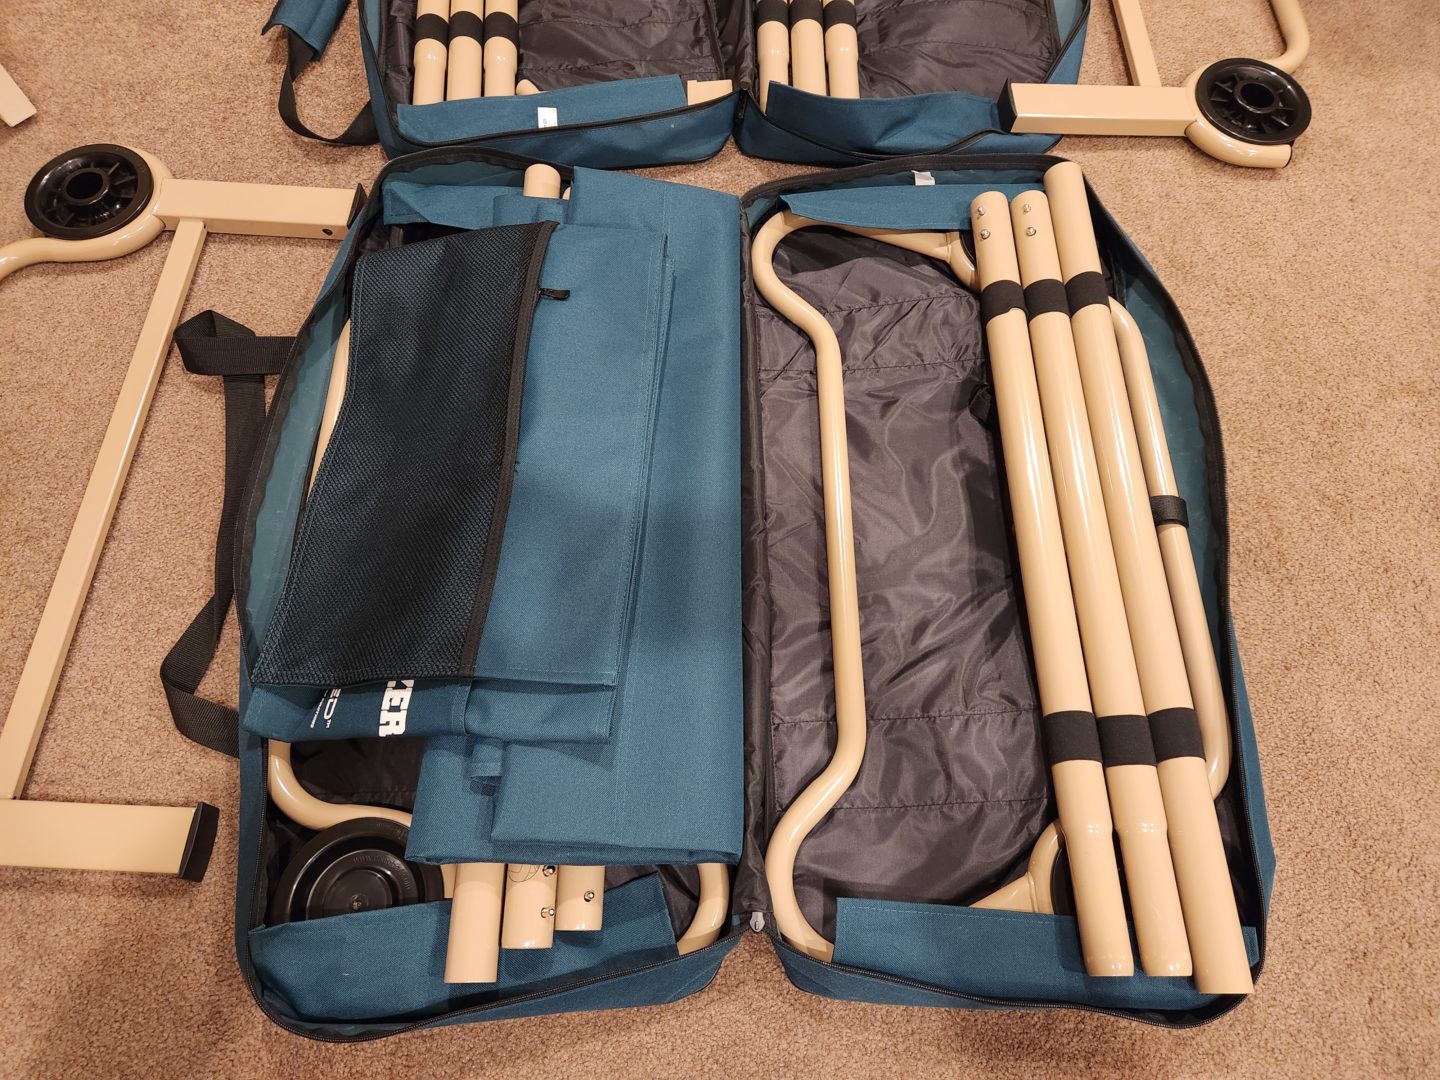
The Side Rails
Now we add the side rails. For each side of each bag, two swaged rails (the ones with the pegs) go on the inside of the bag (closest to the crease) and a single straight rail goes on the outside. You should also alternate which end the pegs are on; in the pictures below, the left side of the bag has the pins on the bottom, right side has the pins on the top. The rails slide into the sets of three elastic straps on each side of the bag. Rotate the swaged rails to the pegs pointing up, this will lessen the chance of damage as they will point inwards when the bag is zipped up. Try to rest the rails on top of the green fabric flap that covers the ends of the frames:

Last step to repack the Disc-O-Bed
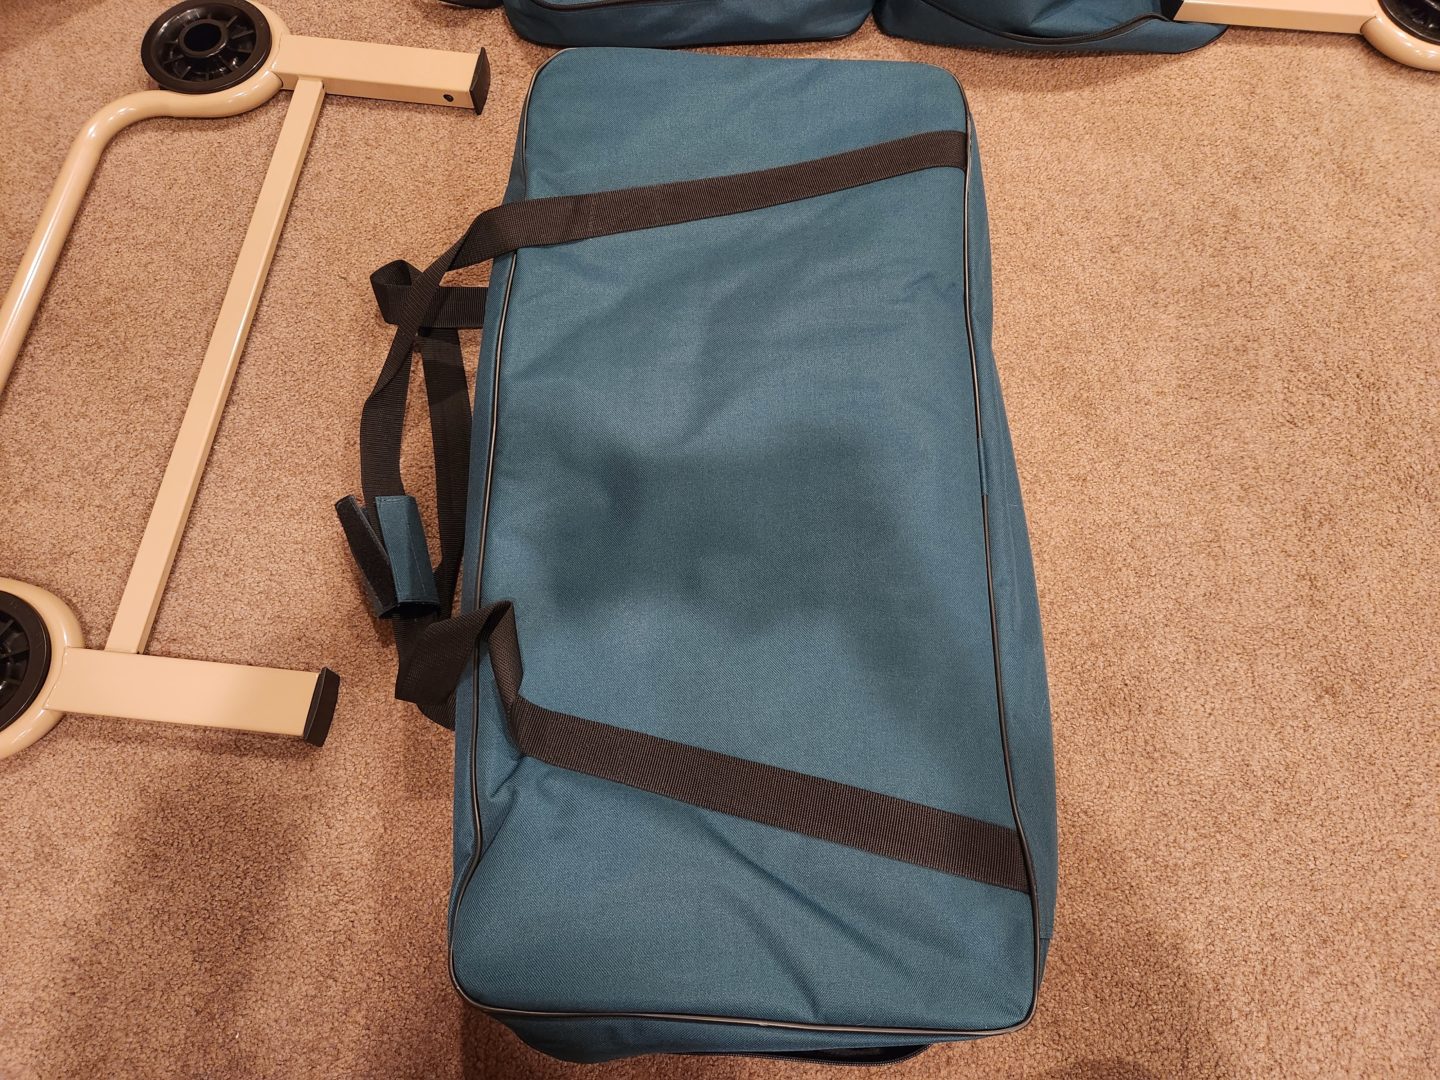
Now all you need to do is lay the sleeping mats and side organizers on one side:
Then close the bags and zip them up!
Wrap up
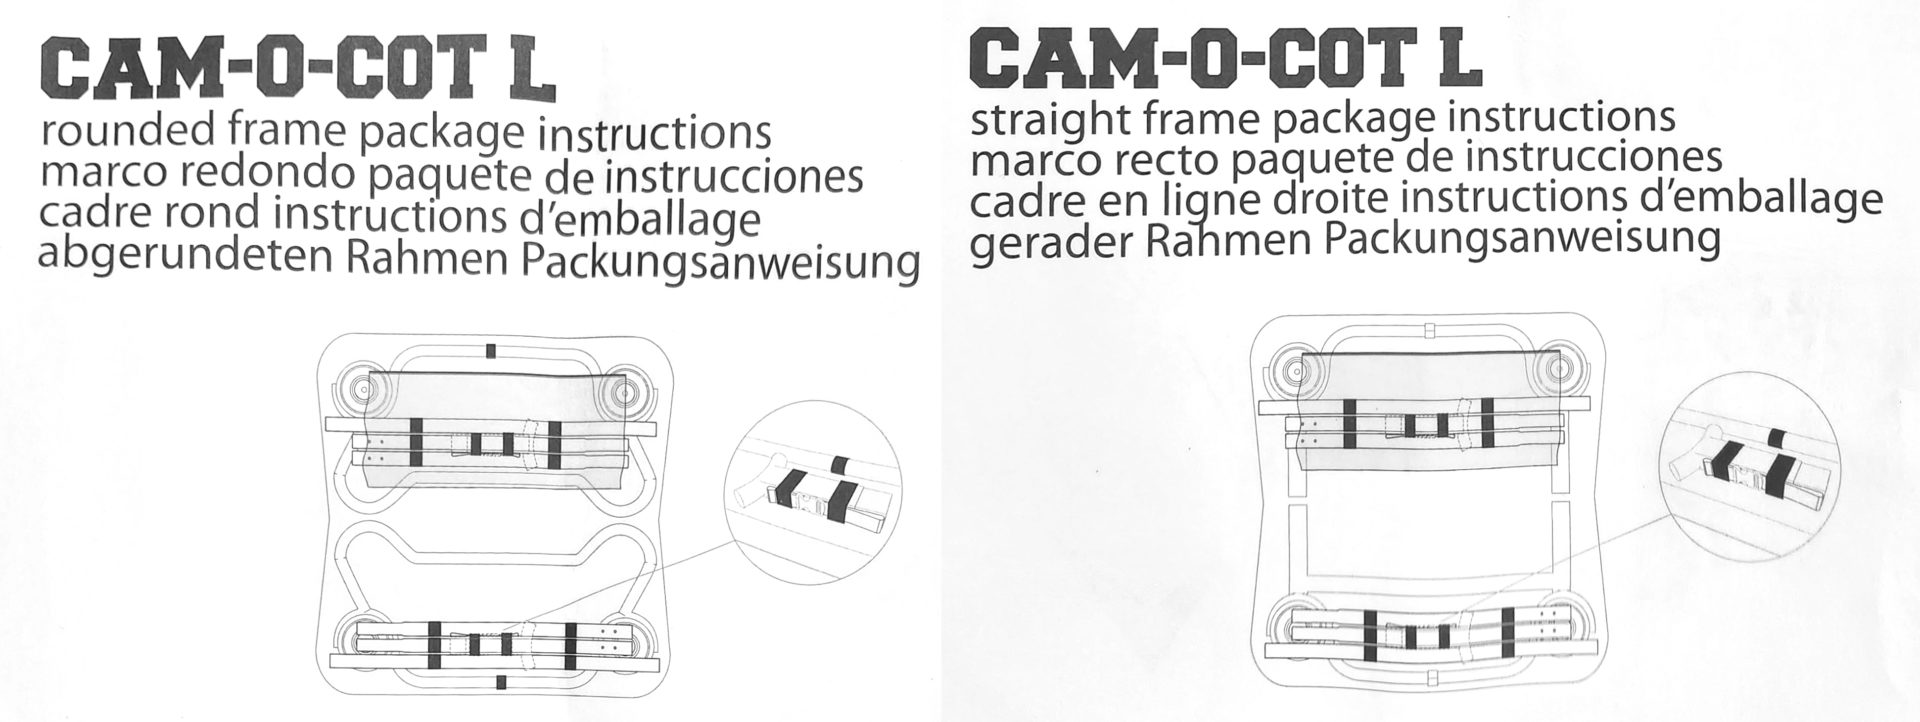
Once you’ve repacked the Disc-O-Beds a few times, you’ll be able to do it much faster and without much thinking. The hardest part is getting the pieces to slide through the elastic bands smoothly, which is to say, repacking these bags should be straight forward once done the first time. For extra help, here is the last page of the manual that has an even shorter guide (single image) on repacking the beds:
Finally someone to address this. Everyone talks about how to put this bed together. Noone is talking about how to put it away. Thank you very much for this! So helpful