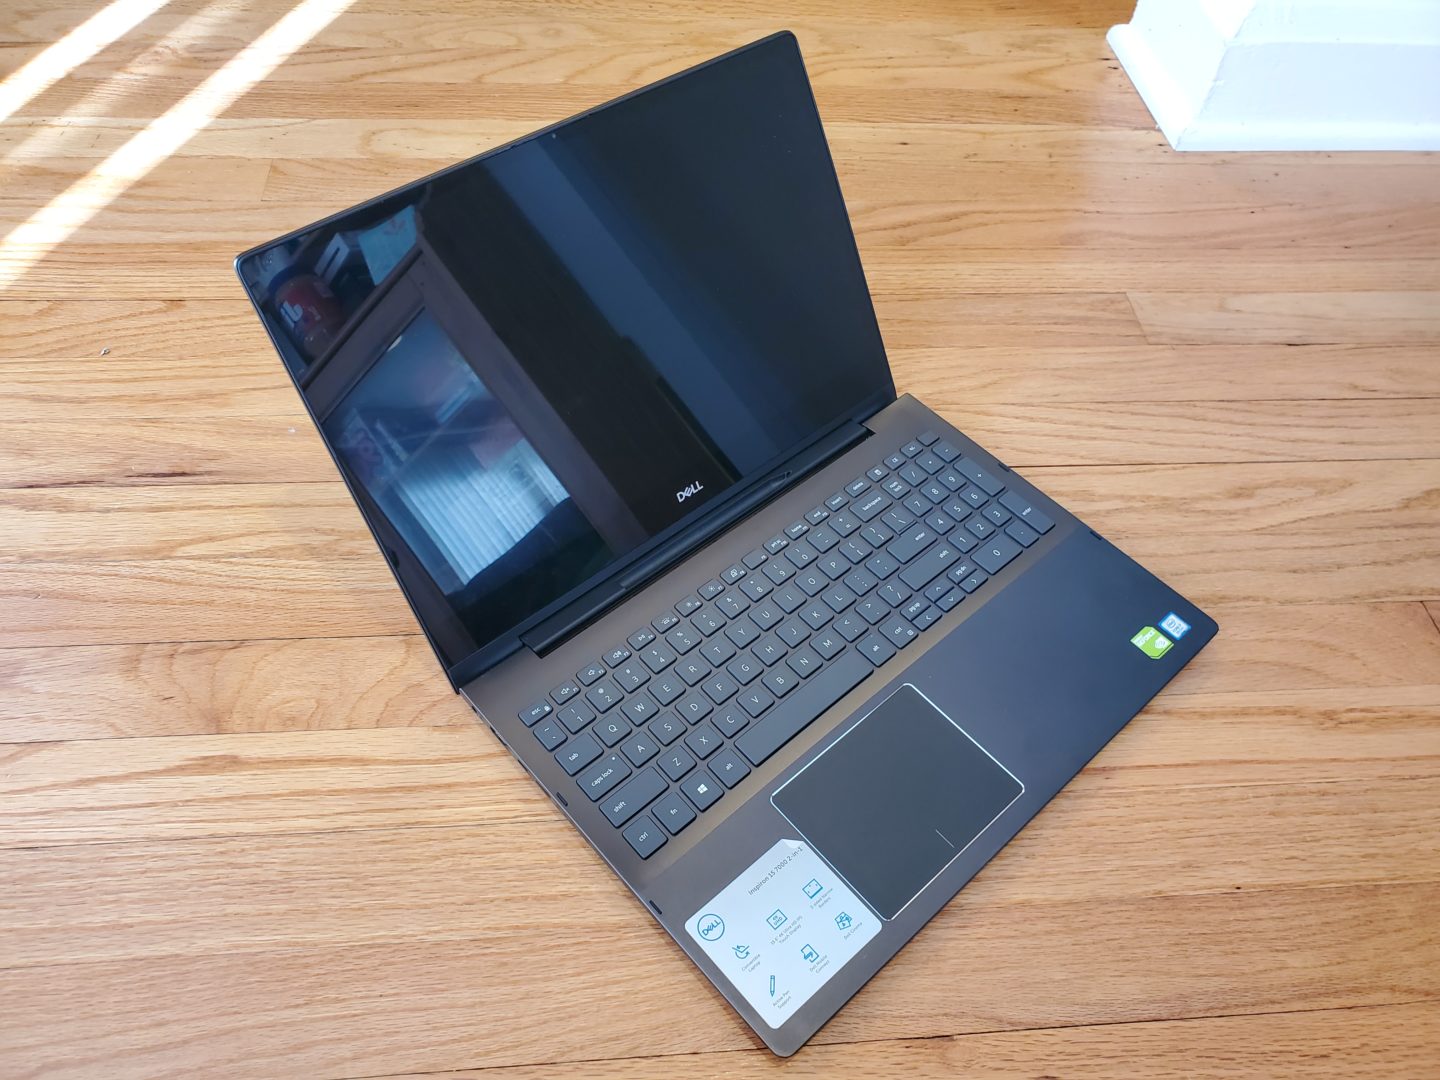
Recently purchase a Dell Inspiron 15 7000 series 2-in-1 laptop and want to learn how to upgrade it? Luckily, you can easily access and change out the memory and SSD (as well as the wifi card and battery) by just removing the bottom cover. Continue on to see the step by step guide on upgrading the SSD and memory:
Remove the bottom cover screws
First, start by flipping the laptop over – there are 9 screws in total you need to unscrew
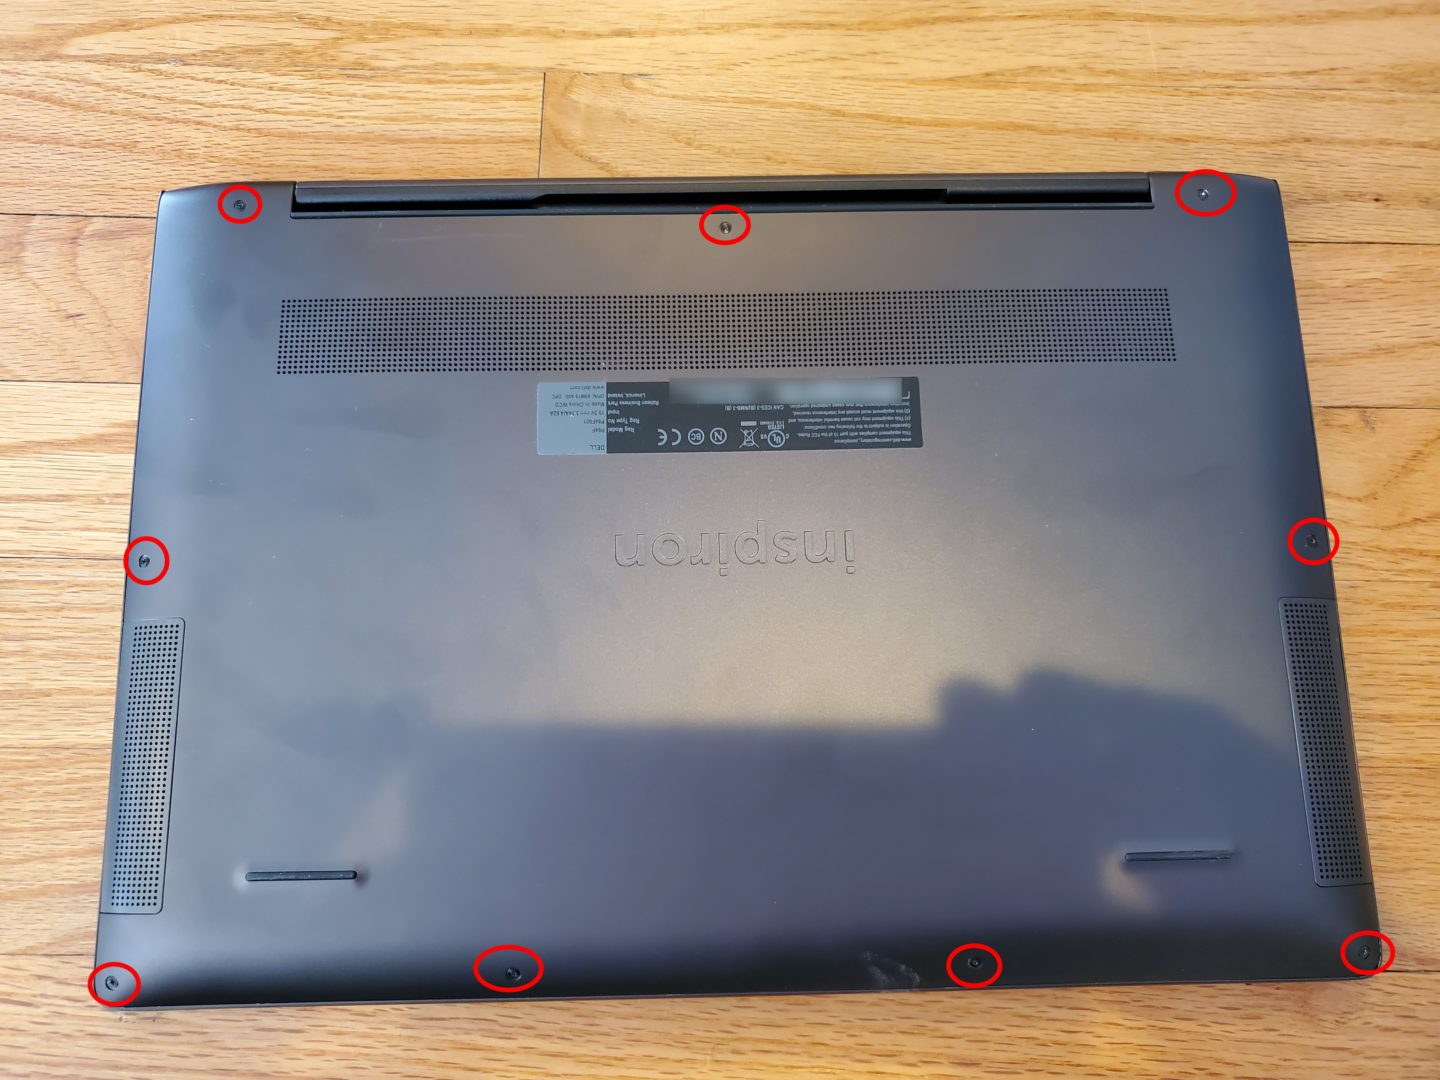
Seven are fully removable and two are captive, meaning, they can be loosened but do not come out (they’re the ones on either side of the hinges):
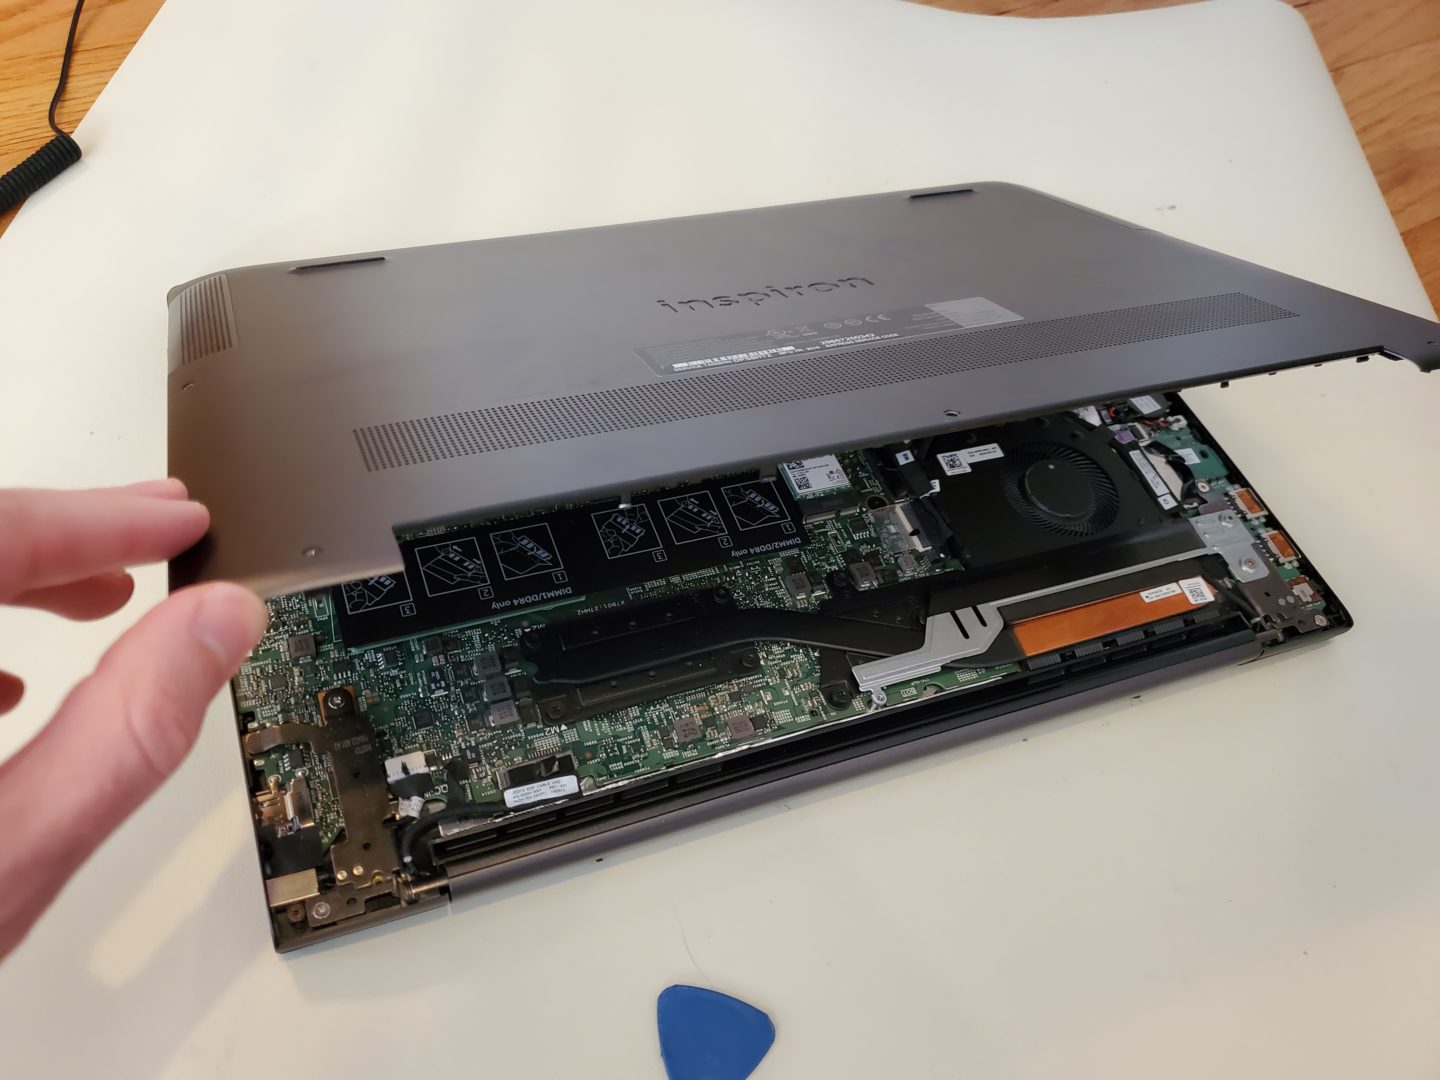
Pry off the bottom cover
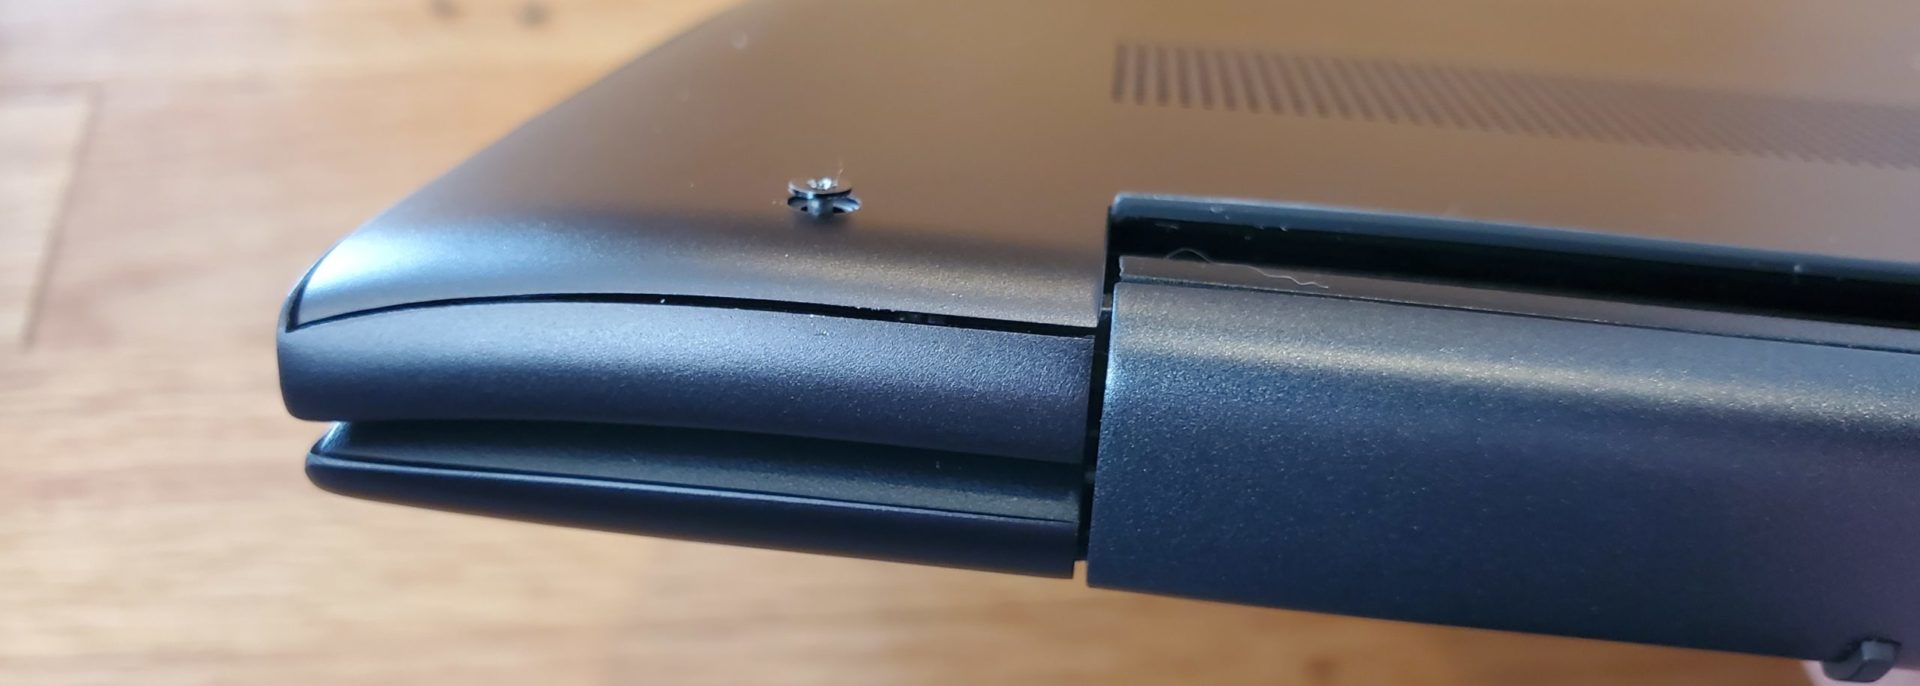
With the screws removed/loosened, it’s time to pry off the bottom cover in order to upgrade the Dell Inspiron 15 7000 2-in-1 laptop. Dell’s service manual shows one should start at the back, and I agree – I’ve found it’s generally easiest to use a pry tool at the hinge:
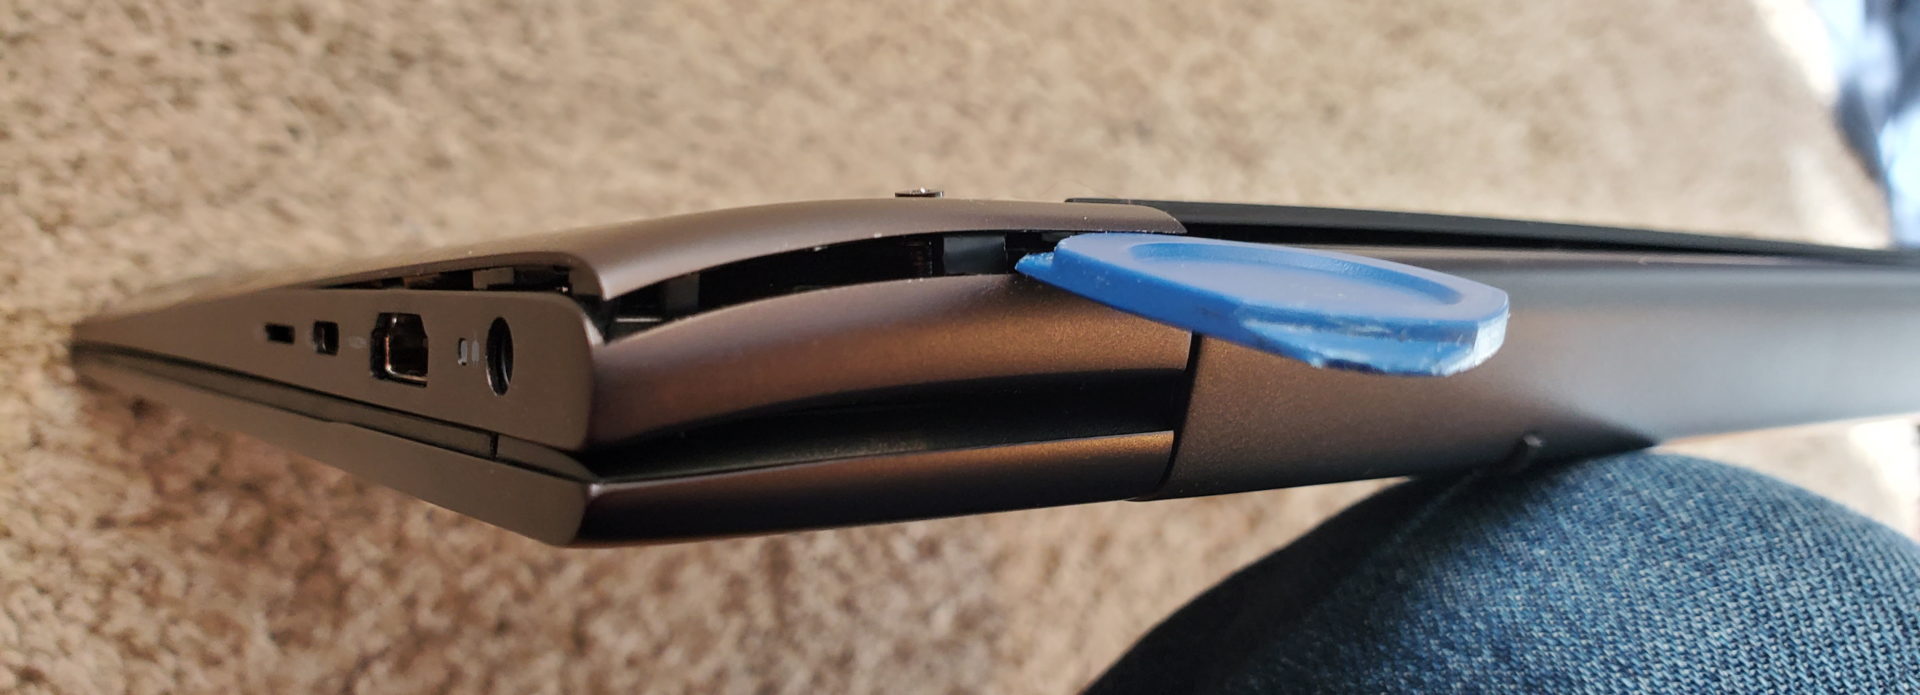
For reference, I like using either an old credit card, or these plastic, triangular, guitar-pick-like tools; they’re cheap and have three corners to use before you need to throw them away (they eventually break after using them a few times on stubborn cases):
Once you have your pry tool wedged in between the cover and the main chassis, carefully move the tool along the entire perimeter of the cover while prying it away from the chassis. Once all the clips are disengaged, the cover should just lift right off (there are no cables attached)
Disconnect the battery
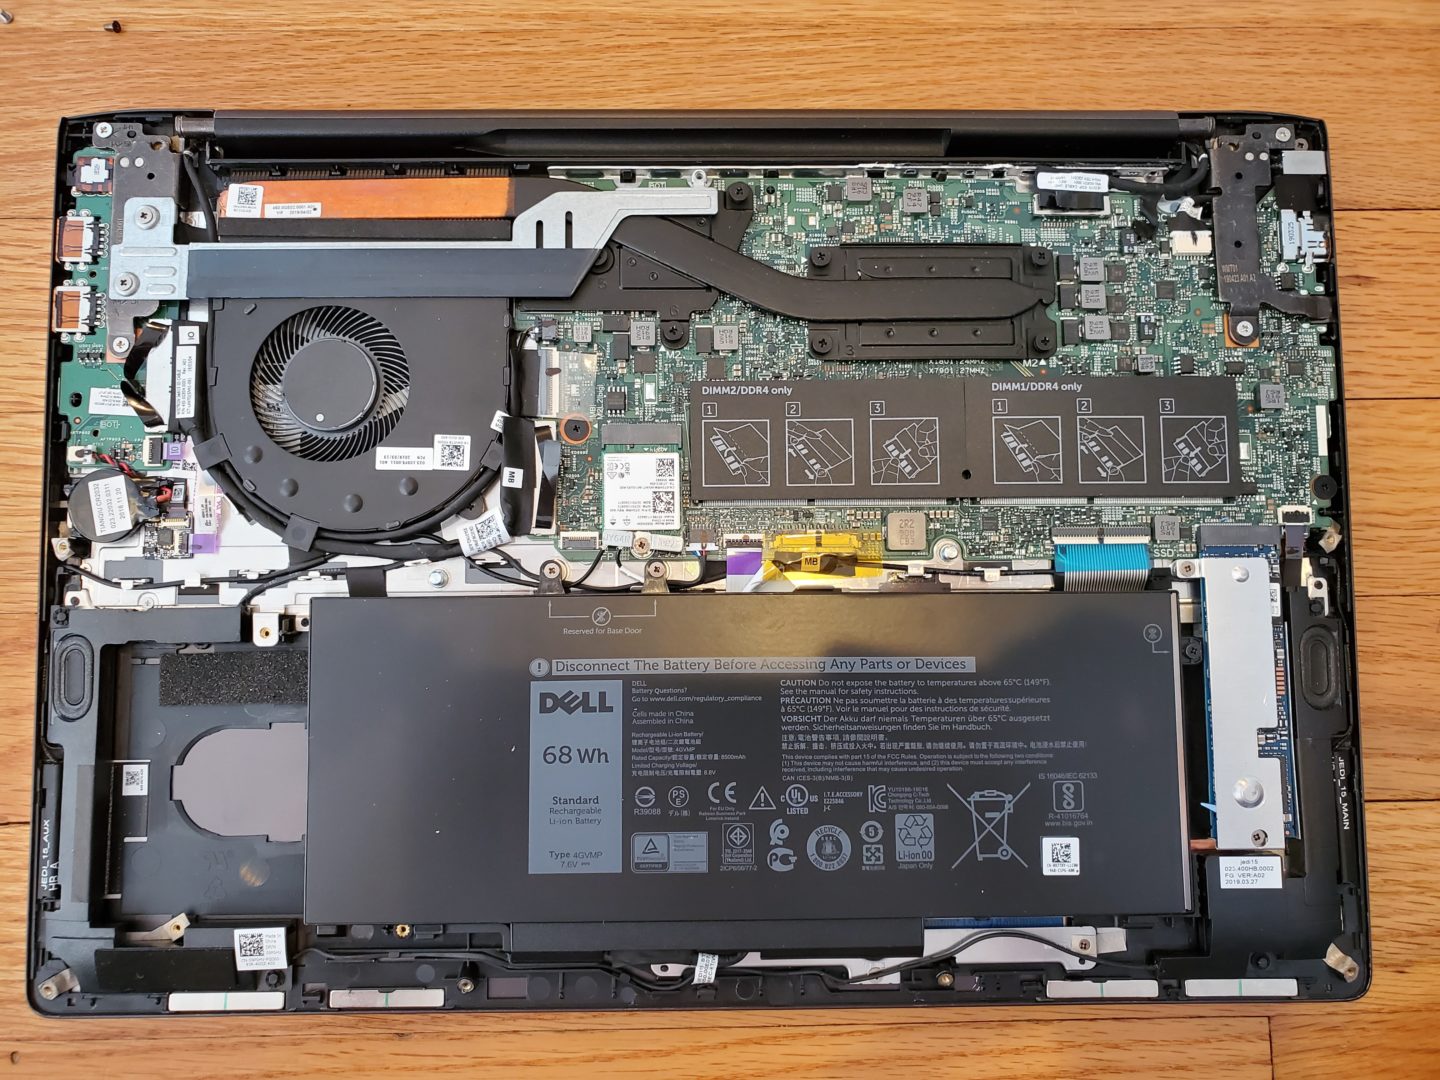
With the bottom cover removed, you now have access to everything you can easily upgrade:
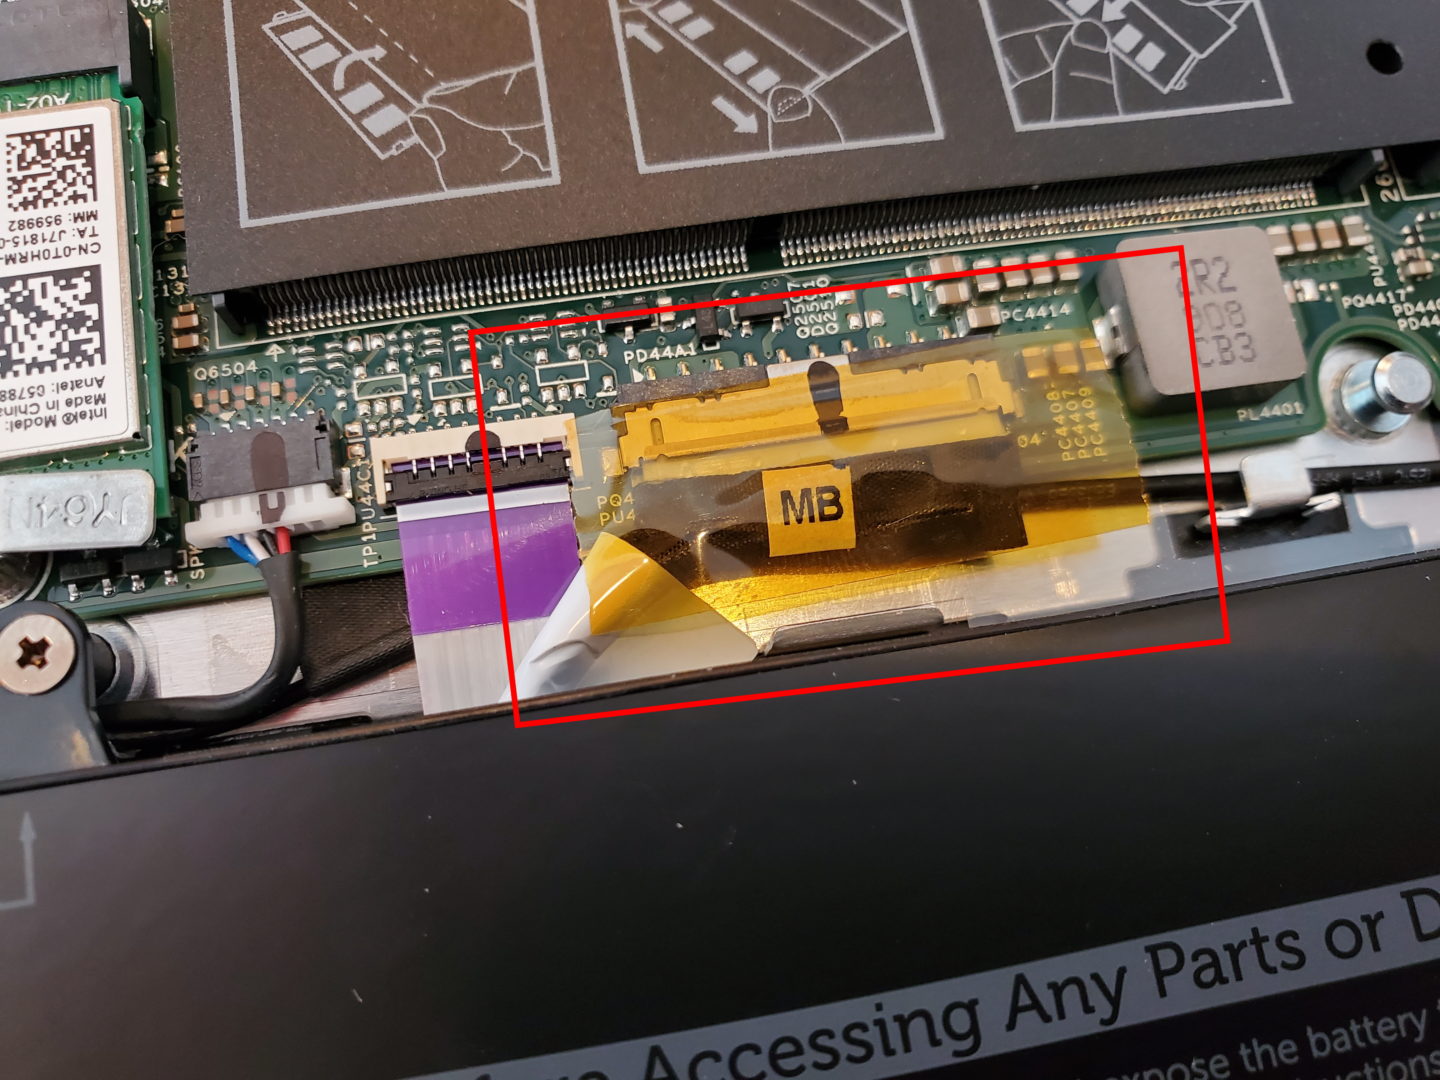
you’ll want to first disconnect the battery for safety reasons. Start by removing the piece of tape covering the connector (if present):
Then, use your finger nails (or a pry tool/screw driver/etc) and push/pull the battery cable out of it’s white connector; it’s best to work against the plastic of the battery cable plug and not tug directly on the wires:
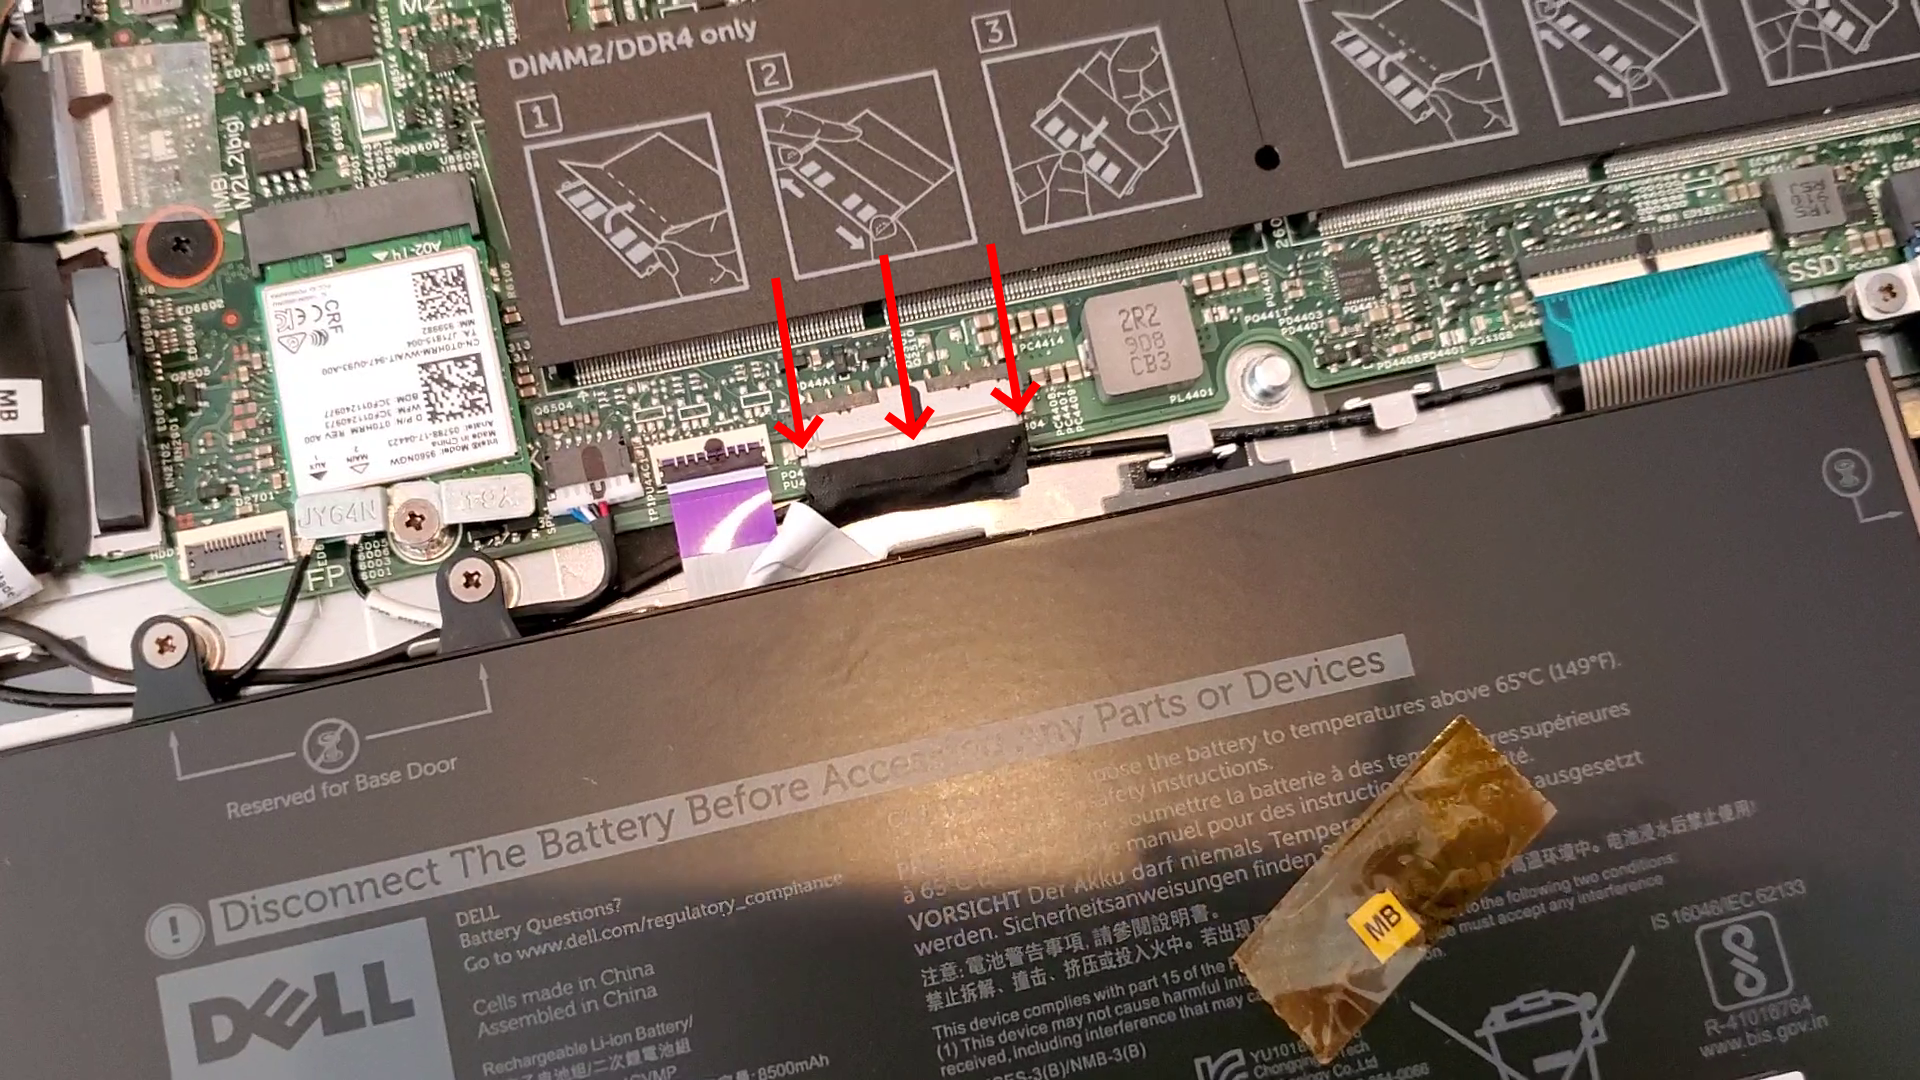
When the battery is unplugged, go ahead and place the tape back on top of the connector to prevent any of the cable’s metal contacts from touching the connector by accident
Upgrade the memory
With the battery unplugged, let’s start with upgrading the two memory sticks which can be found behind these two plastic flaps:
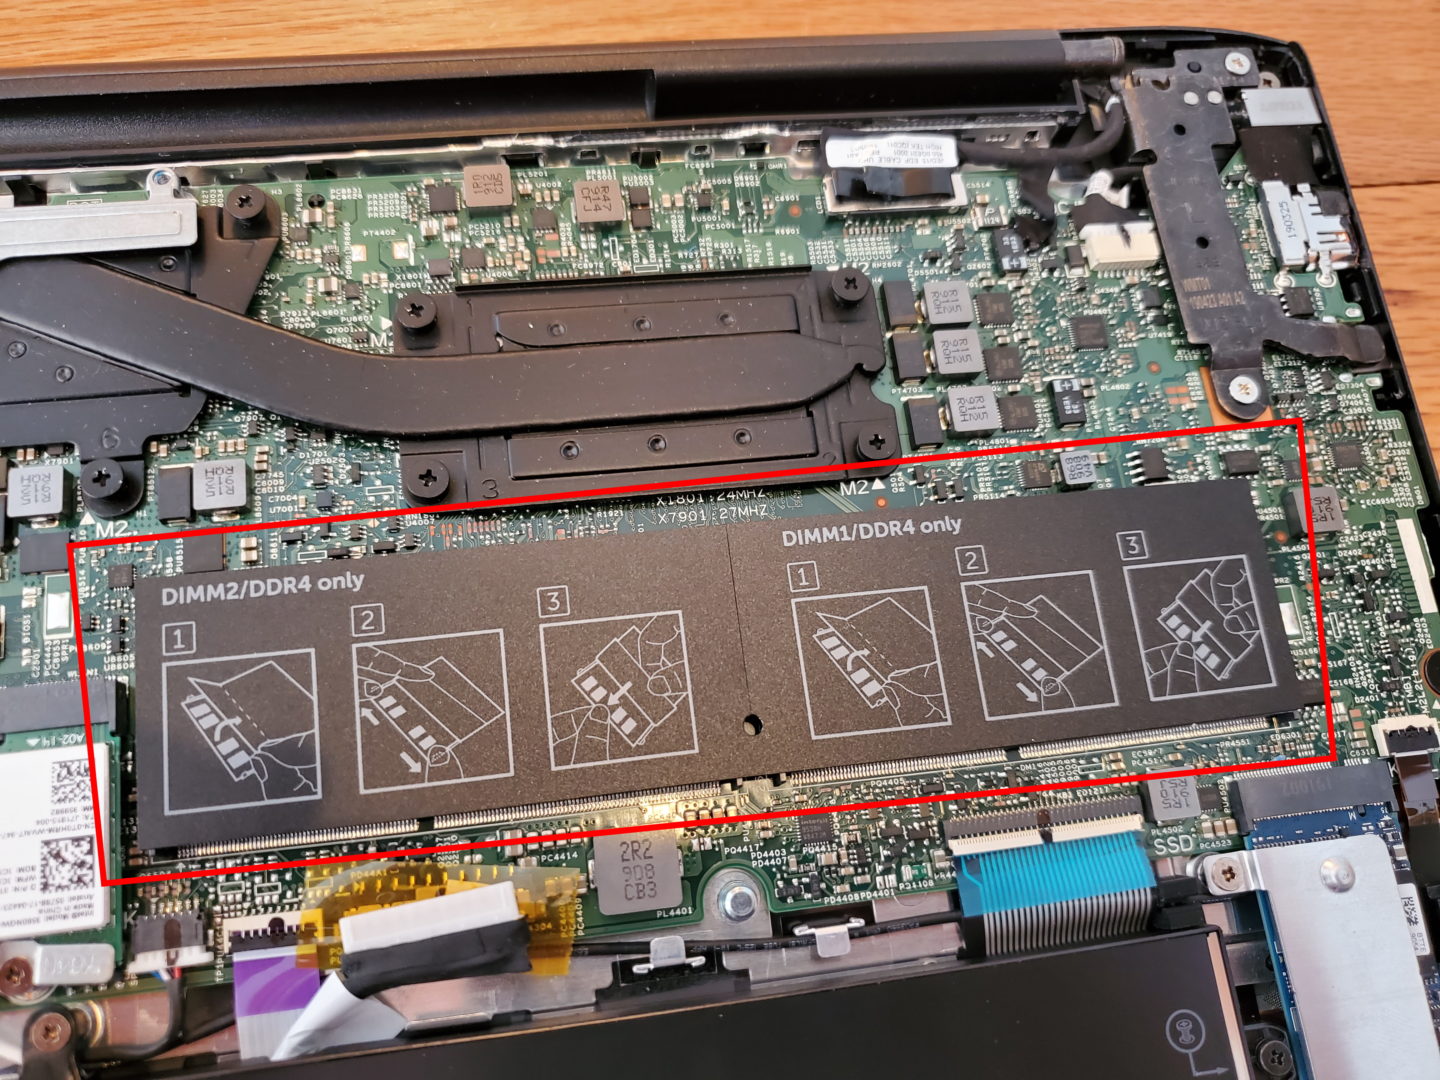
If you just have one stick, you’ll want to deal with the DIMM1 slot only. For either memory slot, pull back the plastic cover and press the metal clips away from the memory card on either side:
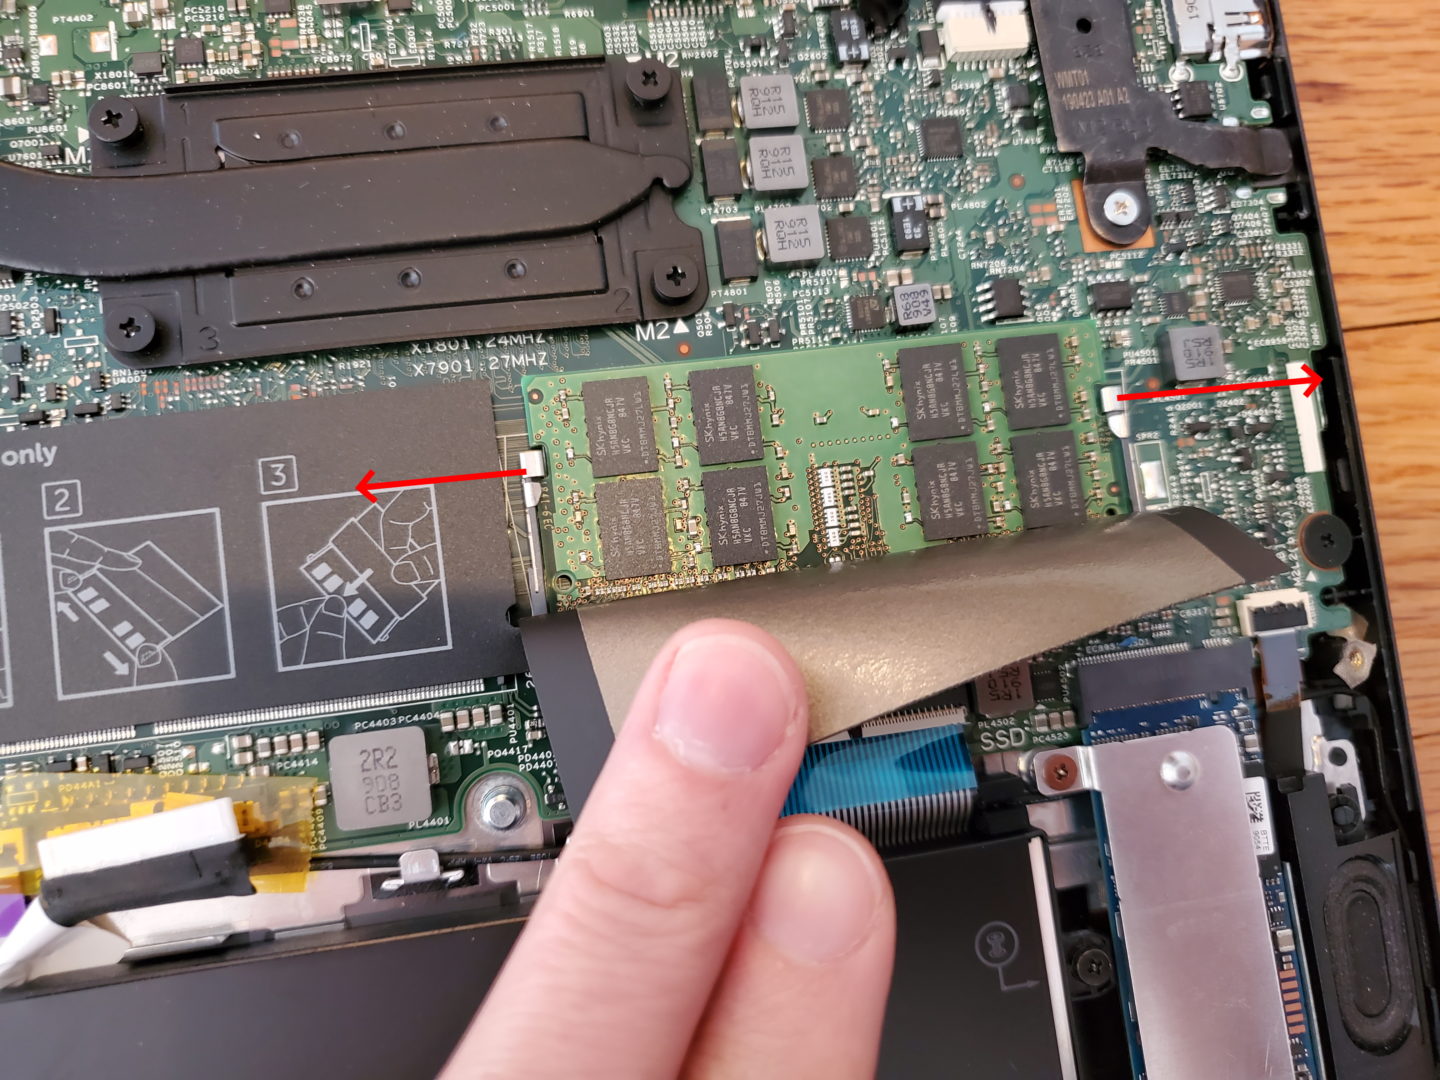
Once the clips are pressed away, the memory will be loose and will likely pop up a bit; simply pull it straight out, away from the connector (not straight “up”, as in perpendicular from the motherboard):
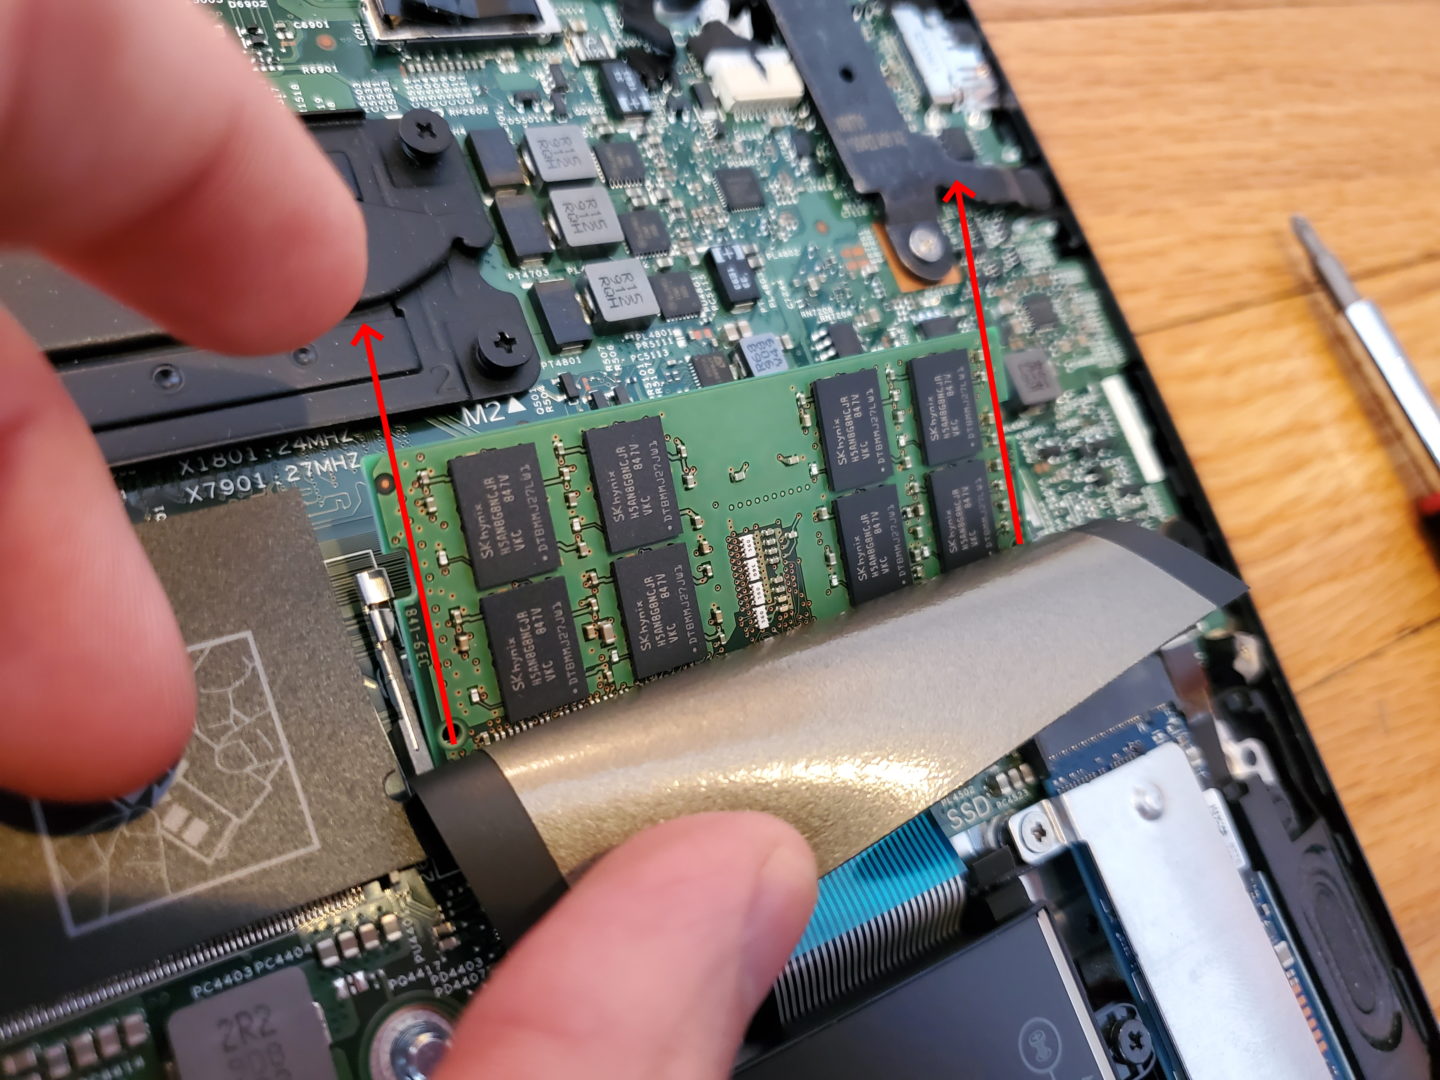
You can now put in whatever memory stick you have to replace it with and press it down back into the clips.
Upgrade the SSD
To remove the SSD, start out by removing the two screws holding in the metal SSD cover and SSD itself. Note that the screw nearest the front of the laptop (furthest from the battery) may not easily be removed, meaning, you may get it removed from the screw post but it could still be “stuck” in the cover. This is fine, it’ll likely loosen and fall out one you start wiggling the cover free:
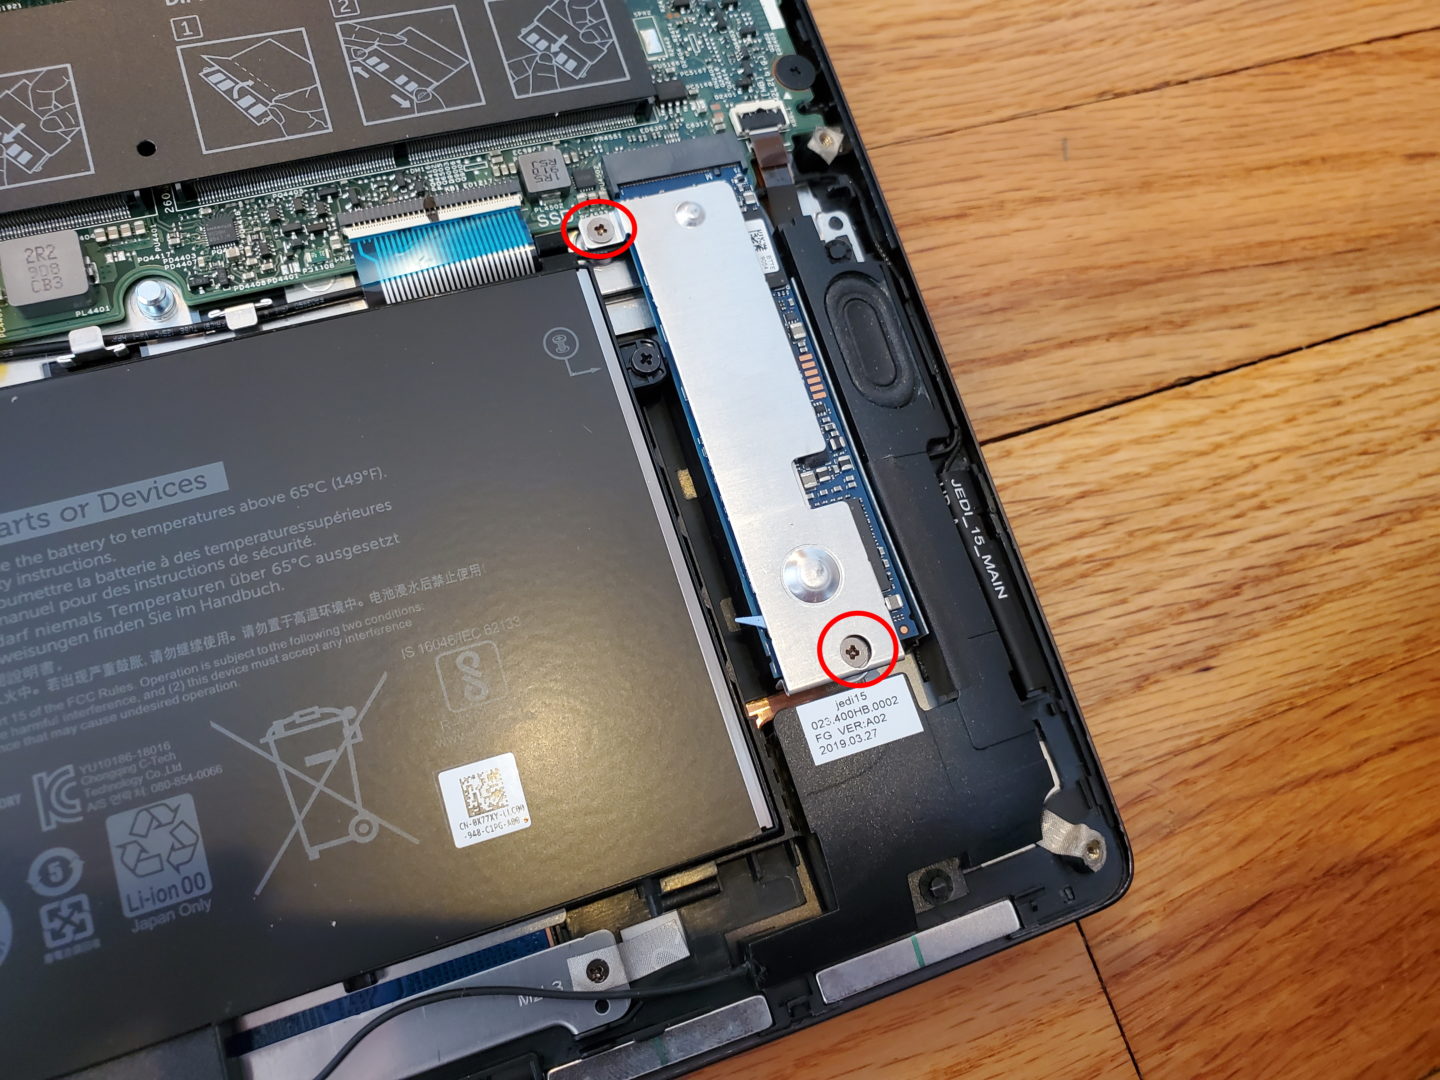
With the screws removed, note that there may be two sticky thermal pads that hold it the cover to the SSD – they may or may not come off very easily, but they do come off. If they come off easily, you should be able to easily just slide the cover off the drive:
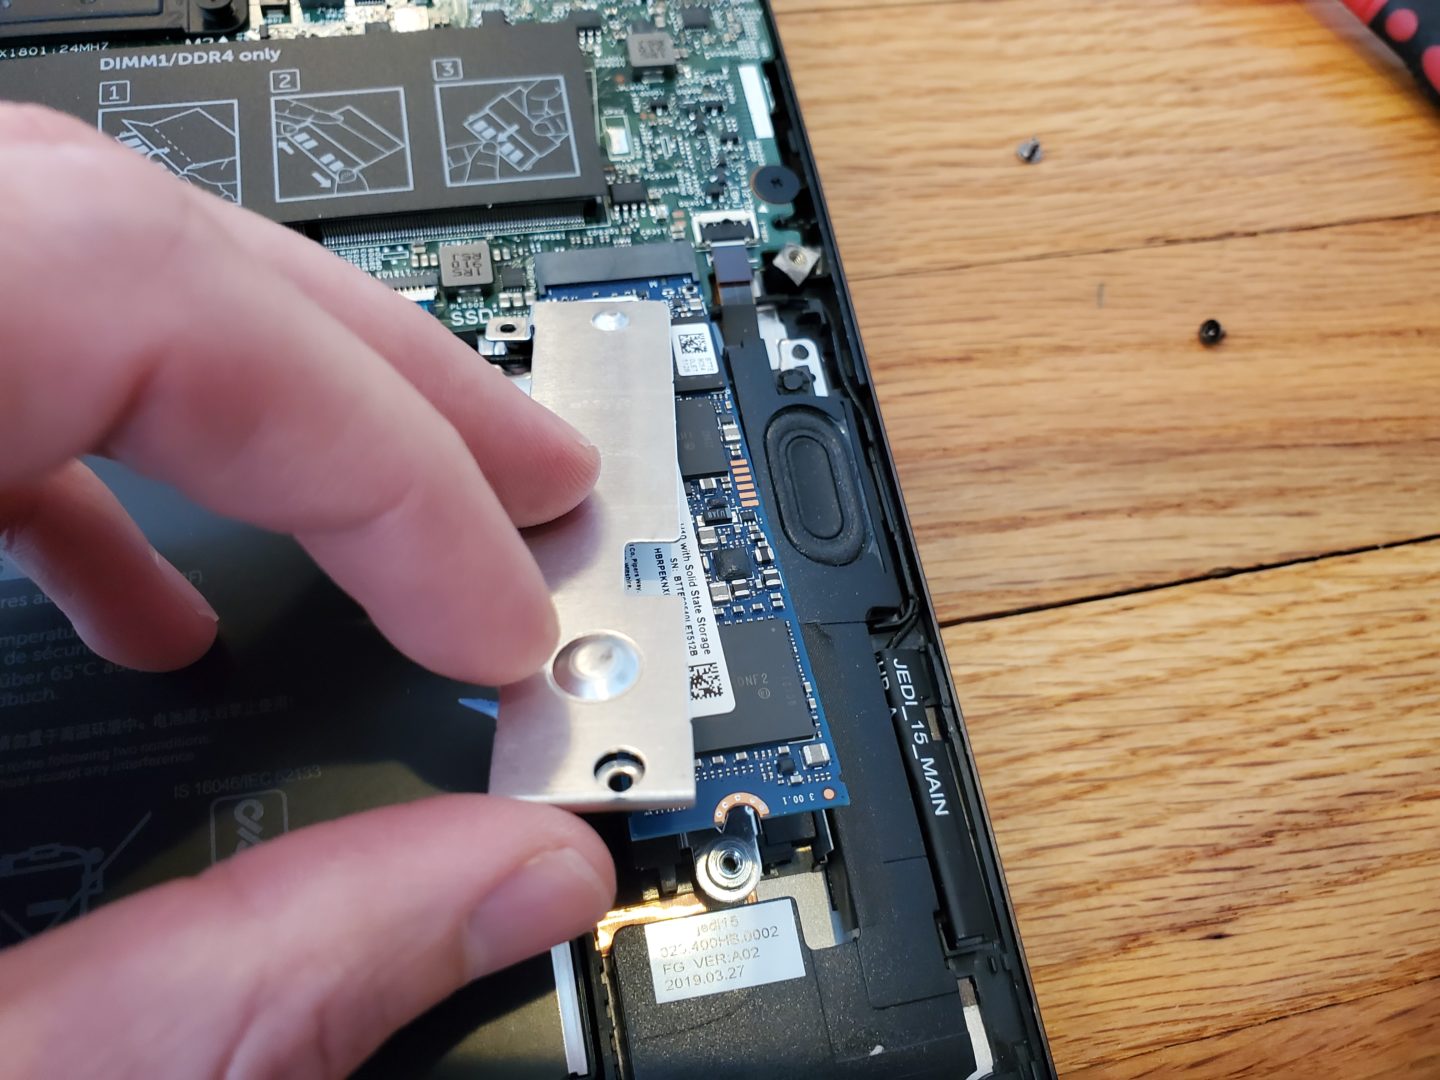
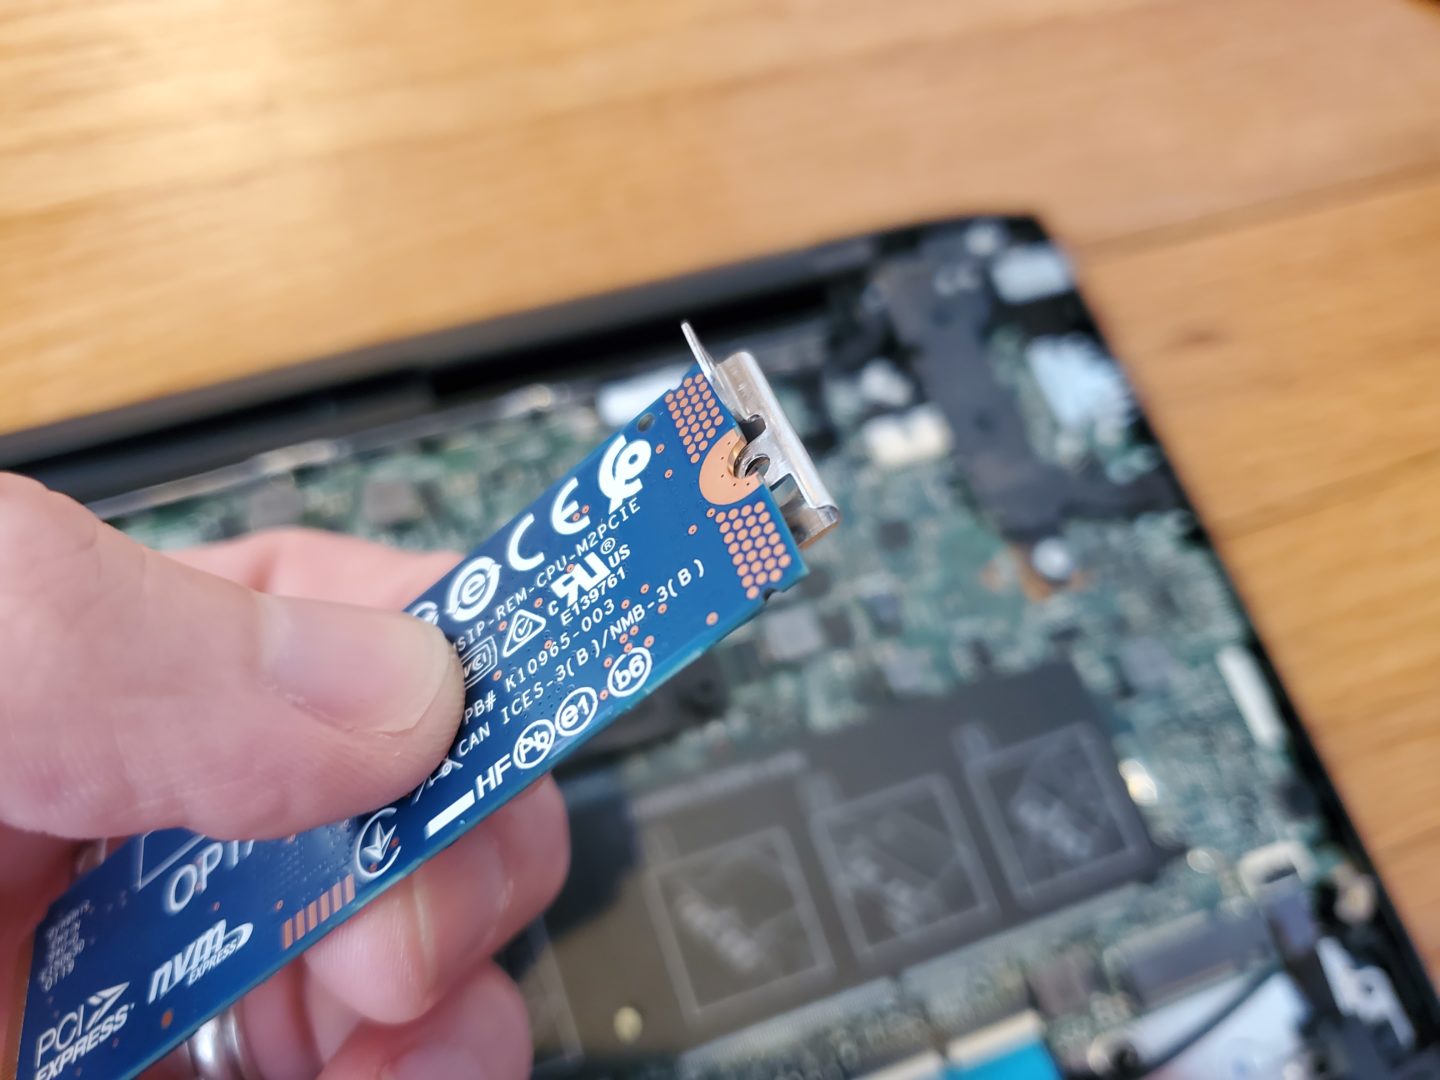
With the cover off (or with it still attached to the SSD), you should be able to simply pull the SSD out of it’s connector. For reference, here’s what the thermal pads look like:
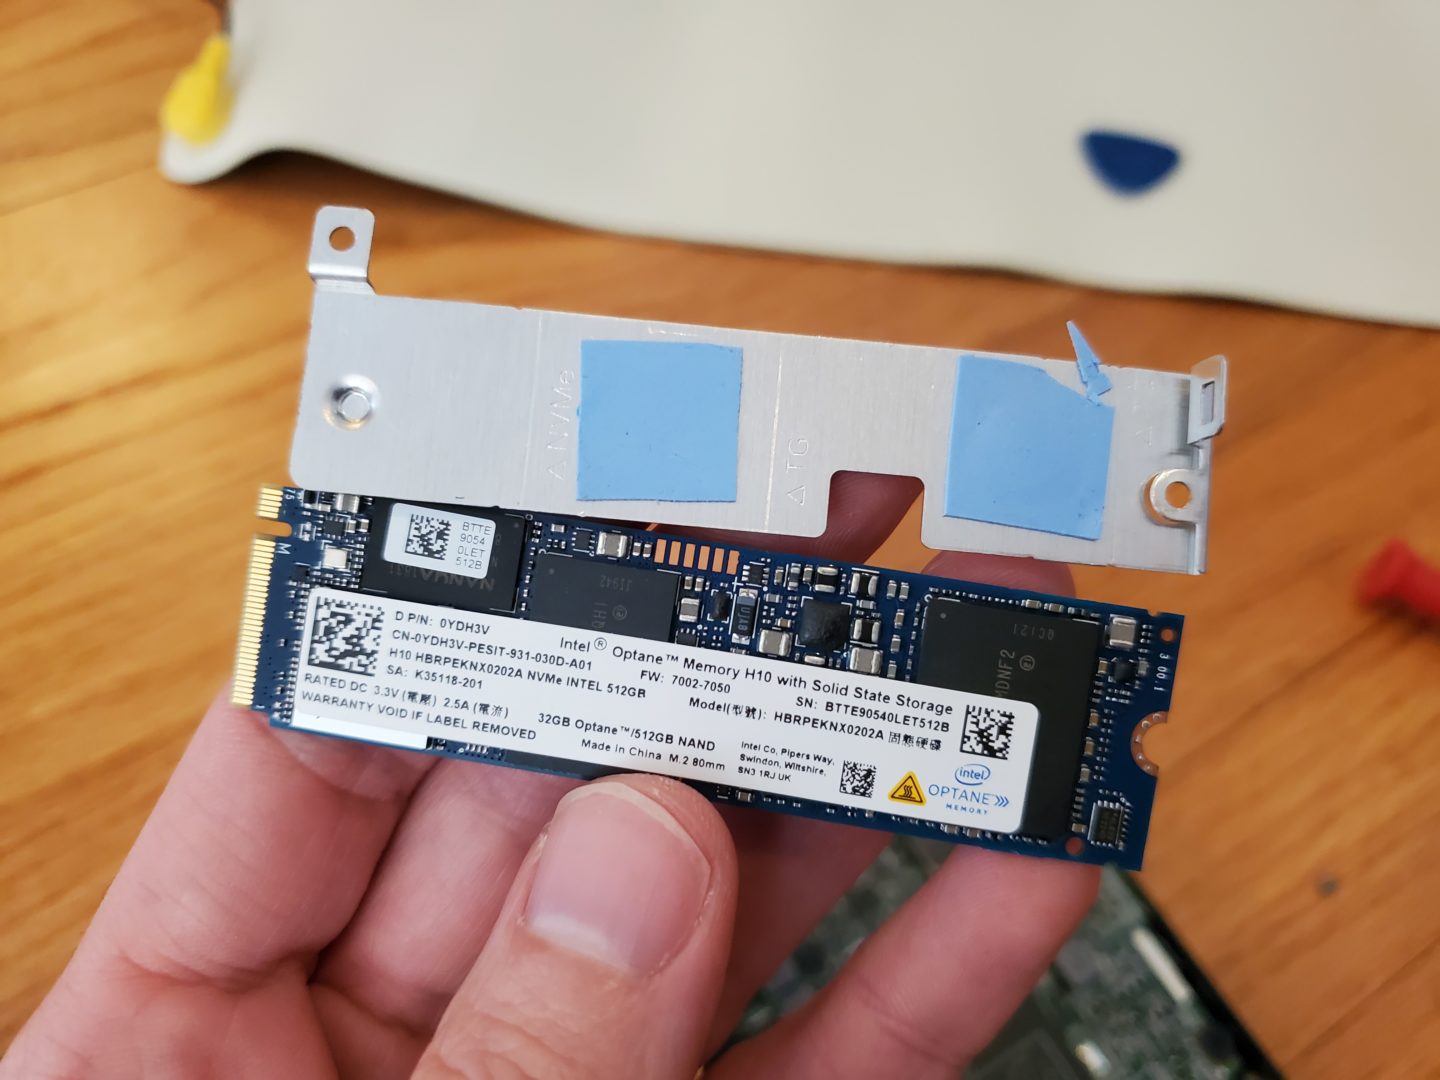
Note that when you put the SSD and SSD cover back in, the SSD does not fit inside what looks to be a clip where one of the screws go on the cover. Instead, it the cover sits on top of the SSD like this:
Simply insert the SSD back in it’s slot and screw back in the two SSD cover screws. That’s it! You’ve upgraded the SSD and memory. Pop back on the bottom cover, tighten the two captive screws, and put back and screw in the seven other screws, and you’re done.
Wrap Up
Luckily, it’s relatively easy to upgrade a Dell Inspiron 15 7000 2-in-1 laptop; all you need to do is remove seven screws, and loosen two others, that hold the bottom cover, then pry off that cover. With that removed, you’ll have easy access to the SSD and both memory slots, as well as the wifi card and battery (should you want to replace those as well).
Can you please do one for the dell inspiron 17r n7110? I need a video showing how to replace the entire display and not just the screen alone. DO you even have the entire display? Thanks can you contact me?
Damien
I actually did a video of a complete n7110 dismantle here, which includes removing the entire display: https://www.youtube.com/watch?v=AyR1mfzHrQk
How much maximum ram can we upgrade in dell Inspiron 15 7000 2-in-1 ????
Dell’s manual states the max is 2x16gb (total 32gb):
does anyone know if installing an os on a blank upgraded drive in this model works for the usual suspects (windows/linux) or does this have one of those weird bioses that needs a special install?